

Add your ElySpace mailbox to the iPhone or iPad Mail app as an IMAP account, either with cPanel's setup profile or by typing the settings in yourself.
Option 1: install the setup profile
cPanel creates a configuration profile that fills in the server settings for you. Do these steps on the iPhone or iPad itself, in Safari.
Log in to cPanel in Safari (see Log in to cPanel from the client area), open Email Accounts and tap Connect Devices next to the address. If you only have the mailbox login, log in to webmail and tap Configure Mail Client instead.
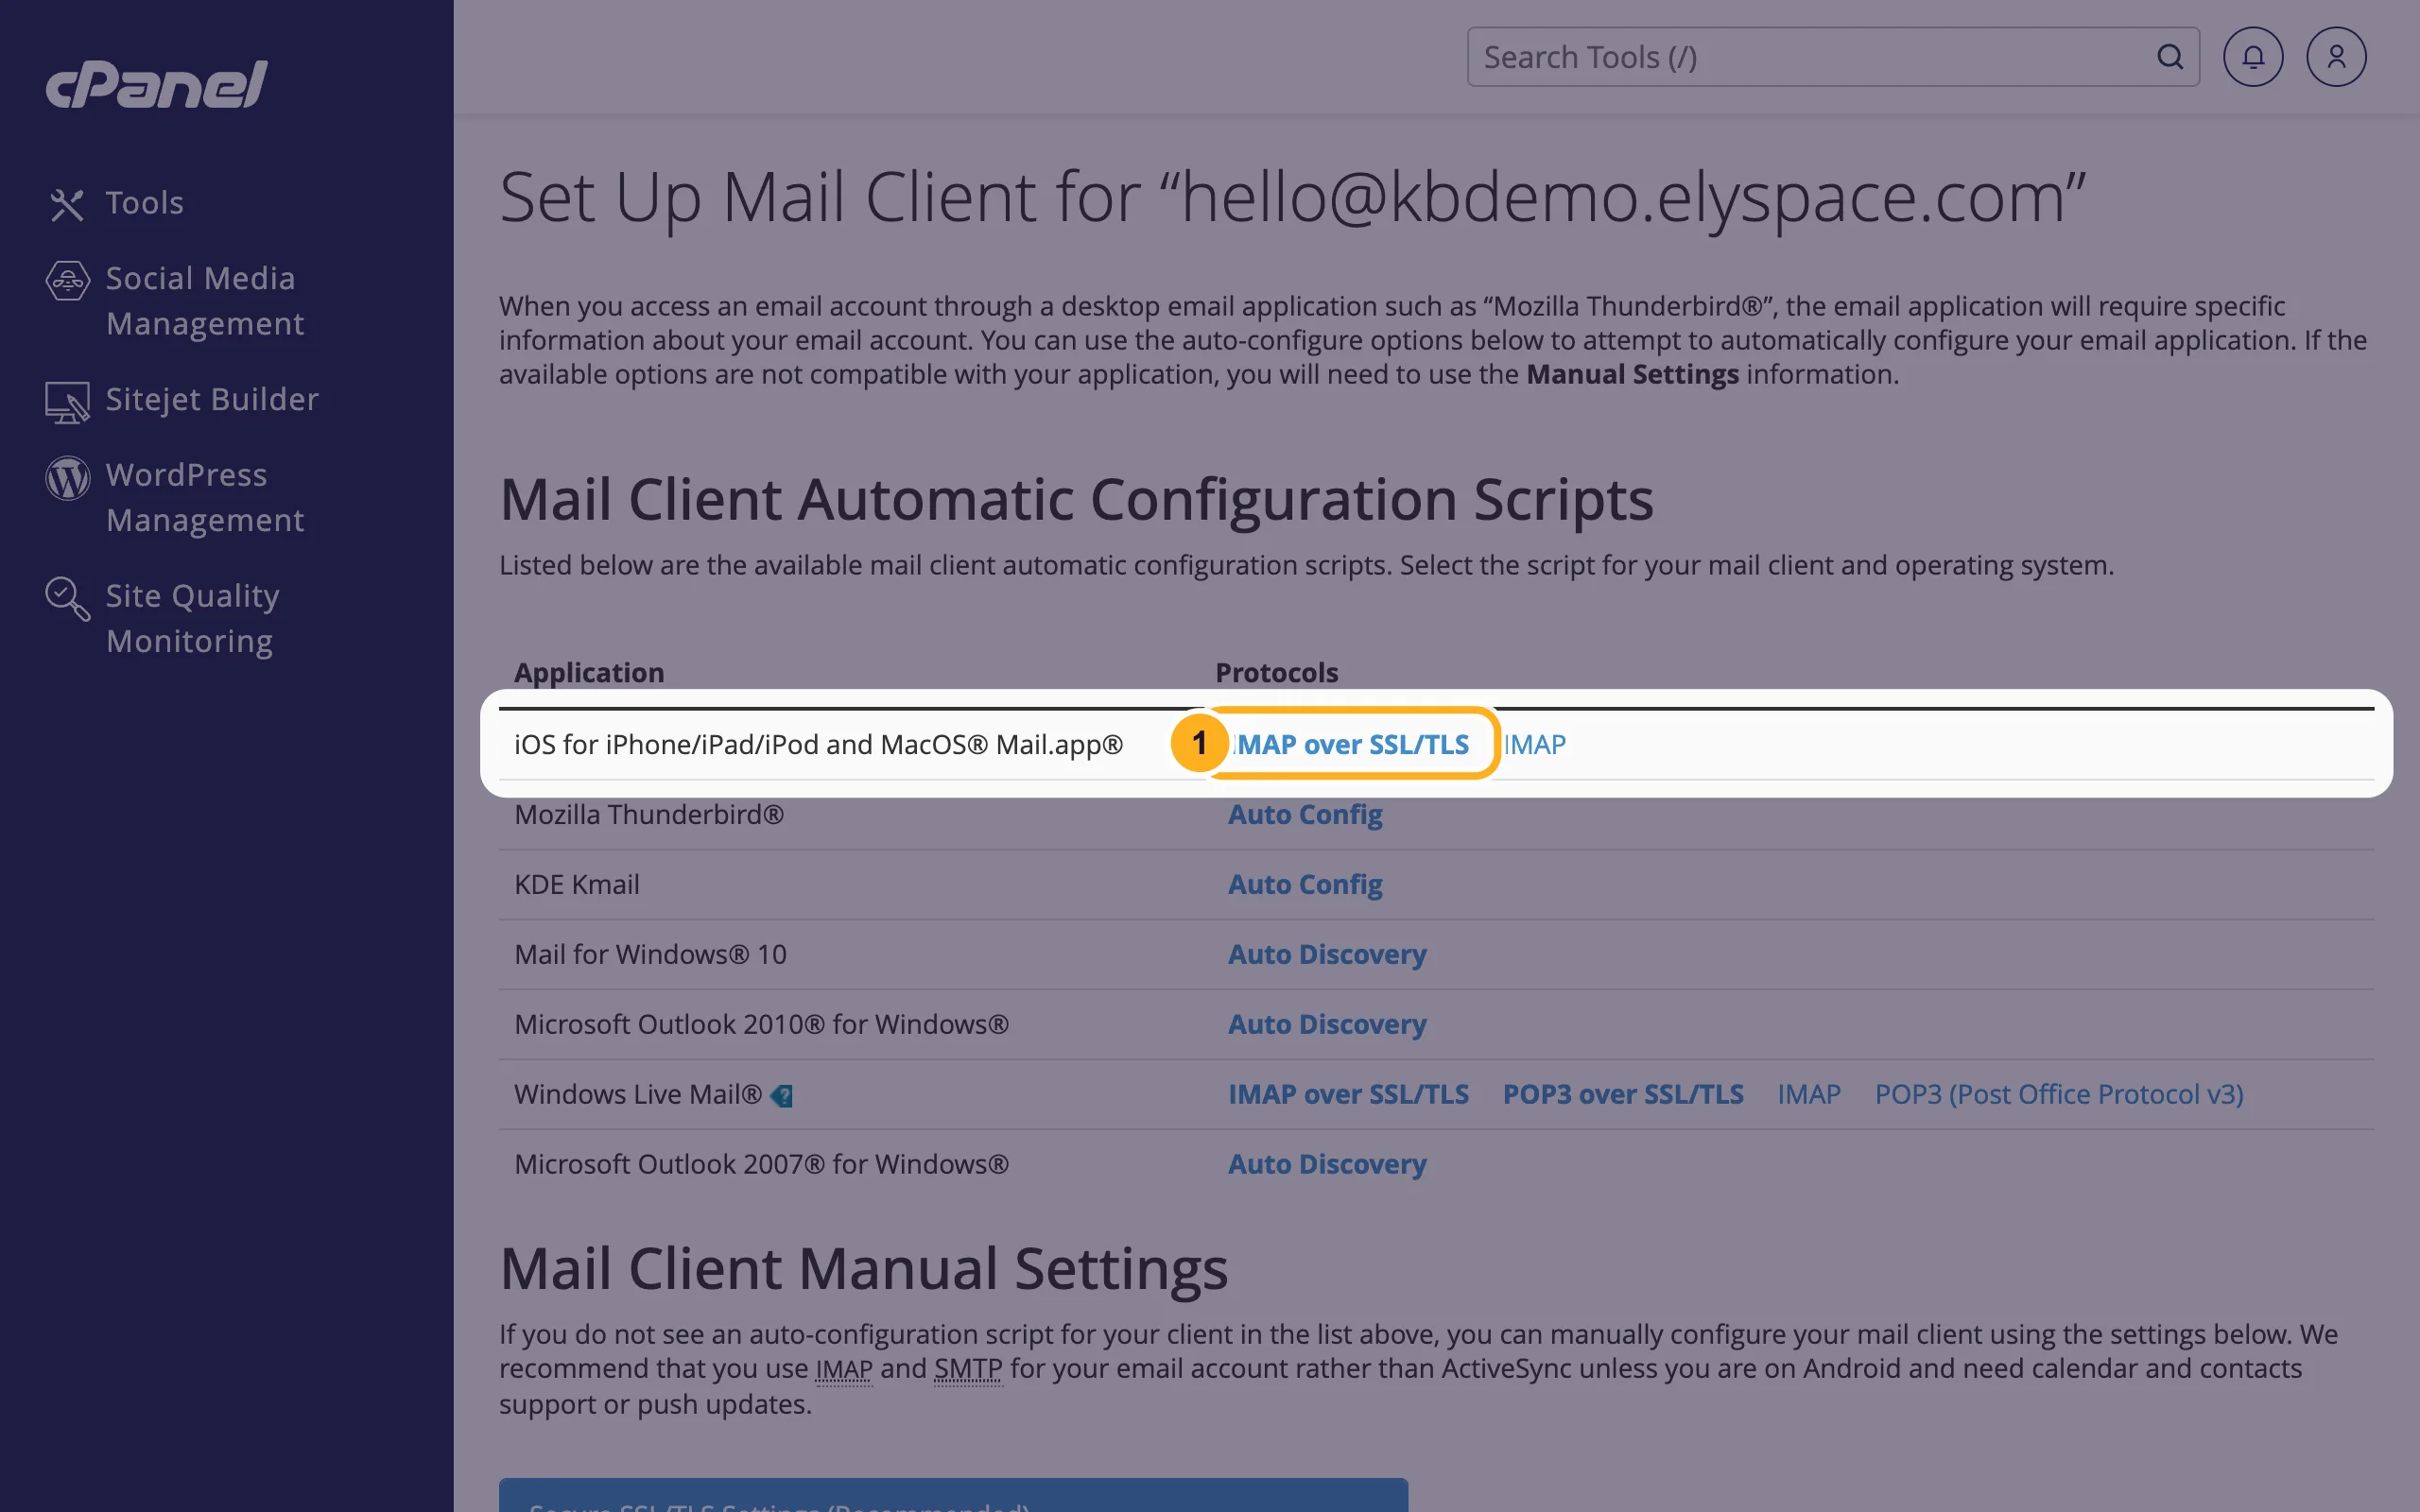
In the row iOS for iPhone/iPad/iPod and MacOS® Mail.app®, tap IMAP over SSL/TLS. Allow the download when Safari asks.
Open the Settings app. Tap Profile Downloaded near the top (or go to General, VPN & Device Management), then tap Install and confirm with your device passcode.
Enter the mailbox password when iOS asks for it and finish the installation. The account then appears in the Mail app.
Option 2: add the account by hand
Open Settings, then Apps, Mail, Mail Accounts and tap Add Account. On older iOS versions it's Settings, Mail, Accounts.
Tap Other, then Add Mail Account.
Enter your Name (shown to the people you write to), your Email address, the mailbox Password and a Description such as "Work". Tap Next.
Make sure IMAP is selected at the top, then fill in both server sections with the values from cPanel:
Field Incoming Mail Server Outgoing Mail Server Host Name your server name, for example node111.elycloud.comthe same server name User Name your full email address your full email address (required, even if iOS says optional) Password the mailbox password the mailbox password 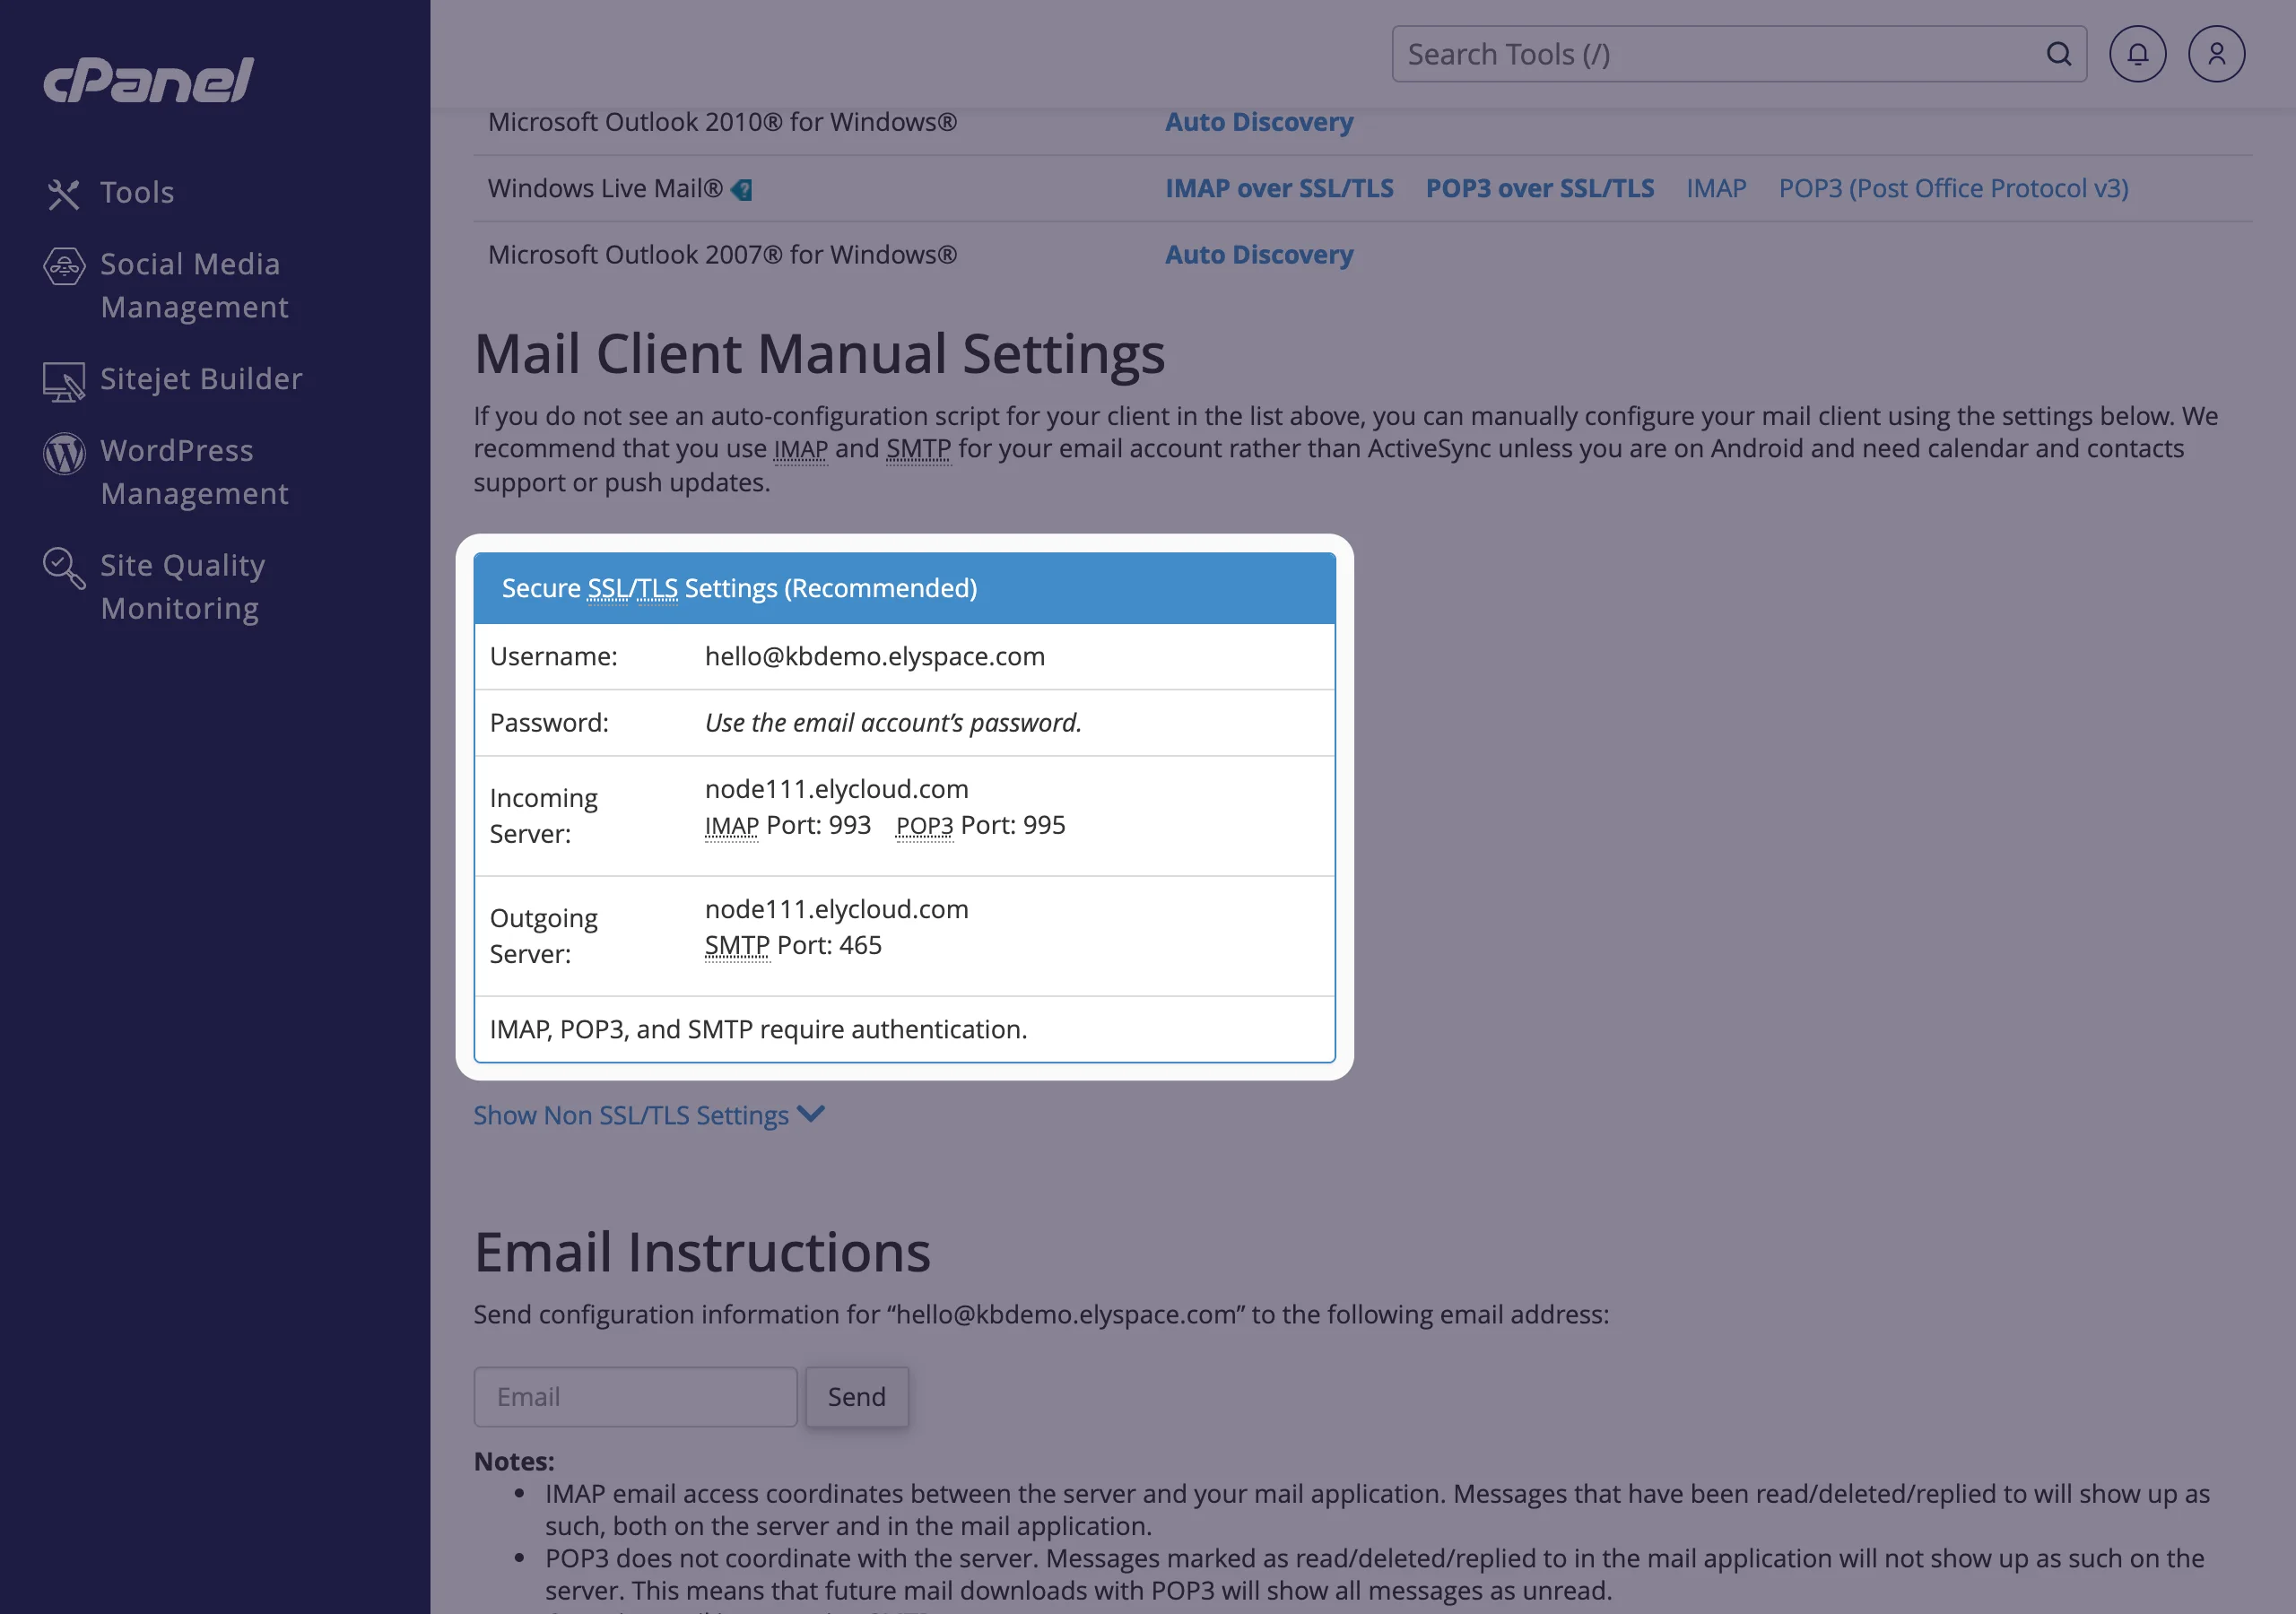
Tap Next. iOS checks the settings; then choose what to sync (Mail) and tap Save.
Check the ports and SSL
iOS usually picks the right ports by itself. If sending or receiving fails, check them:
In Settings, open Mail Accounts (as above), tap your account, then tap the account (your email address) and Advanced. Turn on Use SSL and set Server Port to
993.Go back, tap SMTP under Outgoing Mail Server and tap the primary server. Turn on Use SSL, set Authentication to Password and Server Port to
465. Tap Done.
Common problems
"Cannot Verify Server Identity"
You entered mail.yourdomain.com as host name. Use your server name from the Connect Devices page instead; its certificate matches.
"Account verification failed" or the password is not accepted
Use the full email address as user name for both servers and check the password in webmail. If it doesn't work there either, set a new one (see Change an email account password).
Mail arrives but can't be sent
The outgoing server needs the user name and password too. Check the SMTP settings above; on some networks port 465 is blocked, so try 587 with SSL on.
Related articles
- Email server settings and ports (IMAP, POP3, SMTP)
- Set up email on Android
- Set up email in Outlook
- Log in to webmail
Still stuck? Open a support ticket and we'll help.
