

Make WordPress faster in three steps: turn on page caching with the LiteSpeed Cache plugin, upload smaller images and run a current PHP version.
1. Turn on page caching with LiteSpeed Cache
Without a cache, WordPress builds every page from scratch for every visitor. With LiteSpeed Cache, the server keeps a ready copy and sends it straight away.
In cPanel, open WordPress Management, open your site's card, click the Plugins tab and click Install.
Install the plugin:
- Search for
LiteSpeed Cache. - Click Install next to LiteSpeed Cache by LiteSpeed Technologies.
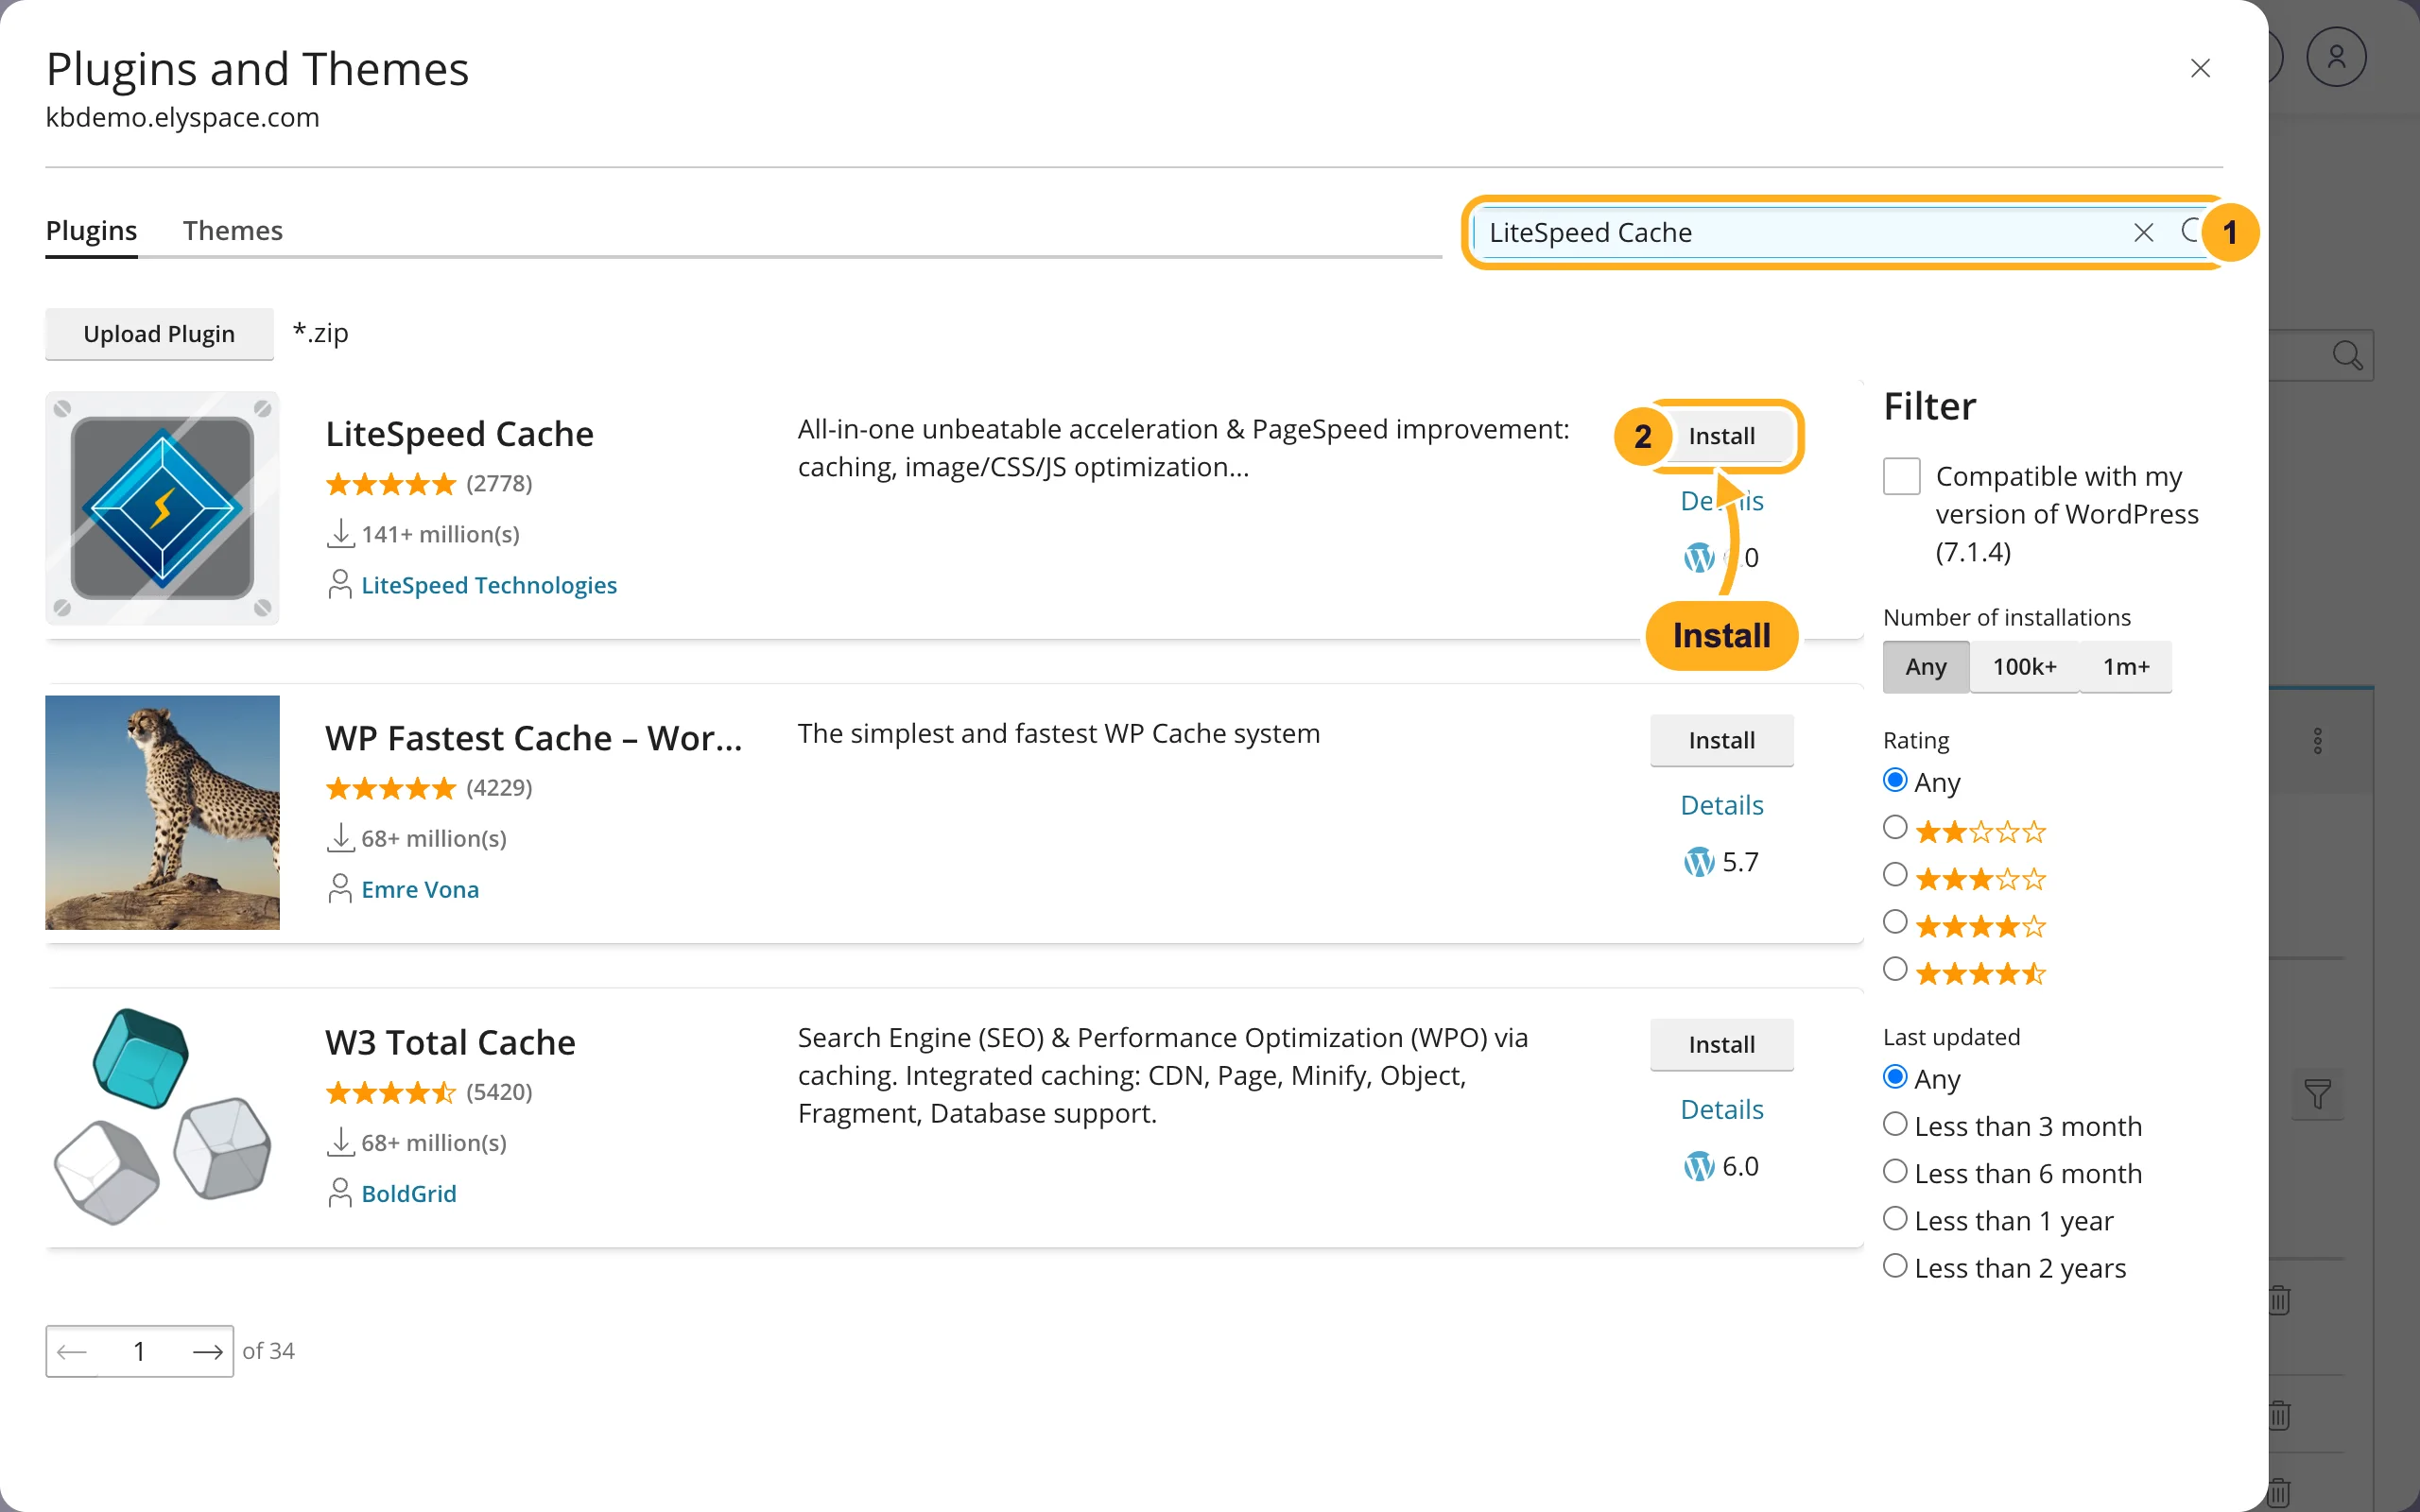
- Search for
The plugin is switched on after installing, and page caching works with its default settings. You'll find its options under LiteSpeed Cache in the WordPress dashboard menu.
Some extra features of the plugin, such as online image optimization, use LiteSpeed's QUIC.cloud service and ask you to sign up. Page caching doesn't need that.
Already using another caching plugin? Switch it off before you activate LiteSpeed Cache. Two caches at once cause problems that are hard to track down.
2. Use smaller images
Large photos are the most common reason for a slow page.
- Resize before uploading. A photo straight from a phone or camera is often several thousand pixels wide. Make it no wider than it's shown on your site, and save it as JPEG or WebP. Logos and icons work well as PNG or SVG.
- Compress. Run images through an image compressor before uploading, or use an image optimization plugin.
- Let WordPress do its part. WordPress creates smaller copies of every uploaded image and loads images further down the page only when a visitor scrolls to them. You don't need to set anything up for that.
3. Run a current PHP version
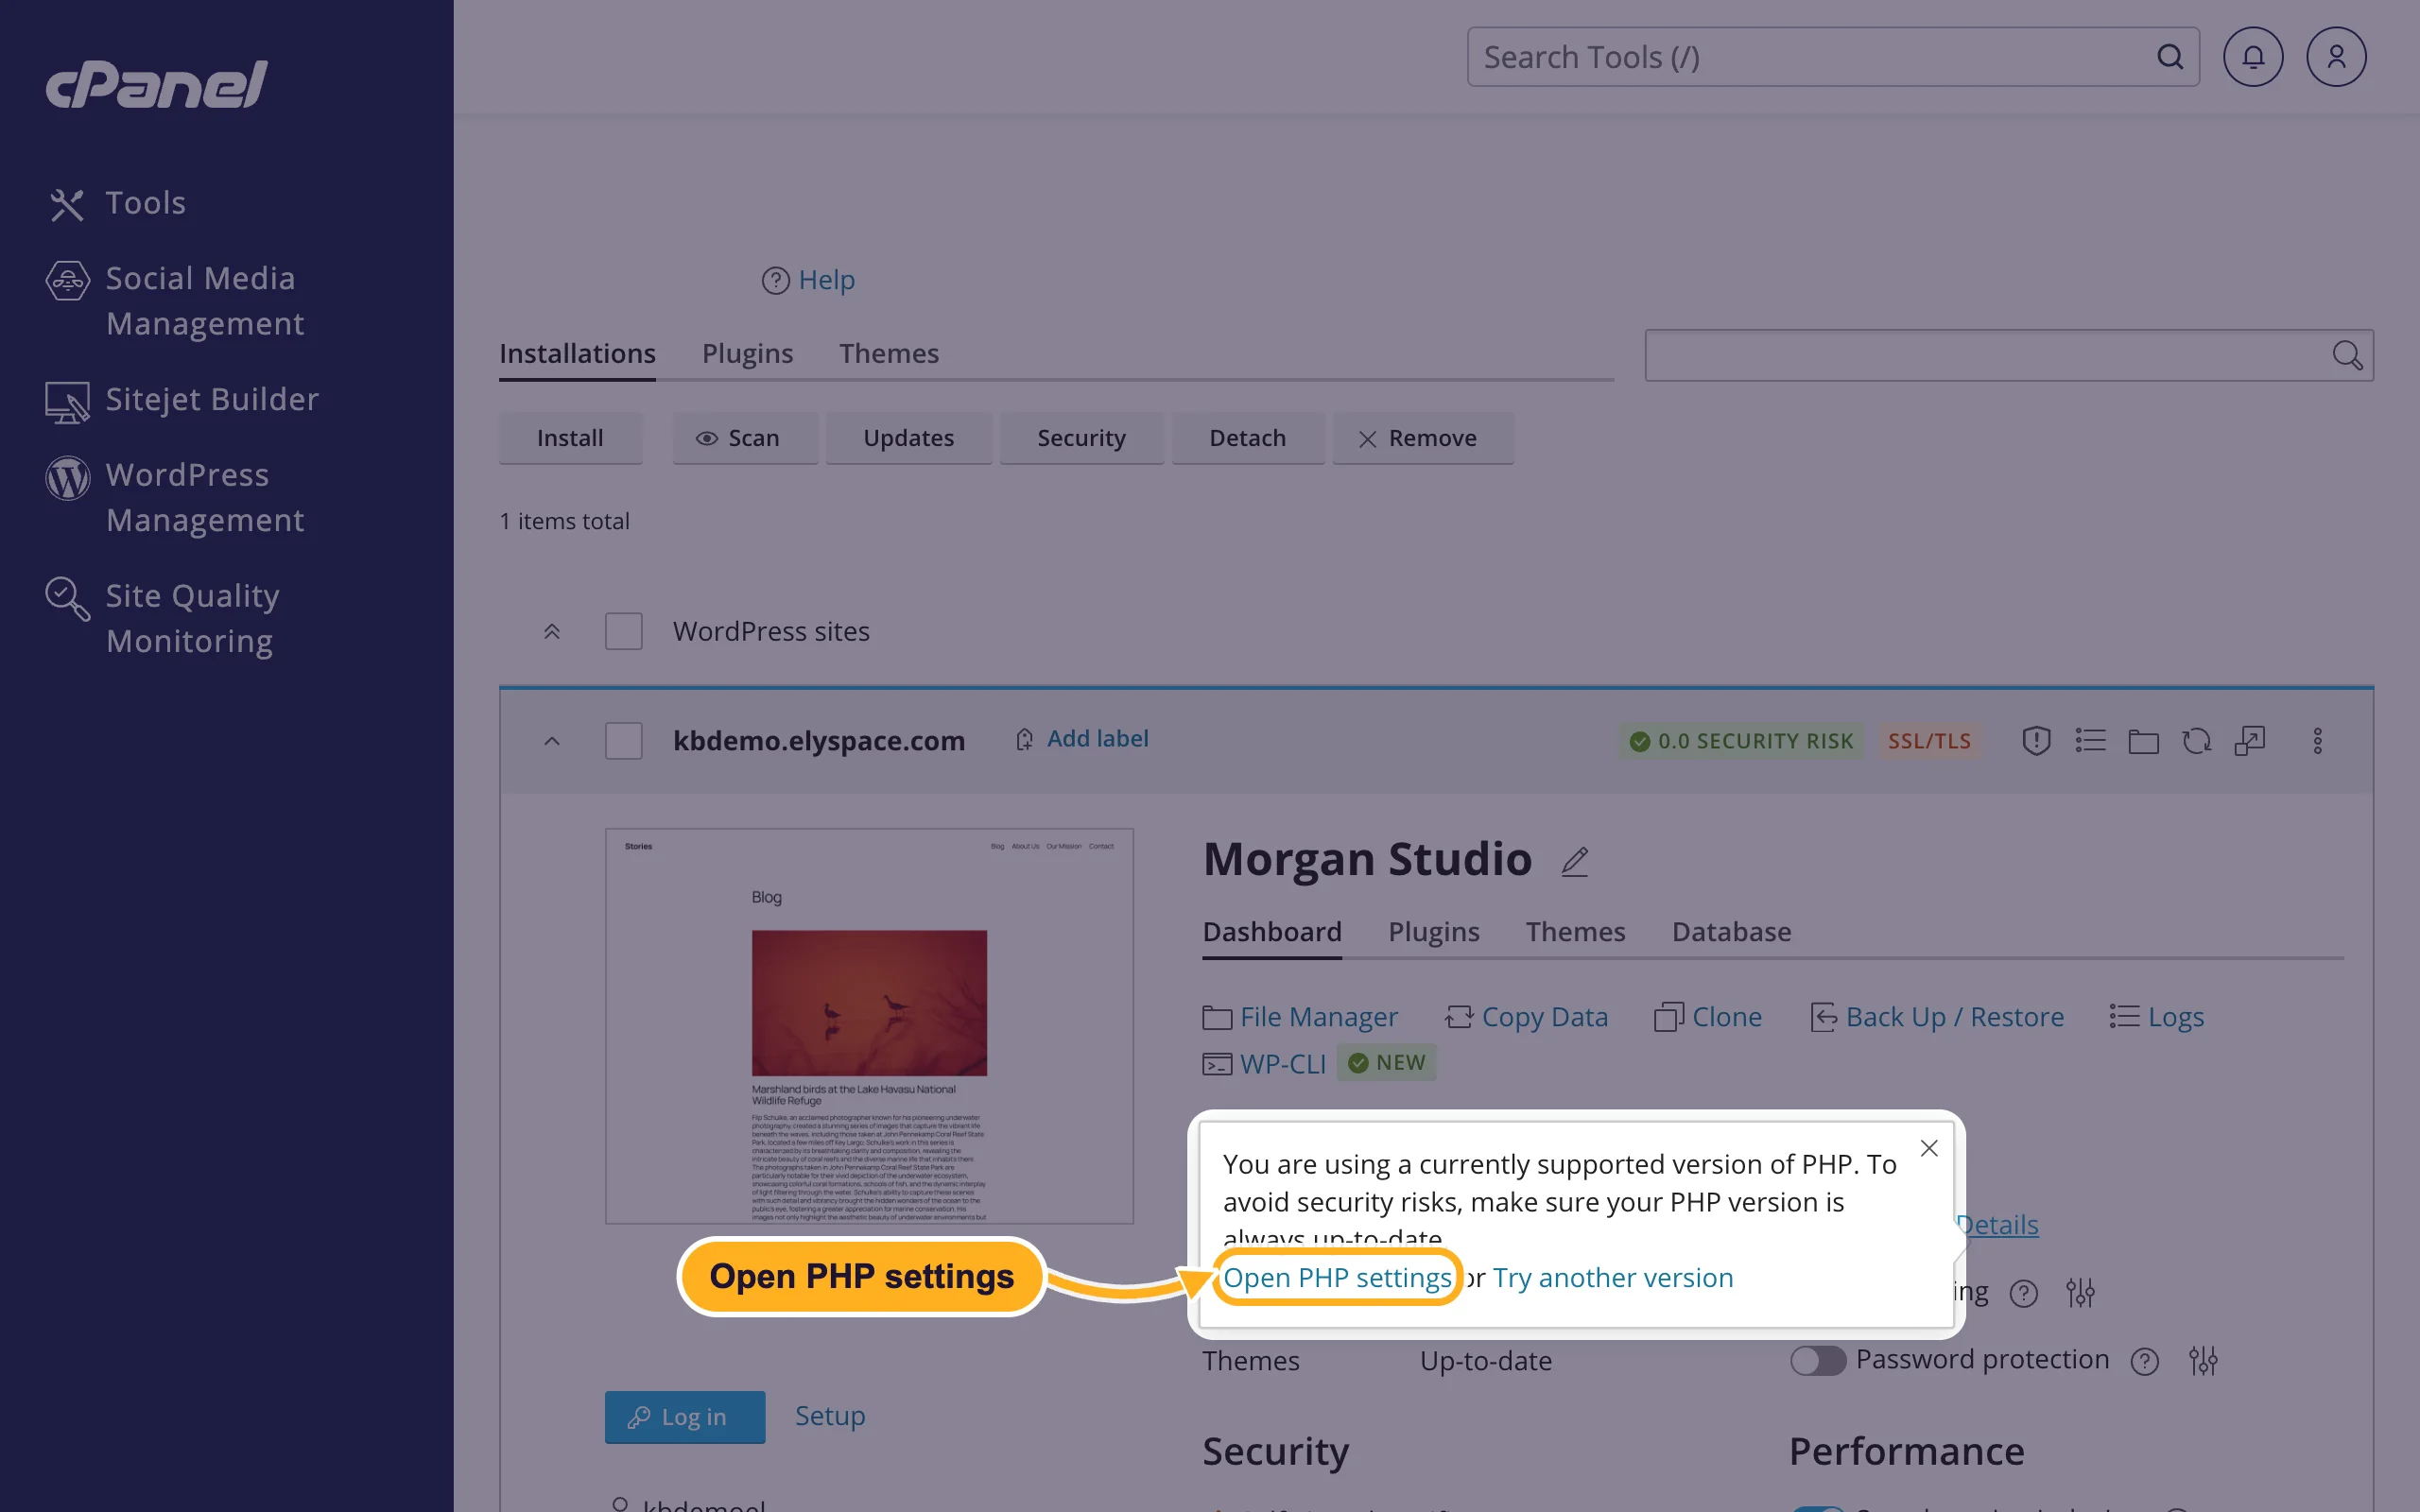
Newer PHP versions run WordPress faster and get security fixes. Your site's card shows the version next to PHP under Tools.
Click Details next to the PHP version. The note tells you whether your version is still supported. Open PHP settings leads to the PHP settings for your site.
To change the version, use cPanel's MultiPHP Manager: see Change the PHP version and PHP settings. Back up first and update your plugins and theme, then check the site after switching. If something breaks, switch back.
More quick wins
- Delete plugins and themes you don't use, and replace heavy plugins that do little (see Install and manage WordPress plugins and themes).
- Keep WordPress, plugins and themes up to date (see Update WordPress, plugins and themes).
- Turn on compression of text files: Turn on Gzip compression (Optimize Website).
Common problems
Changes don't show up on the site
You're seeing the cached copy. Purge the cache in LiteSpeed Cache (it adds a purge option to the bar at the top of the dashboard), then reload without cache: Ctrl+F5 on Windows, Cmd+Shift+R on a Mac.
A form, cart or members' area misbehaves after turning on caching
Pages that change per visitor shouldn't be cached. Exclude those pages in the plugin's cache settings, or switch the plugin off to confirm it's the cause.
The site shows an error after a PHP change
A plugin or theme doesn't support that version. Switch back in MultiPHP Manager, then update or replace the plugin. See Fix "There has been a critical error on this website".
Related articles
- Change the PHP version and PHP settings
- Change PHP limits: upload size, memory and execution time
- Install and manage WordPress plugins and themes
Still stuck? Open a support ticket and we'll help.
