

Every mailbox has its own calendar and address book. Sync them with your iPhone, Mac or Thunderbird using CalDAV and CardDAV and your email login.
The settings
| Setting | Value |
|---|---|
| Username | Your full email address, for example [email protected] |
| Password | The password of this mailbox |
| Calendar server (CalDAV) | cpcalendars.yourdomain.com (or https://cpcalendars.yourdomain.com) |
| Contacts server (CardDAV) | cpcontacts.yourdomain.com (or https://cpcontacts.yourdomain.com) |
| Port and security | 443 with SSL/TLS (the normal https port, most apps set it on their own) |
Replace yourdomain.com with your own domain and [email protected] with your address. Apps that need the exact address of one calendar or address book use these:
https://cpcalendars.yourdomain.com/calendars/[email protected]/calendar
https://cpcontacts.yourdomain.com/addressbooks/[email protected]/addressbookCheck your username in webmail
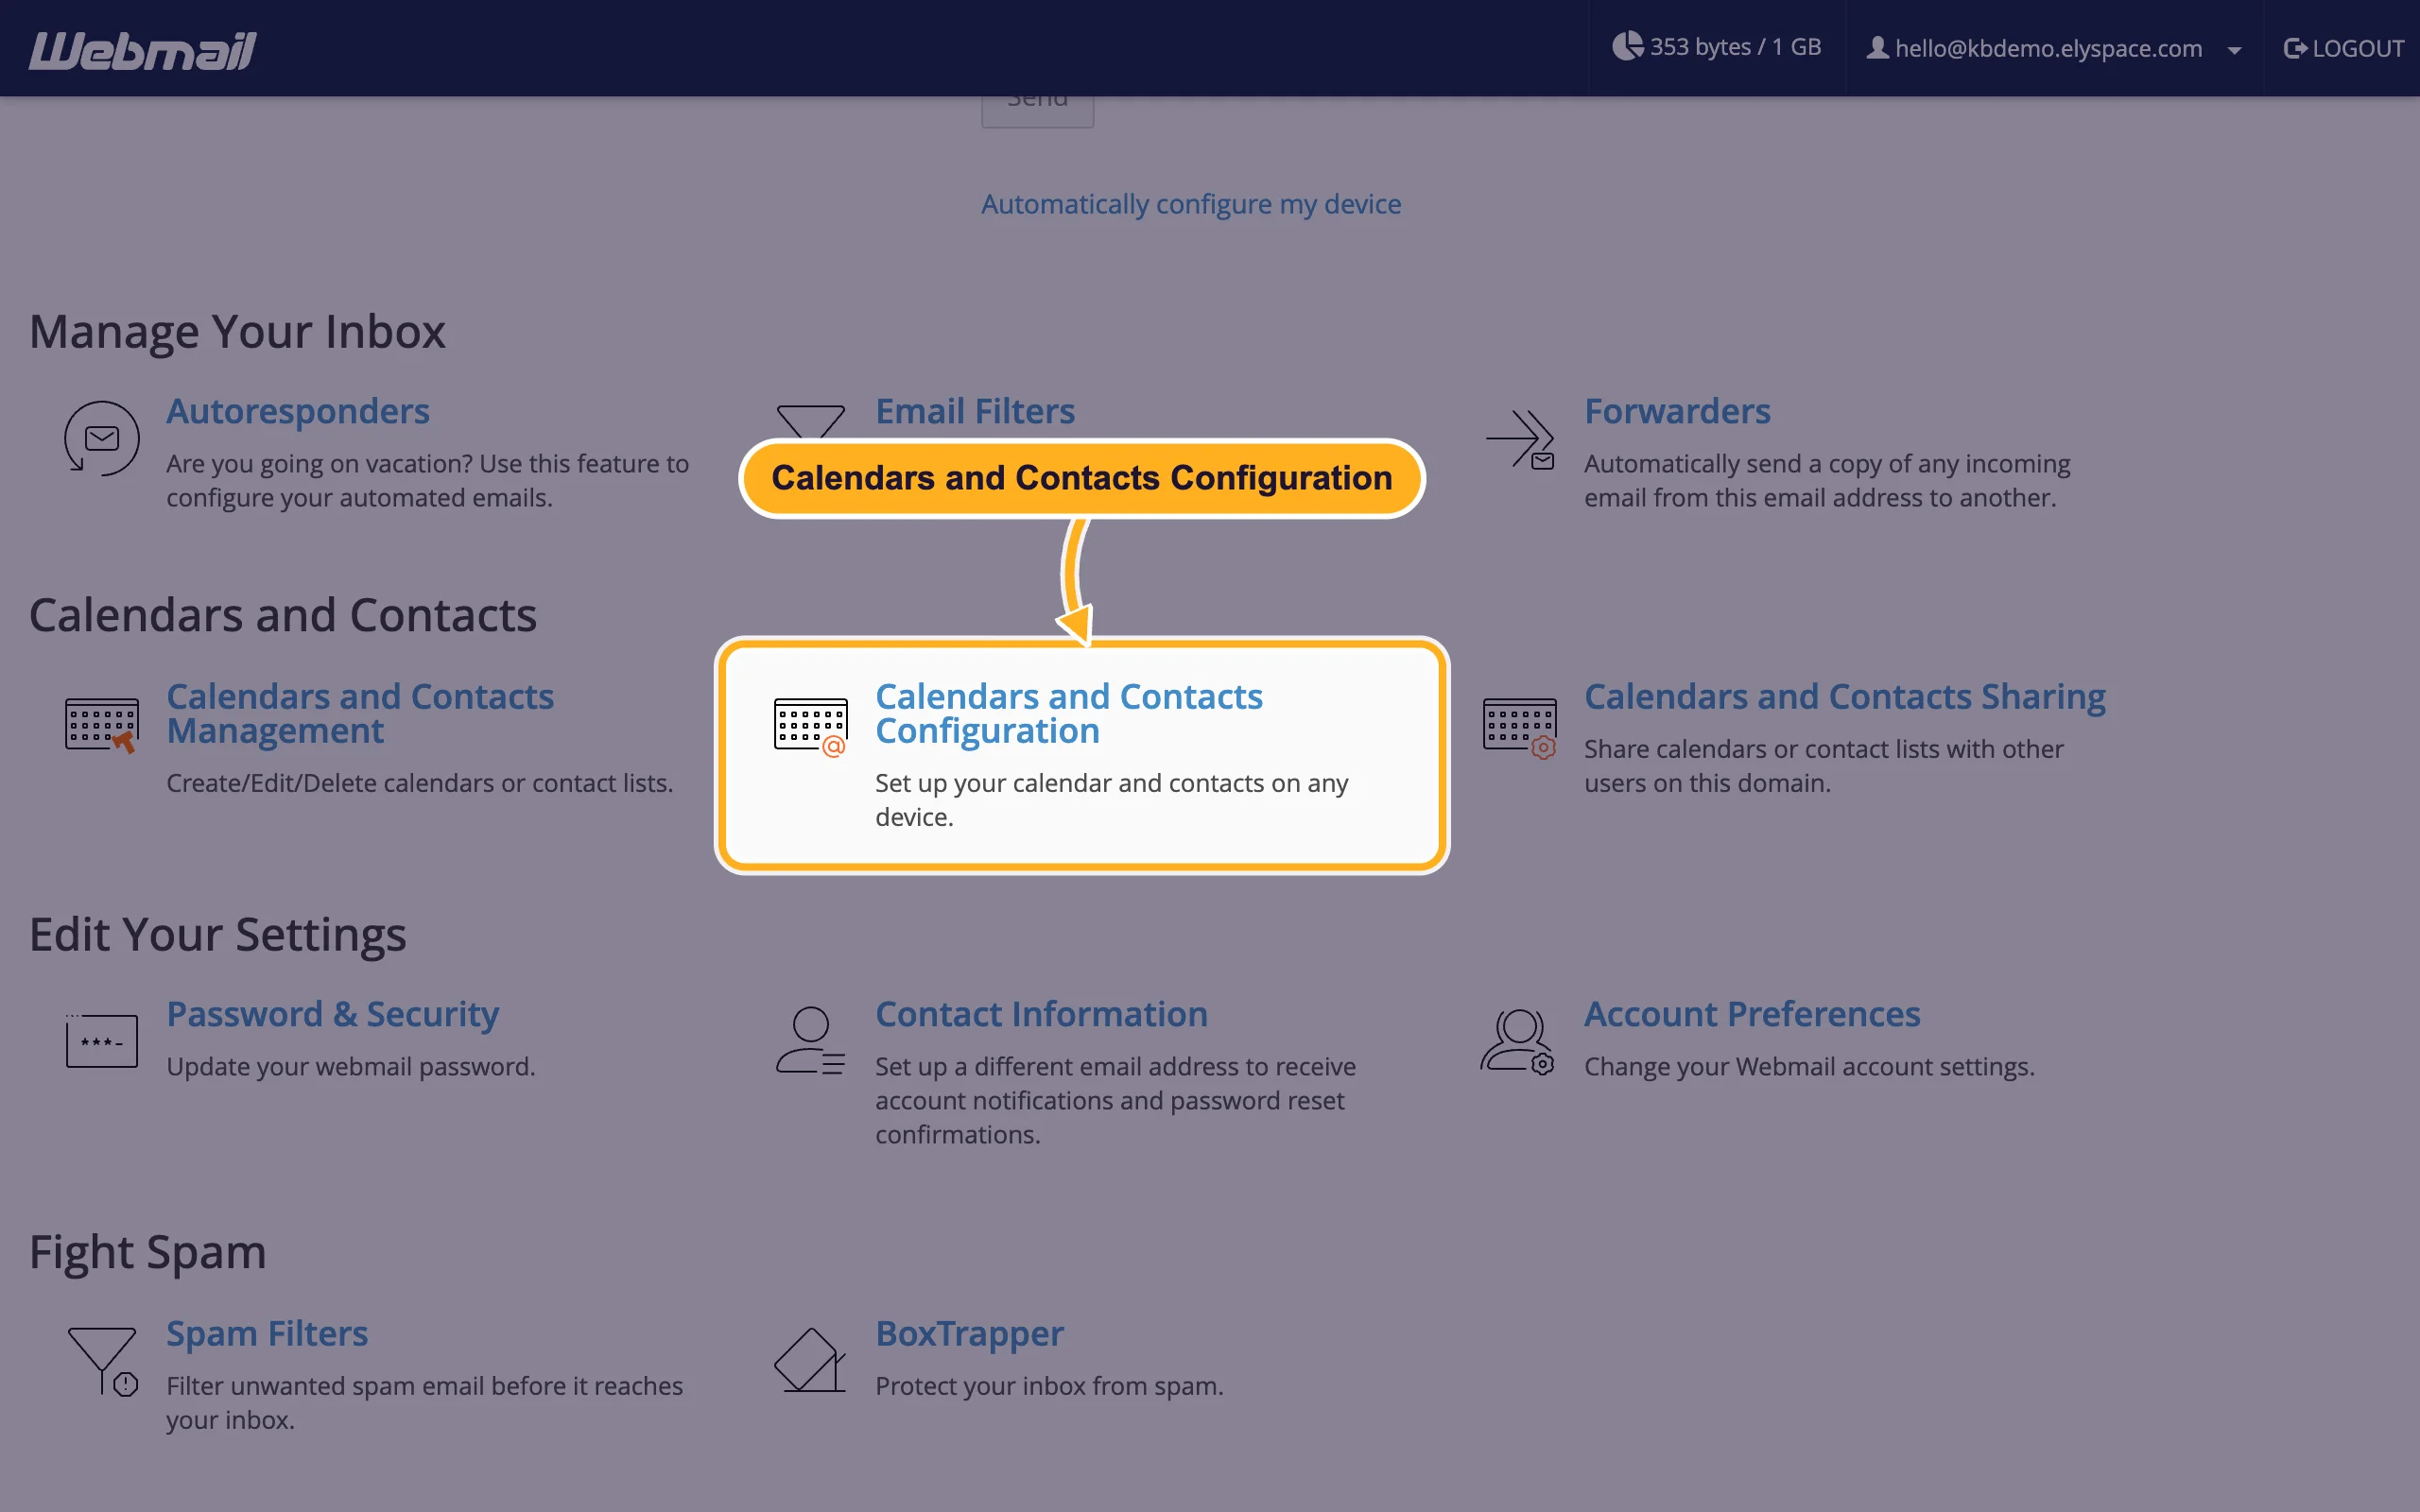
Log in to webmail with the mailbox (see Log in to webmail). On the start page, under Calendars and Contacts, click Calendars and Contacts Configuration.
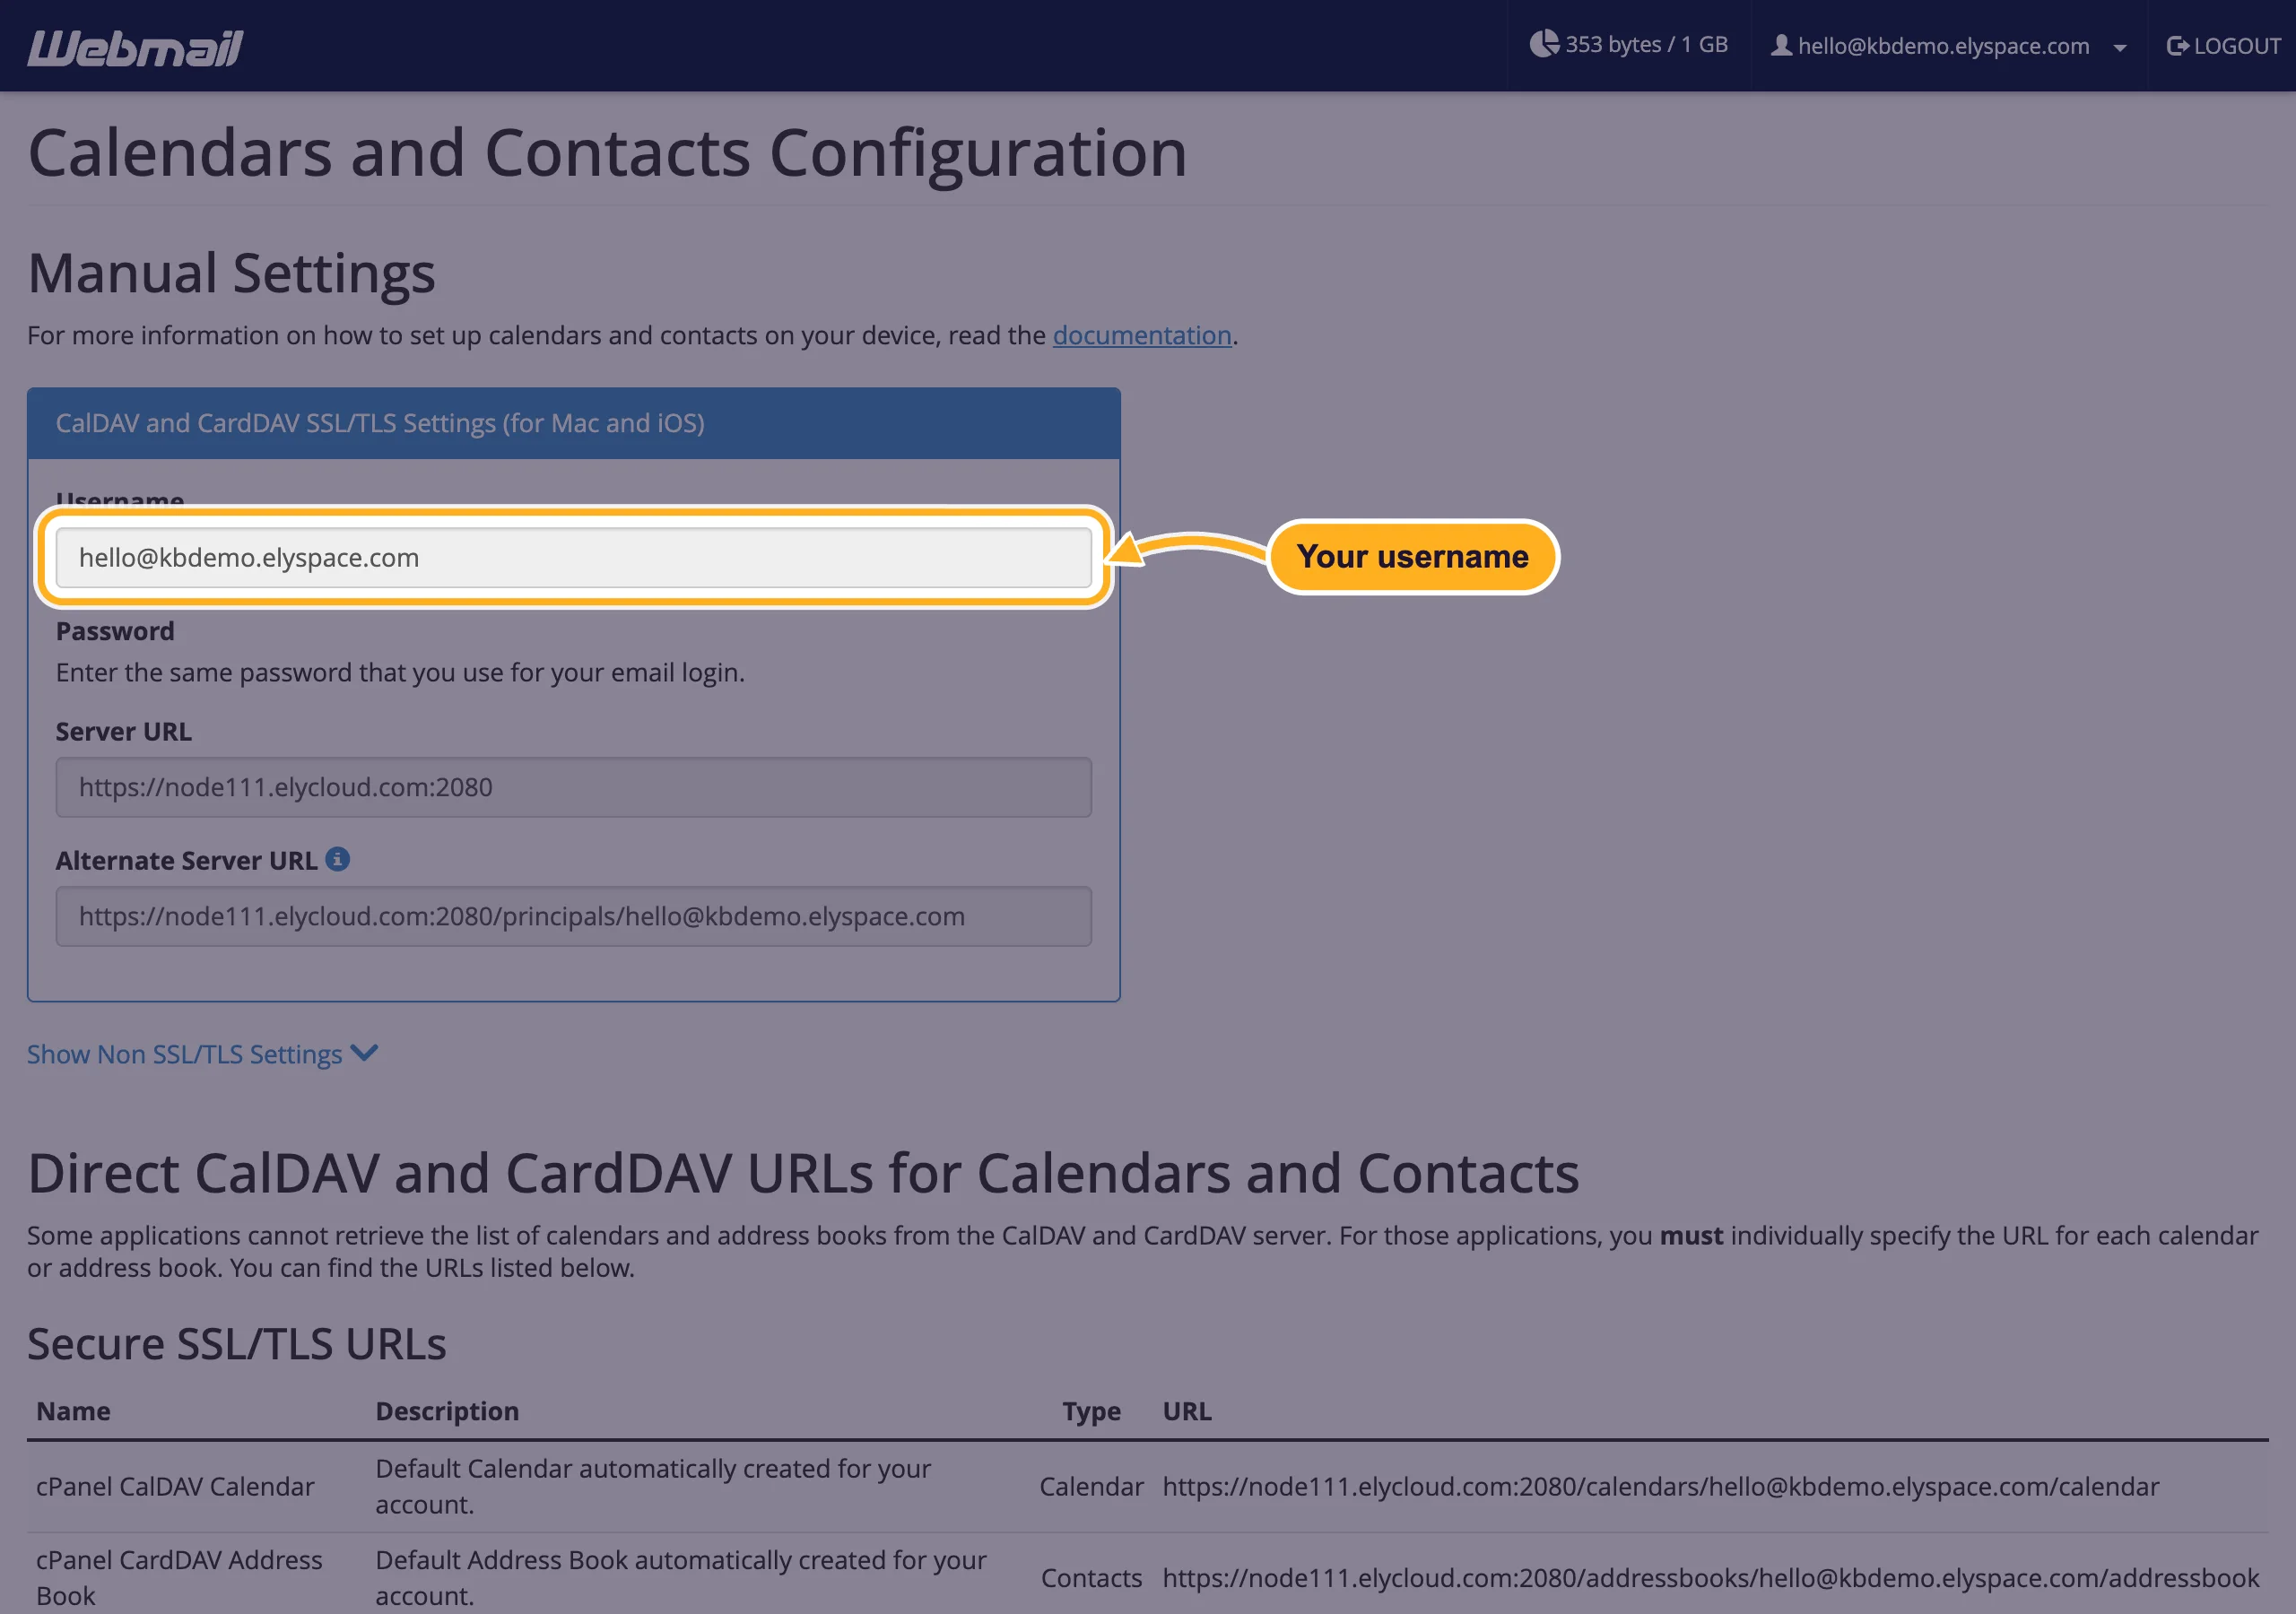
Under CalDAV and CardDAV SSL/TLS Settings (for Mac and iOS), the Username field shows the login for your devices. The password is the one you use for your email. For the server, use the cpcalendars and cpcontacts addresses from the table above: they work on every network, because they use the normal https port.
Add the calendar and contacts to your device
iPhone or iPad
- Open Settings, tap Apps, then Calendar, Calendar Accounts, Add Account, Other and Add CalDAV Account.
- Enter Server
cpcalendars.yourdomain.com, your full email address as User Name, the mailbox Password and a Description. Tap Next, then Save. - For contacts, go to Settings, Apps, Contacts, Contacts Accounts, Add Account, Other, Add CardDAV Account and enter
cpcontacts.yourdomain.comwith the same login.
Mac
- Open System Settings and click Internet Accounts, then Add Account and Add Other Account.
- Choose CalDAV account, set Account Type to Manual, enter your email address, the password and Server Address
cpcalendars.yourdomain.com, and click Sign In. - Repeat with CardDAV account and
cpcontacts.yourdomain.com.
Thunderbird
For the calendar, create a new calendar On the Network, enter your email address as username and https://cpcalendars.yourdomain.com as location, then let Thunderbird find the calendars. For contacts, add a CardDAV Address Book with https://cpcontacts.yourdomain.com. Setting up the mailbox itself is covered in Set up email in Thunderbird.
Android
Android has no built-in CalDAV or CardDAV support. Install a sync app that supports CalDAV and CardDAV from Google Play and enter the settings from the table above.
Create, share or delete calendars
Each mailbox starts with cPanel CalDAV Calendar and cPanel CardDAV Address Book. In cPanel (or webmail), Calendars and Contacts Management lets you create more with Create, and rename or delete them with the pencil and bin icons. Calendars and Contacts Sharing gives other users on your domain access to a calendar or address book, with or without Allow Editing.
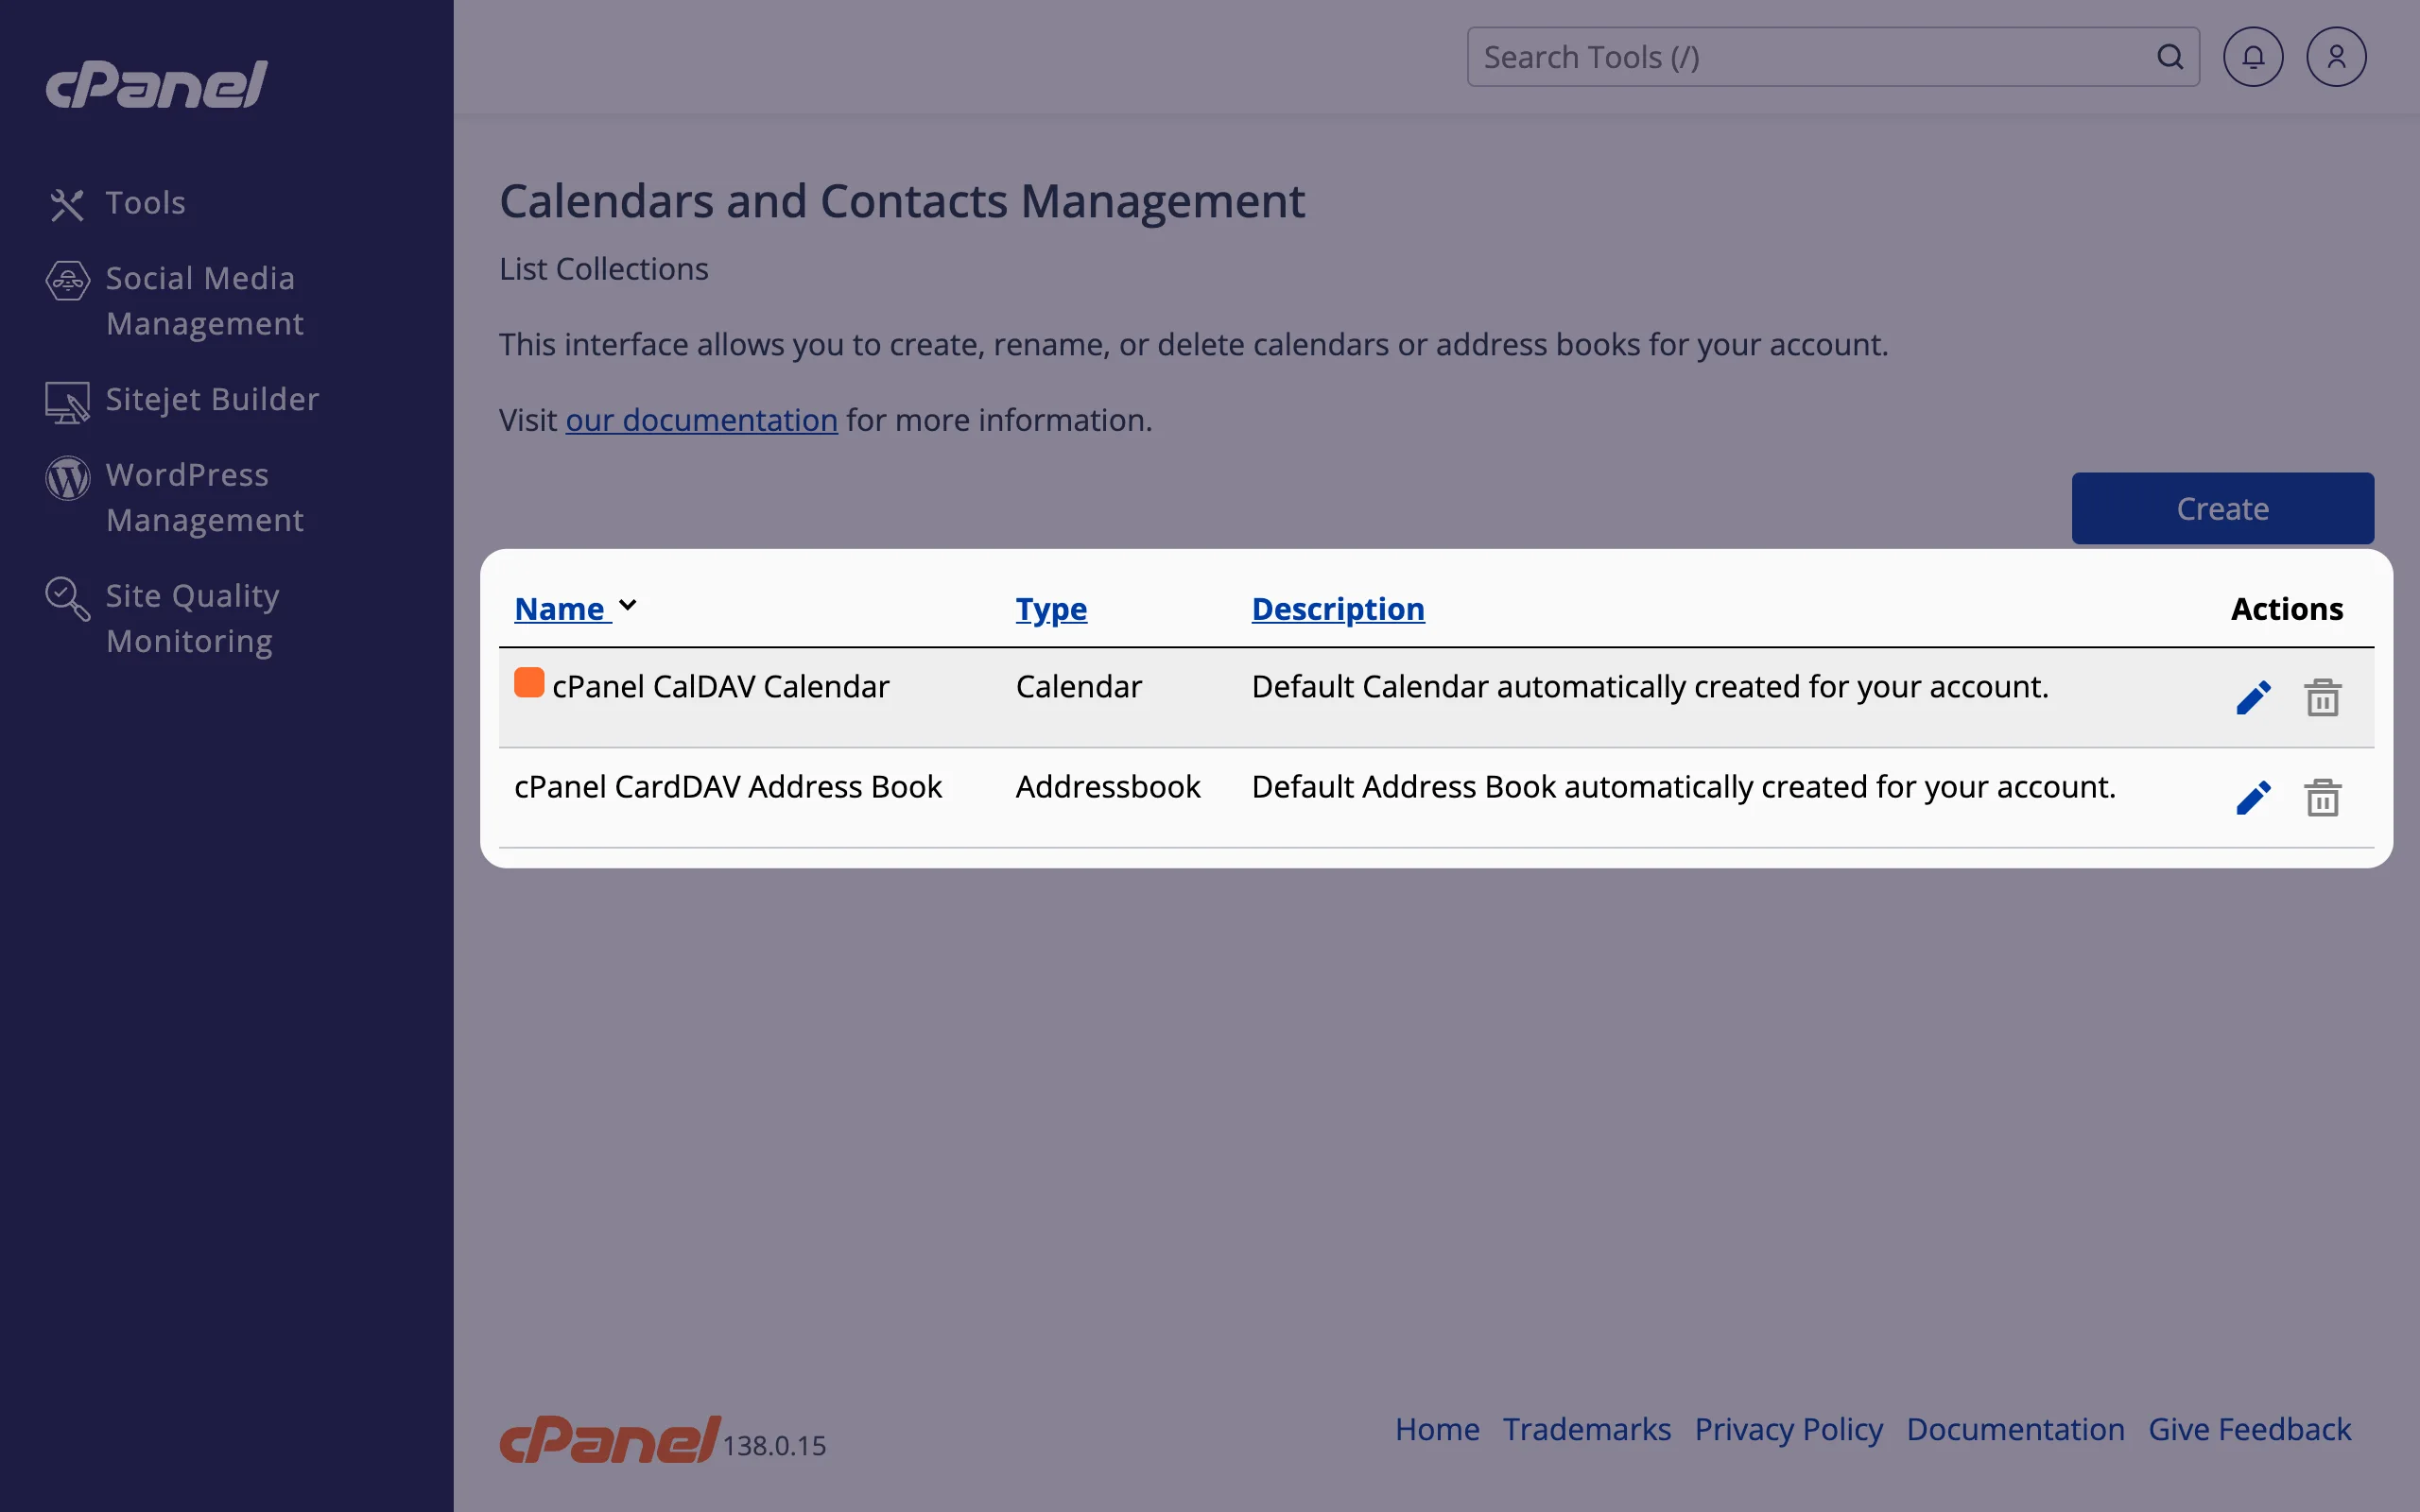
In cPanel these pages show the calendars of your cPanel user. To work with a mailbox's own calendars, open the same pages from that mailbox's webmail.
Common problems
"Cannot connect" or "Unable to verify account"
Check the server: use cpcalendars.yourdomain.com or cpcontacts.yourdomain.com, not an address with port 2080. Then check that the username is the full email address and the password is the mailbox password (see Change an email account password).
Certificate warning
The SSL certificate for cpcalendars or cpcontacts isn't issued yet, usually because the domain's DNS was changed recently. See Free SSL: check and fix your certificate (AutoSSL), or open a ticket.
Contacts sync, the calendar doesn't (or the other way round)
Calendar and contacts are two separate accounts on most devices. Add both, one with the cpcalendars address and one with the cpcontacts address.
Related articles
- Log in to webmail
- Set up email on iPhone or iPad
- Set up email in Apple Mail on a Mac
- Set up email in Thunderbird
Still stuck? Open a support ticket and we'll help.
