Introduction
If you need to cancel your hosting account with ElySpace, follow these simple steps. This guide will walk you through the process step-by-step to ensure a smooth and hassle-free cancellation.
Step 1: Log in to Your Account
First, log in to your ElySpace account. Once logged in, you will be able to access the cancellation options for your account.
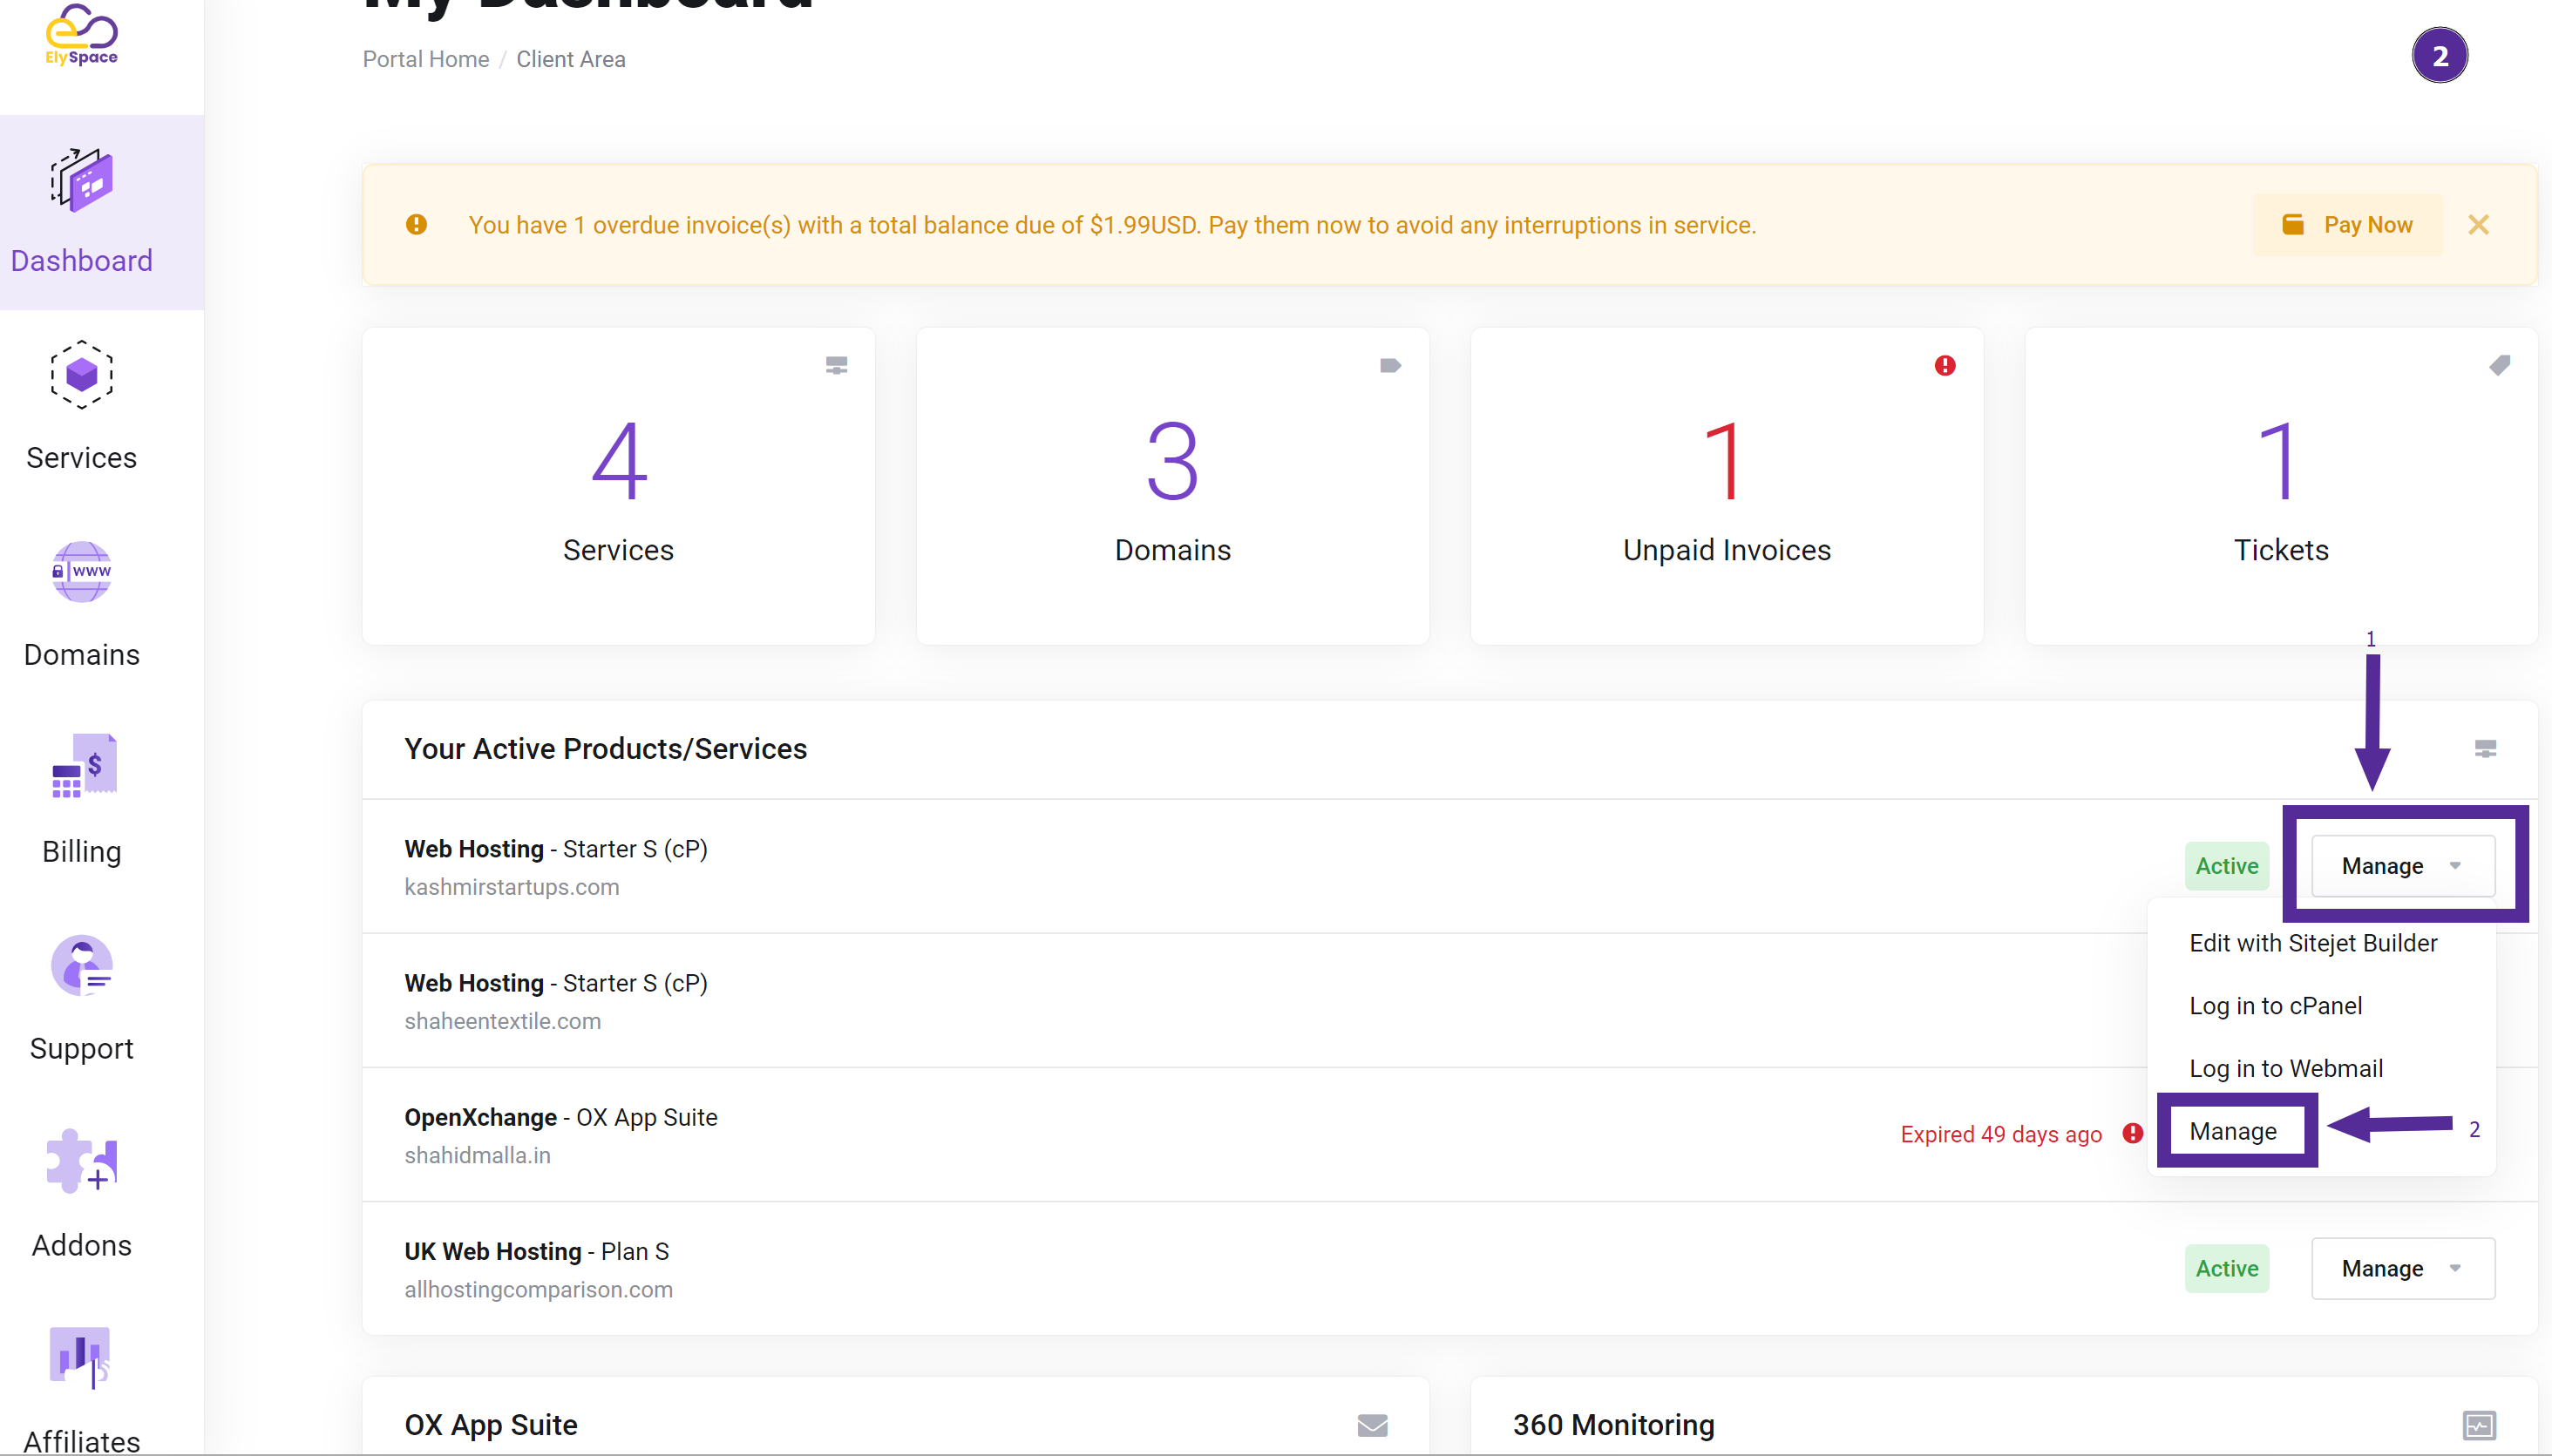
Step 2: Click on "Manage"
After logging in, click on the "Manage" button. This will bring up several options. Find and click on "Manage" again to proceed.
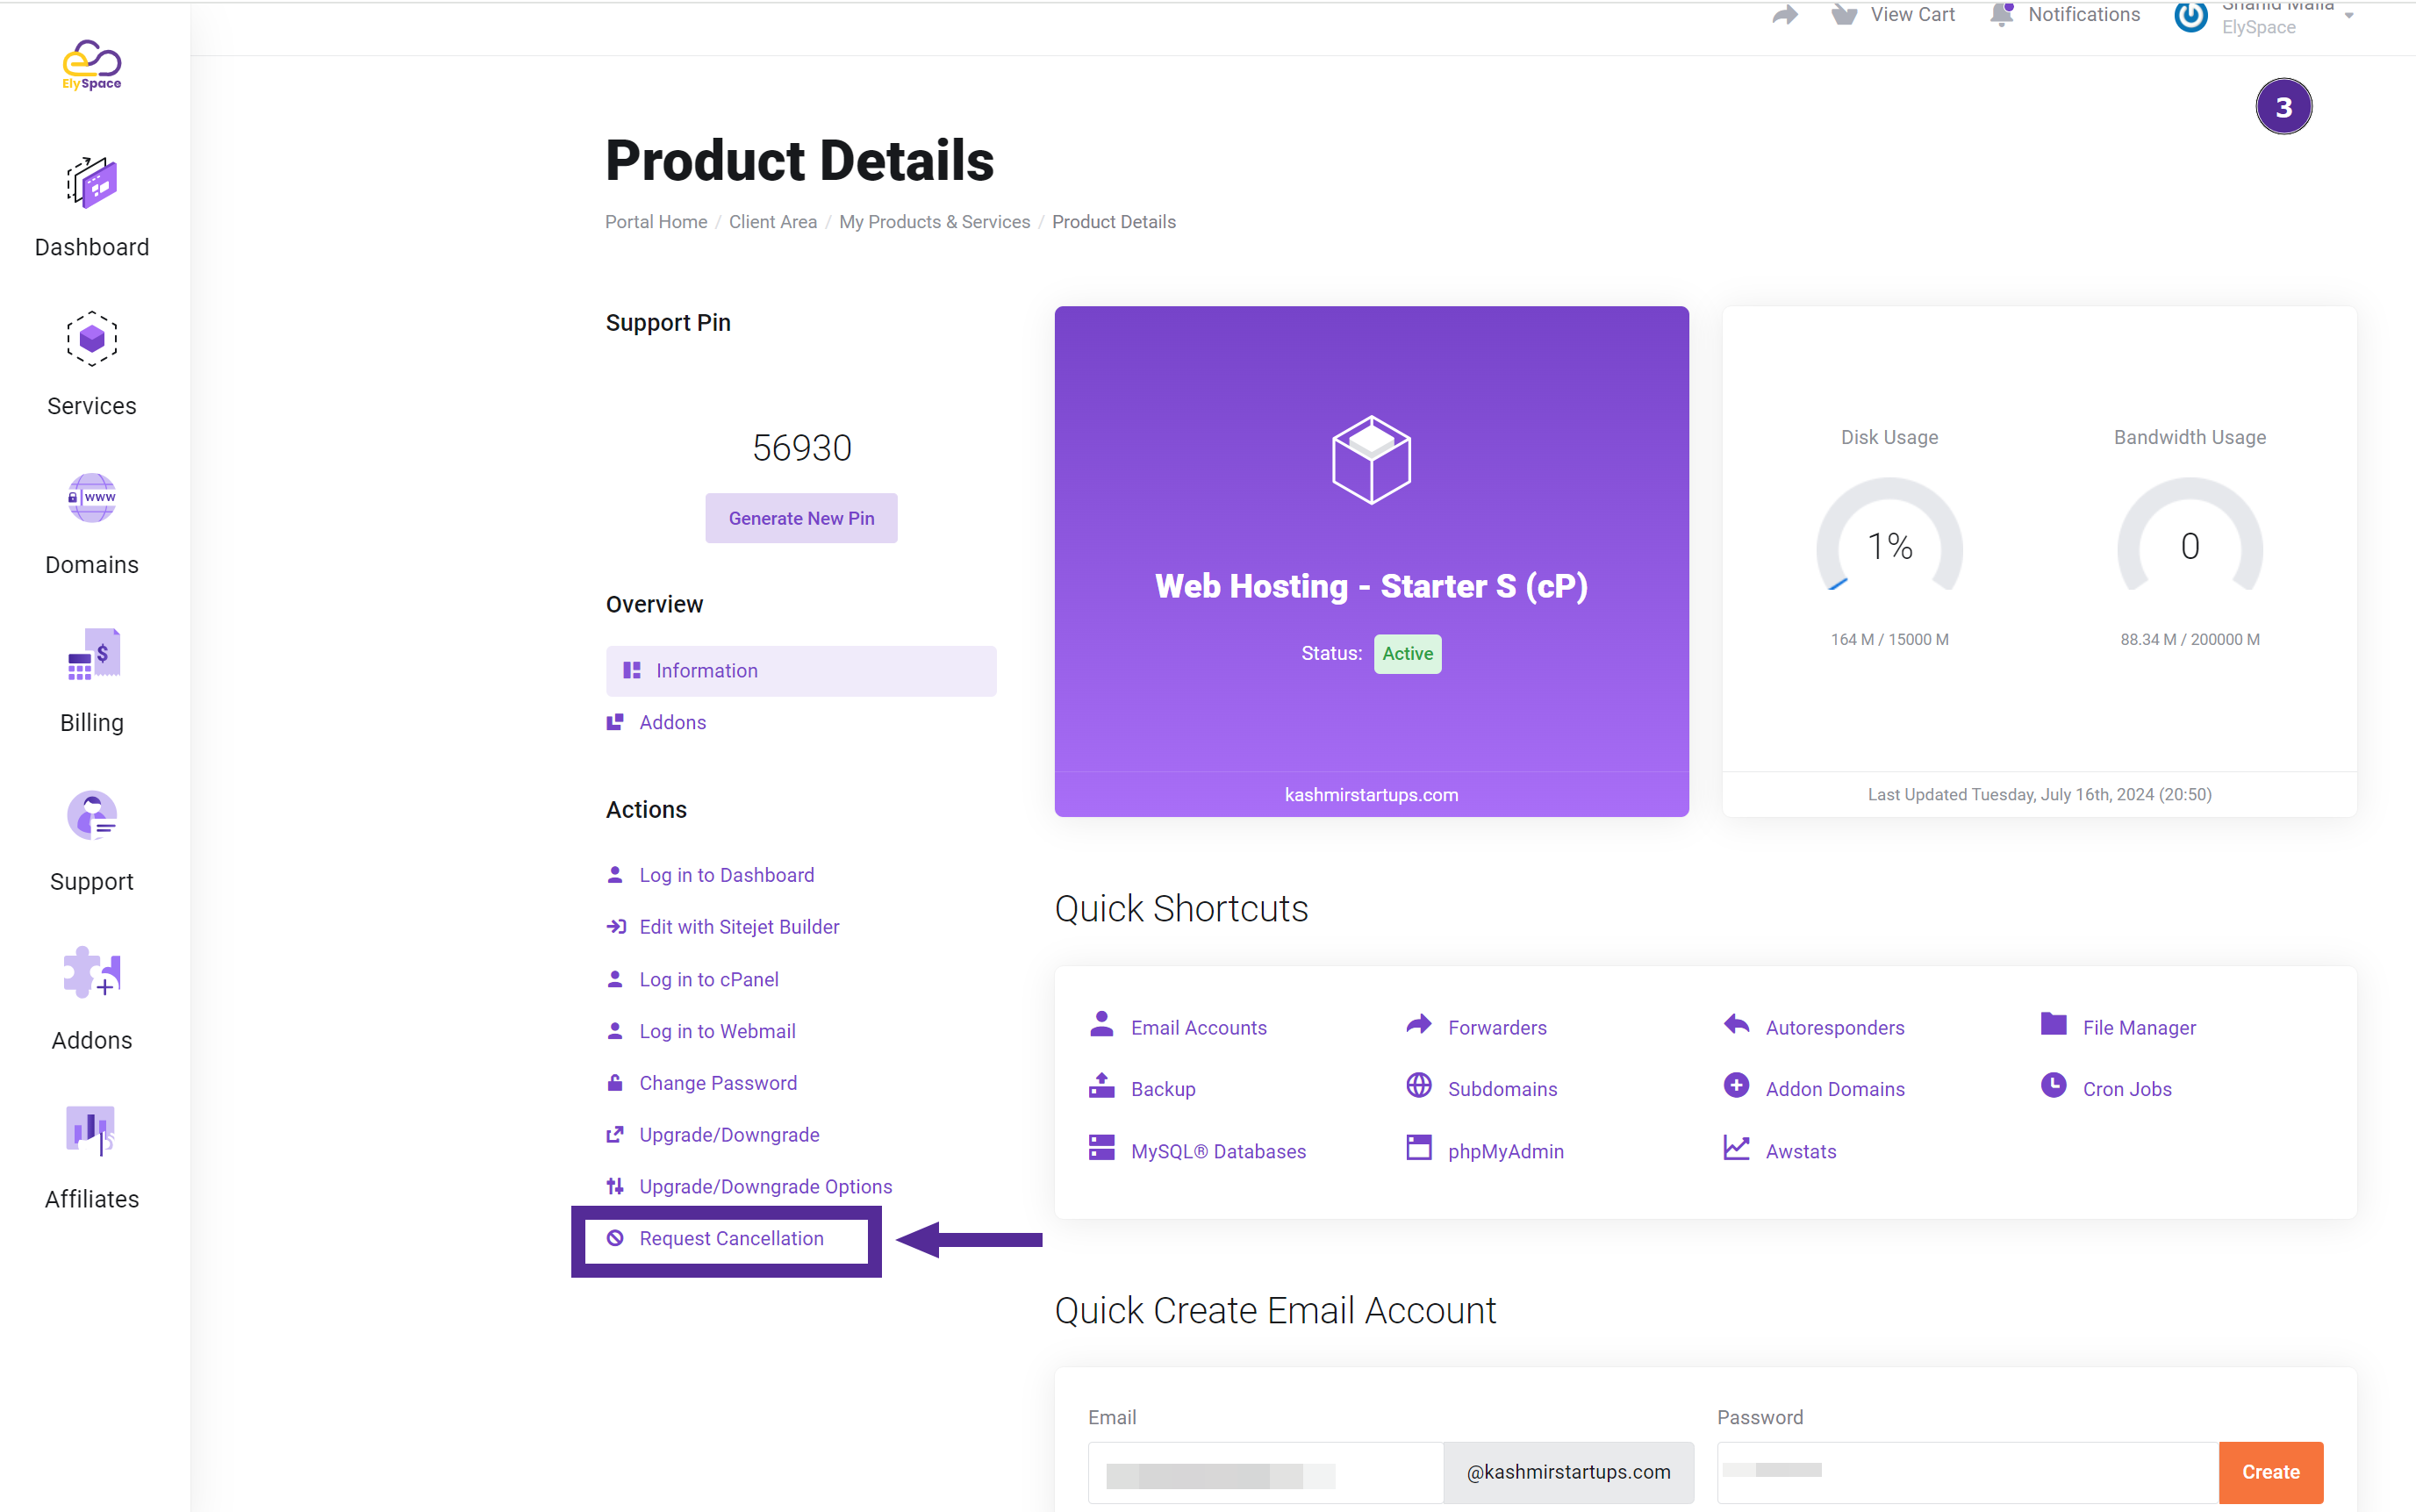
Step 3: Request Cancellation
Next, click on the "Request Cancellation" option. This will take you to the next page where you can proceed with the cancellation process.
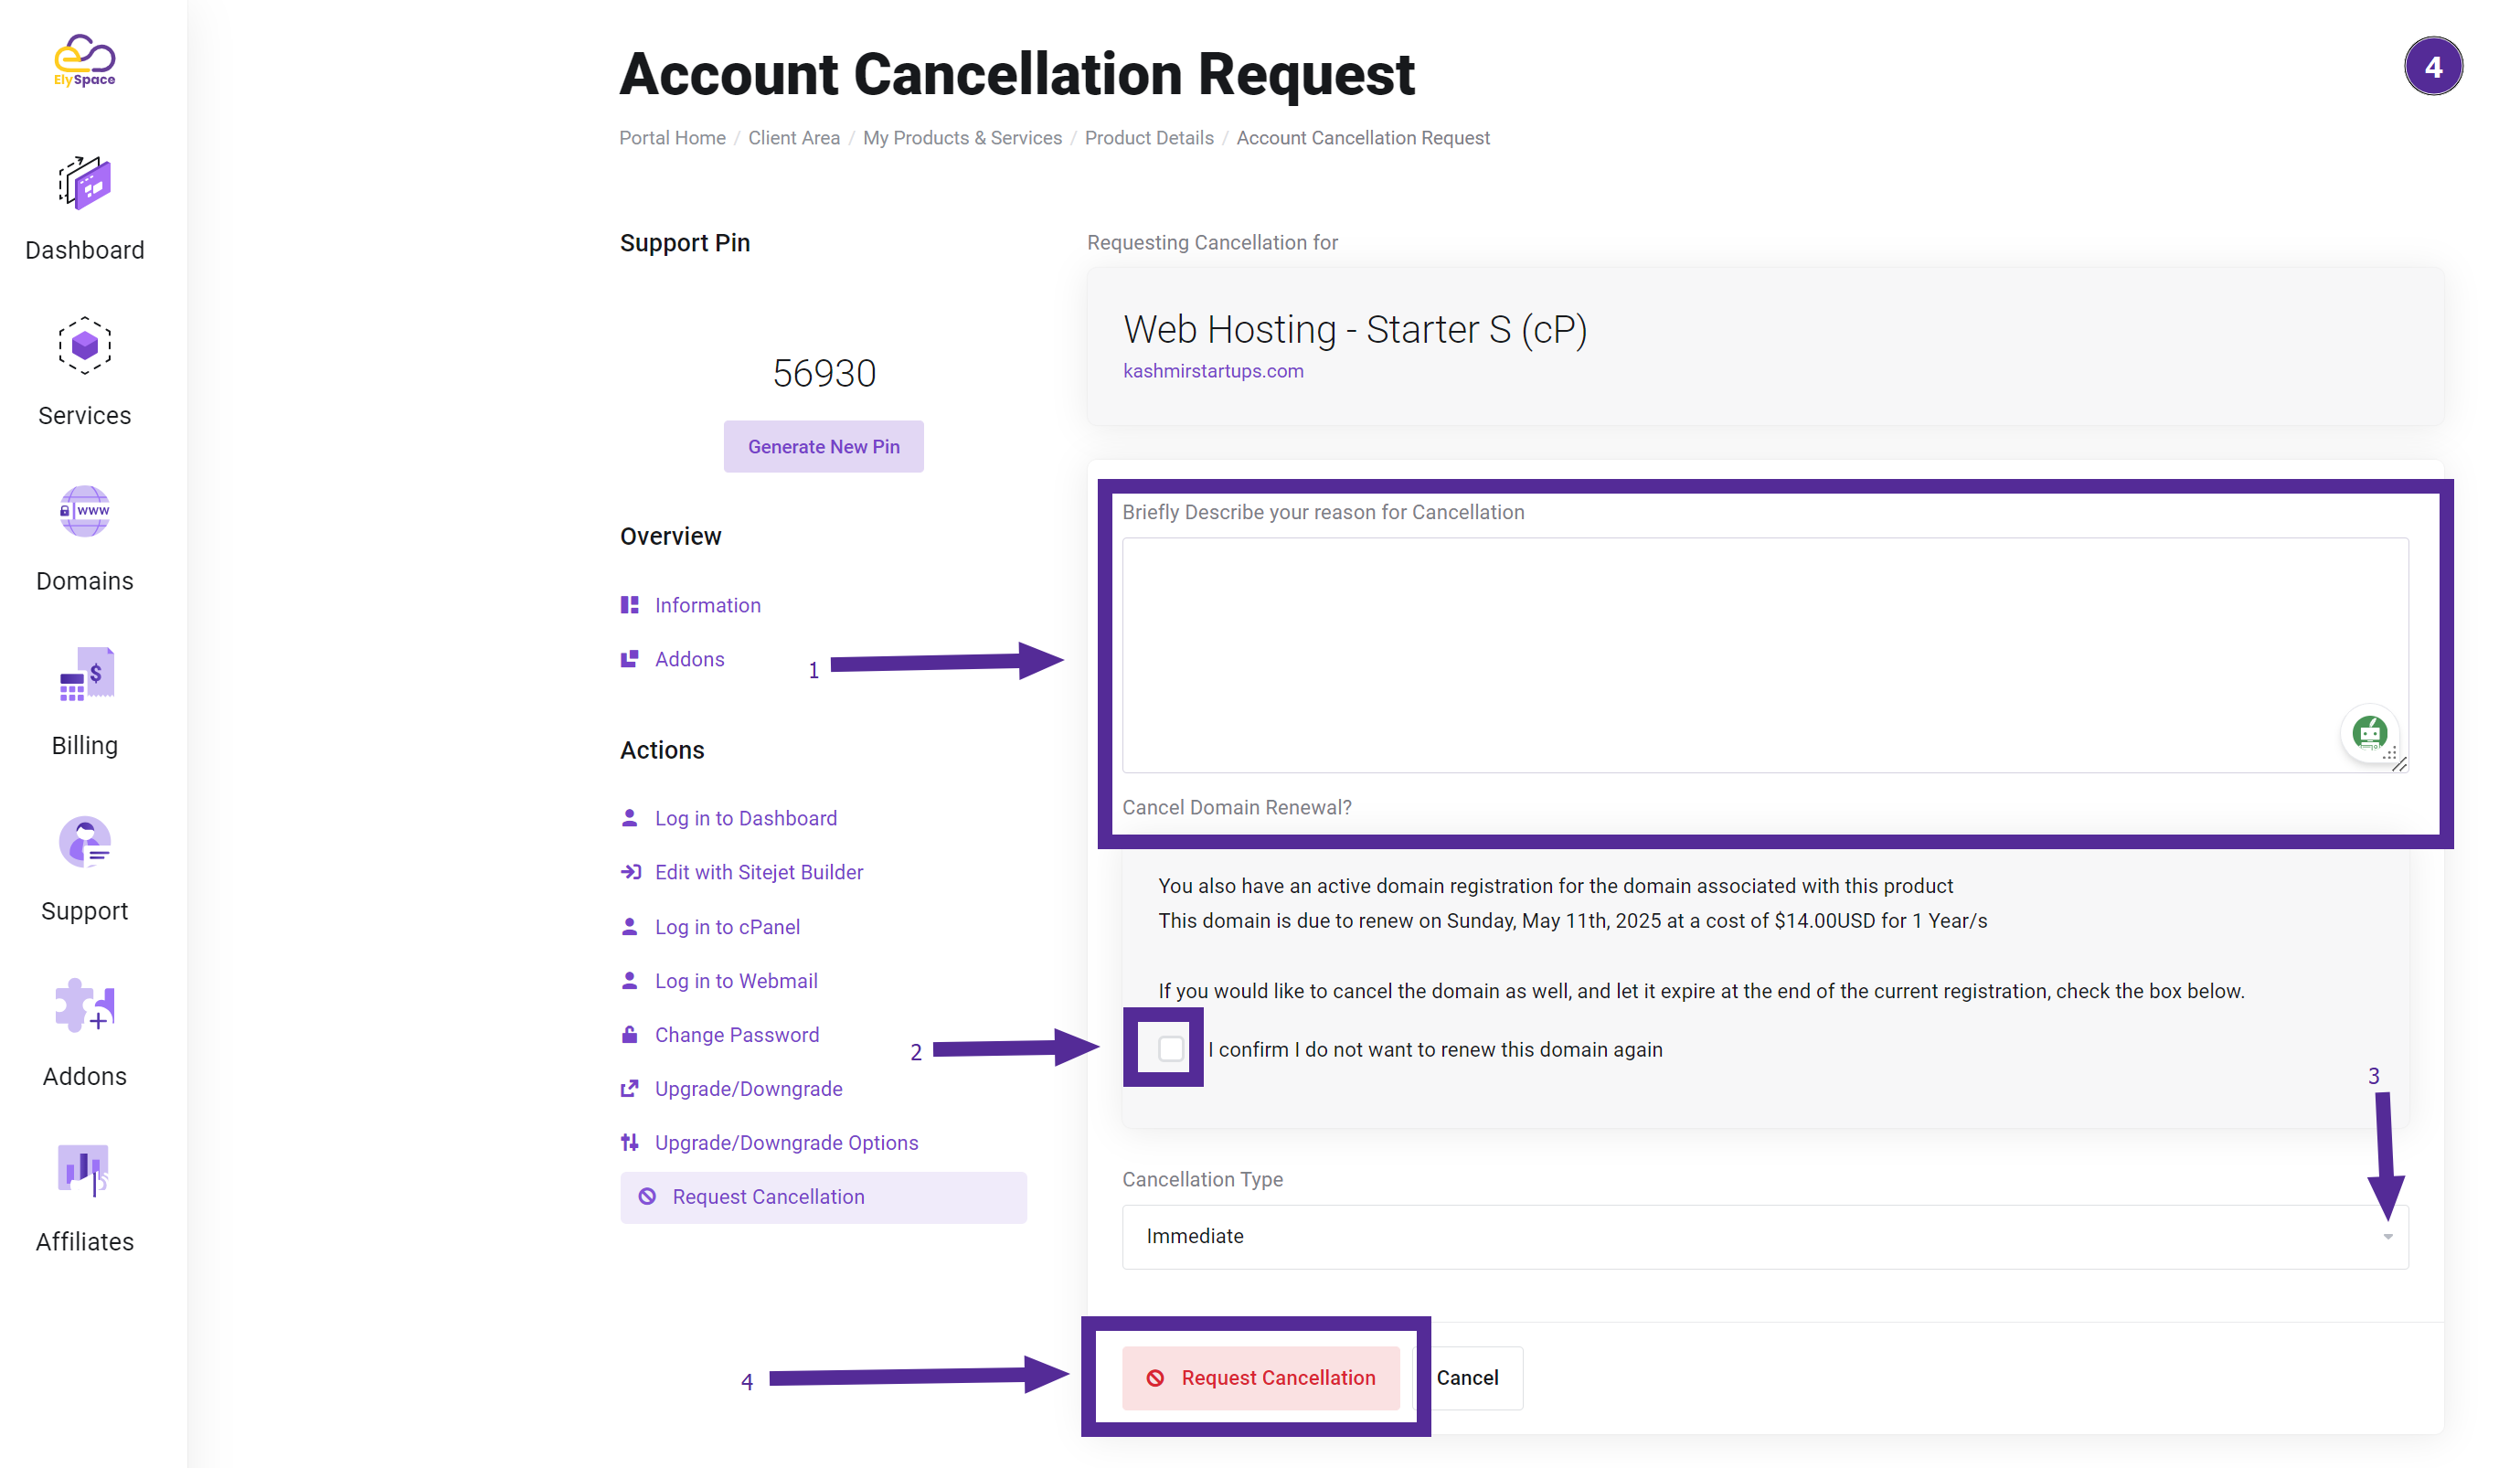
Step 4: Describe Your Reason for Cancellation
On the next page, you will need to describe your reason for cancellation. If you do not want to renew this domain again, make sure to enable the option. You can also select your cancellation type. After filling in the details, click on the "Cancellation" button.
Step 5: Successful Cancellation
Once you have completed the steps above, your service will be successfully canceled. You will receive a confirmation message indicating that your account has been canceled.
Conclusion
Canceling your account with ElySpace is straightforward and simple. By following these steps, you can ensure that your account is canceled smoothly. If you have any issues or need further assistance, feel free to contact our support team.
This article provides a clear and detailed guide for users to follow, ensuring they can cancel their accounts without any confusion.


