Introduction
Web hosting is a service that enables individuals and organizations to make their websites accessible on the internet. When you purchase web hosting, you are essentially renting space on a server to store your website files, making your site visible and accessible online. Follow the steps below to buy web hosting quickly and easily.
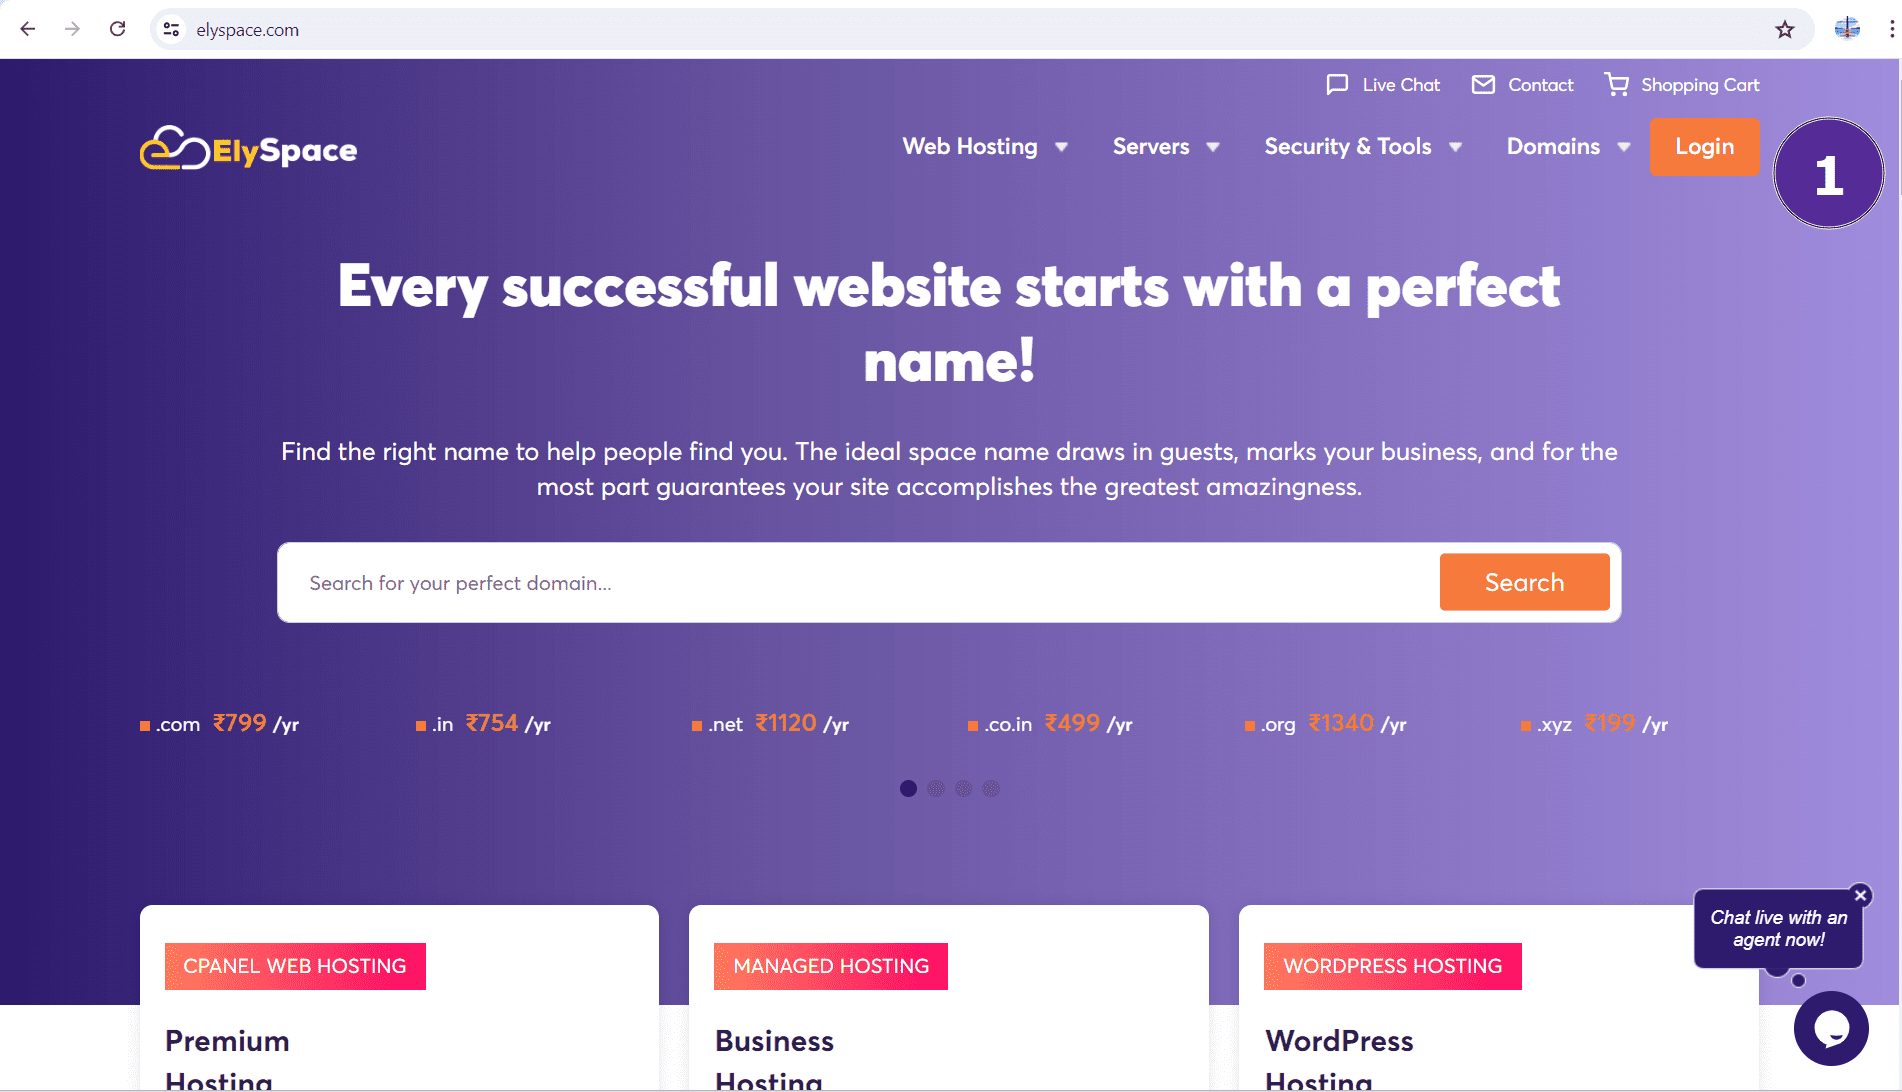
Step 1: Visit the ElySpace Website
Go to the ElySpace website by typing "elyspace.com" in the address bar.
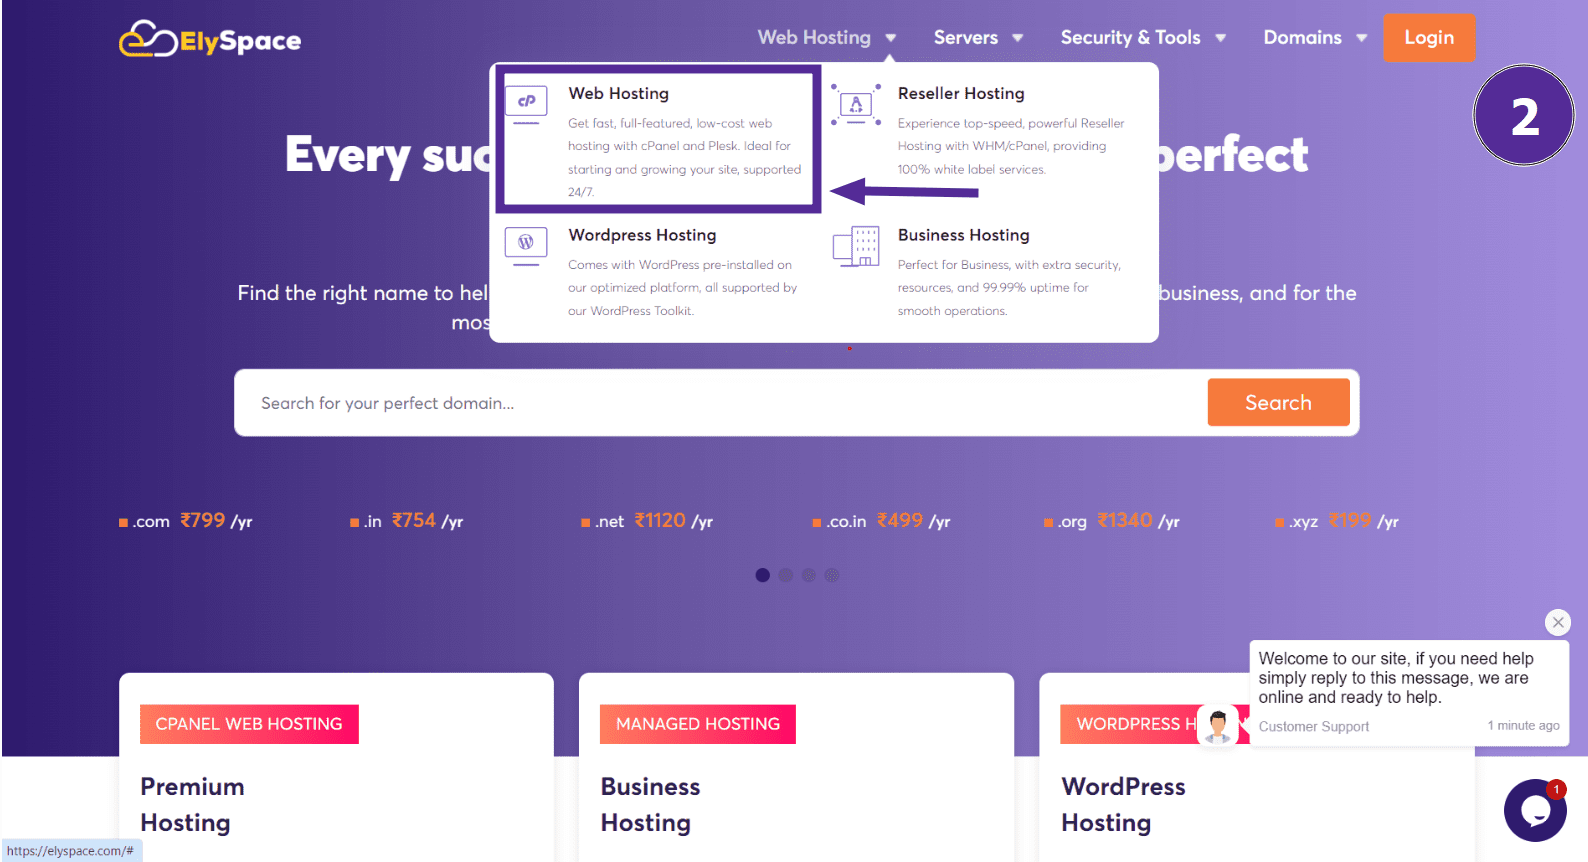
Step 2: Access the Web Hosting Section
In the navigation menu at the top of the page, click on "Web Hosting." This will take you to the web hosting section.
Step 3: Select a Web Hosting Plan
On the web hosting page, you will see different hosting plans or packages. Choose the one that best suits your needs. Here are some examples:
Starter S Plan: It includes 1 Website, 15 GB NVMe Storage, 10 MySQL Databases, and more.
Premium M Plan: It includes hosting for 5 Websites, 30GB NVMe SSD Storage, Unlimited Databases, and more.
Advanced L Plan: It includes hosting for 10 Websites, 50GB NVMe SSD Storage, Unlimited Databases, and more.
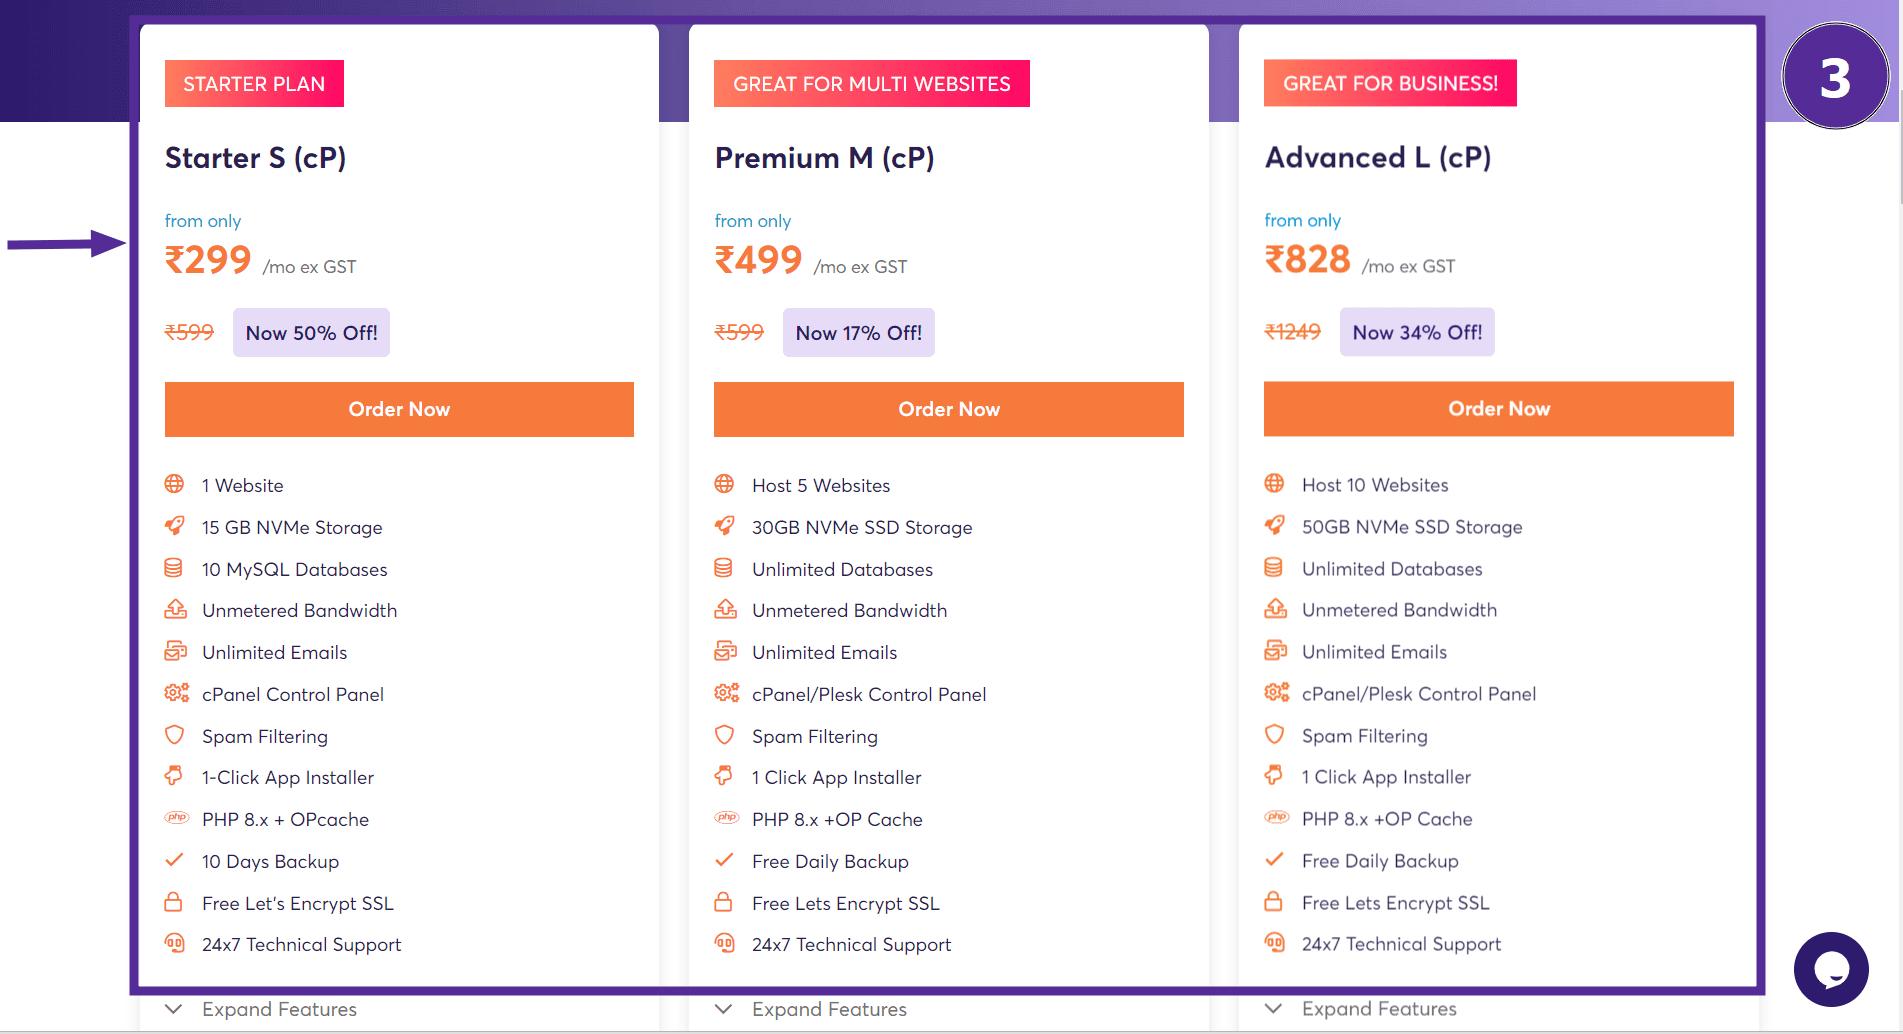
Step 4: Order Your Selected Plan
After choosing your desired plan, click on the 'Order Now' button.

Step 5: Choose Your Domain
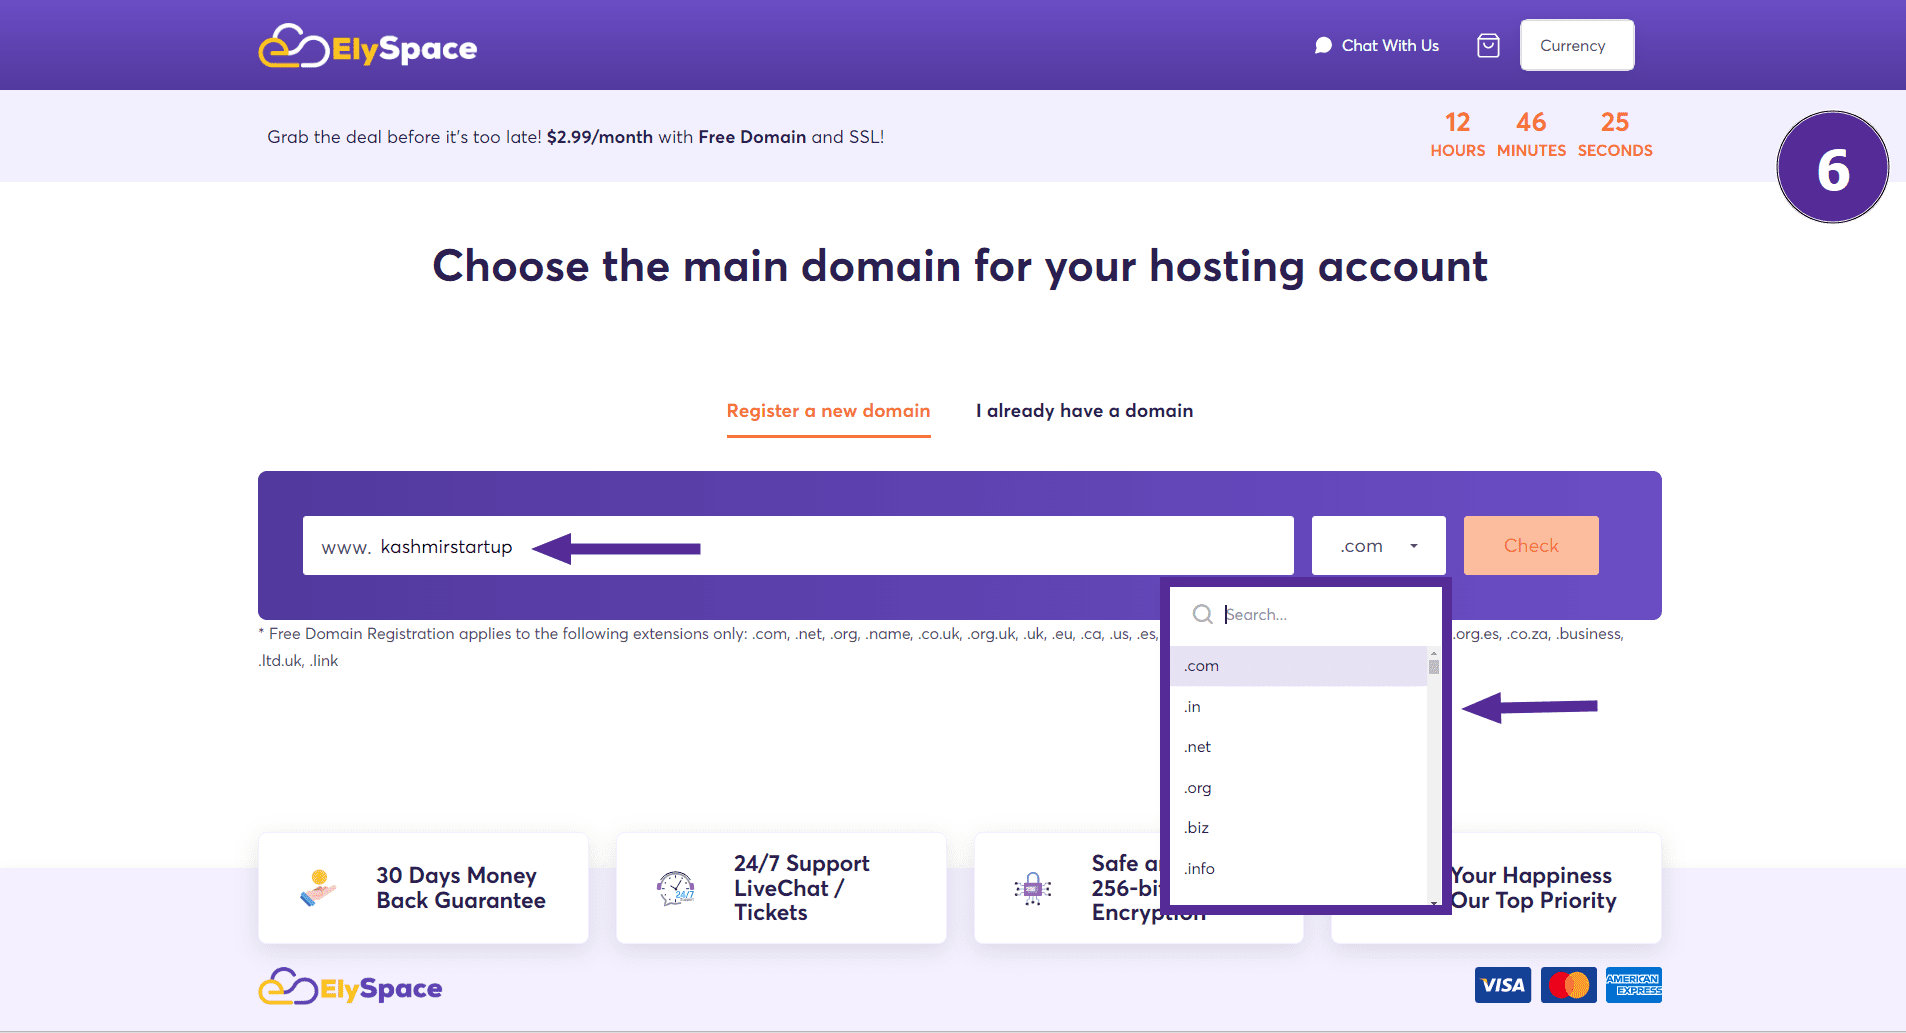
You will be directed to the domain page where you will see two options:
Register a New Domain: Click this if you want to register a new domain. I Already Have a Domain: Click this if you already have a domain name and just need hosting for it.
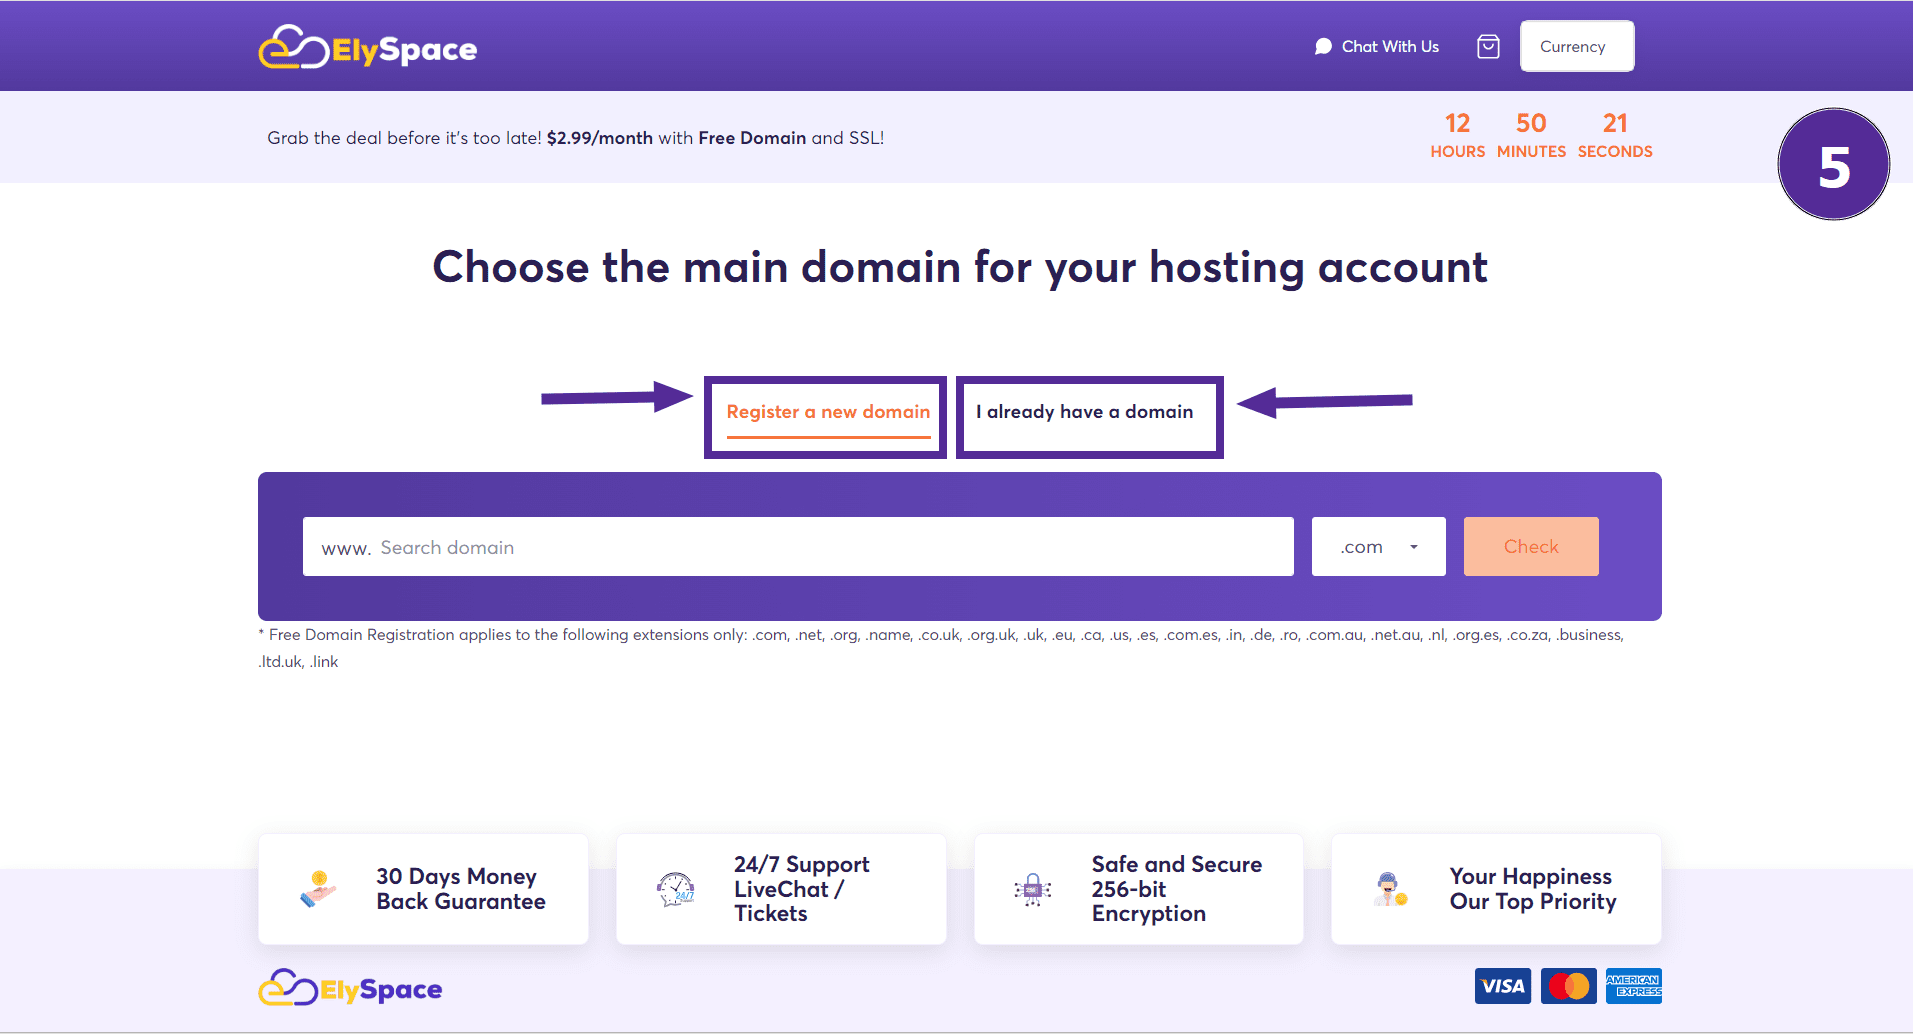
If you choose to register a new domain, enter your desired domain name. You can also select a domain extension like .com, .in, .net, etc., but remember .com is recommended for better search engine optimization.
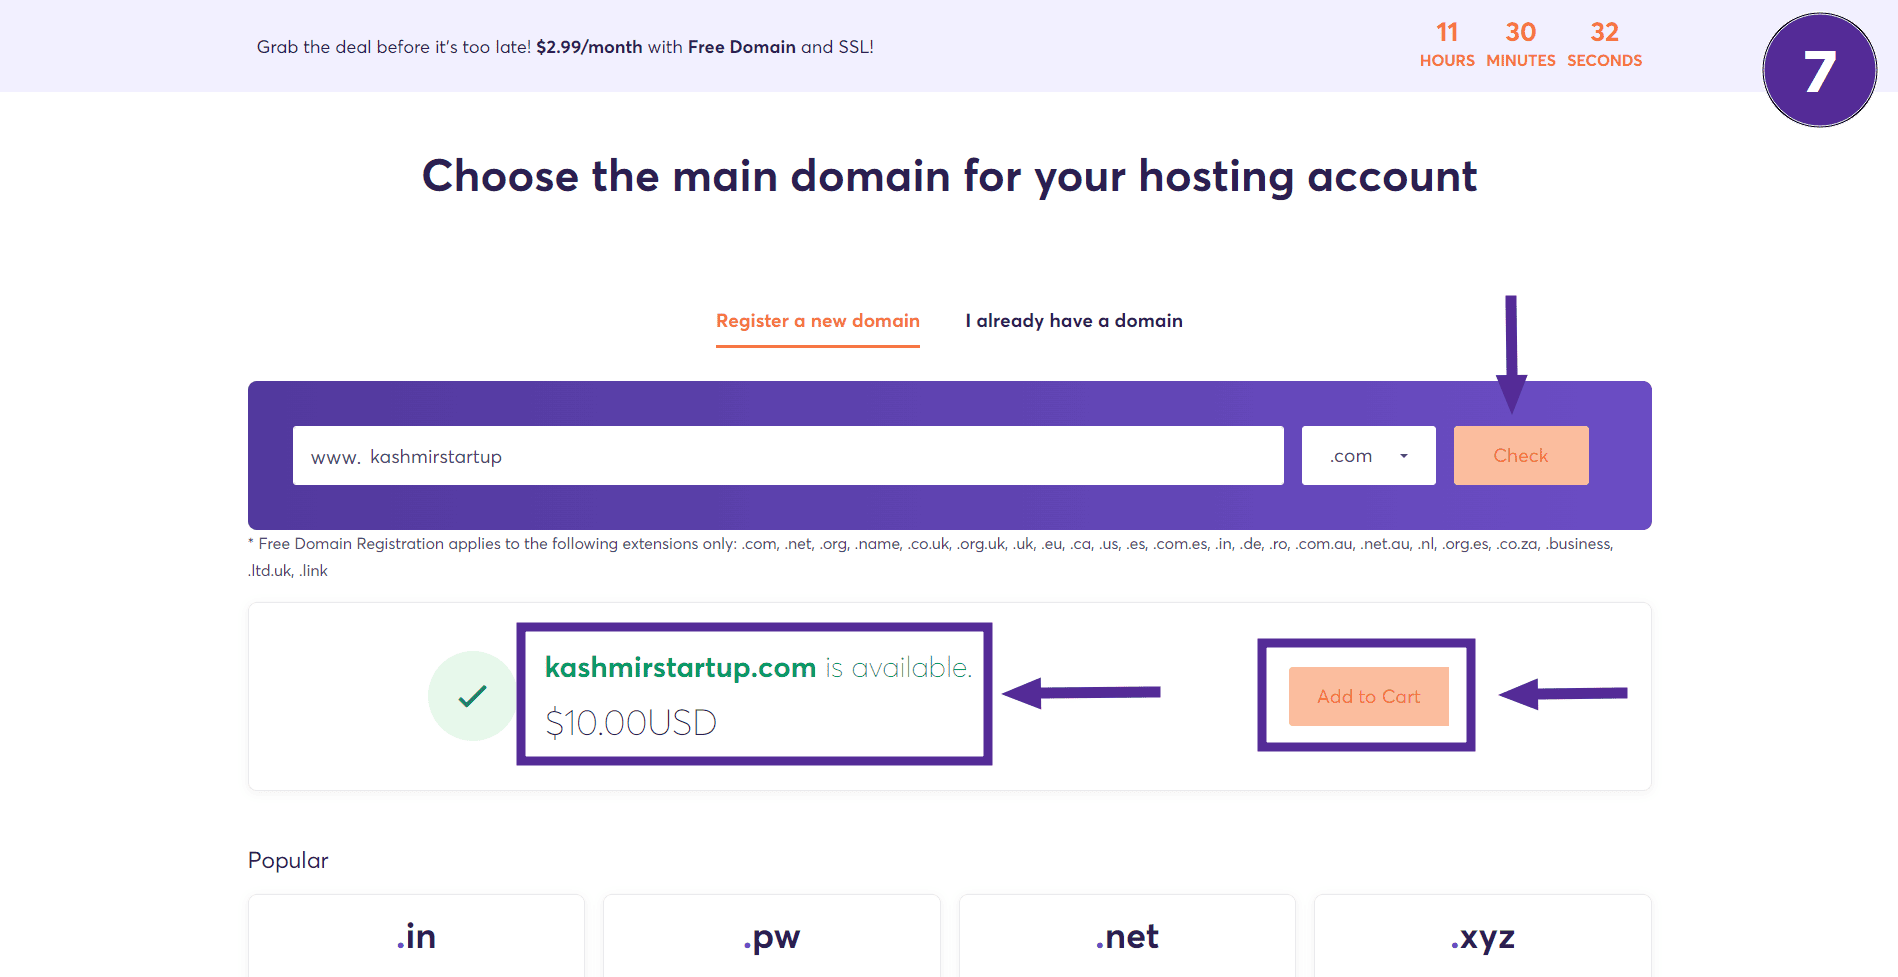
Now click on 'Check' to see if your chosen domain is available. If the domain is available, click on 'Add to Cart.'
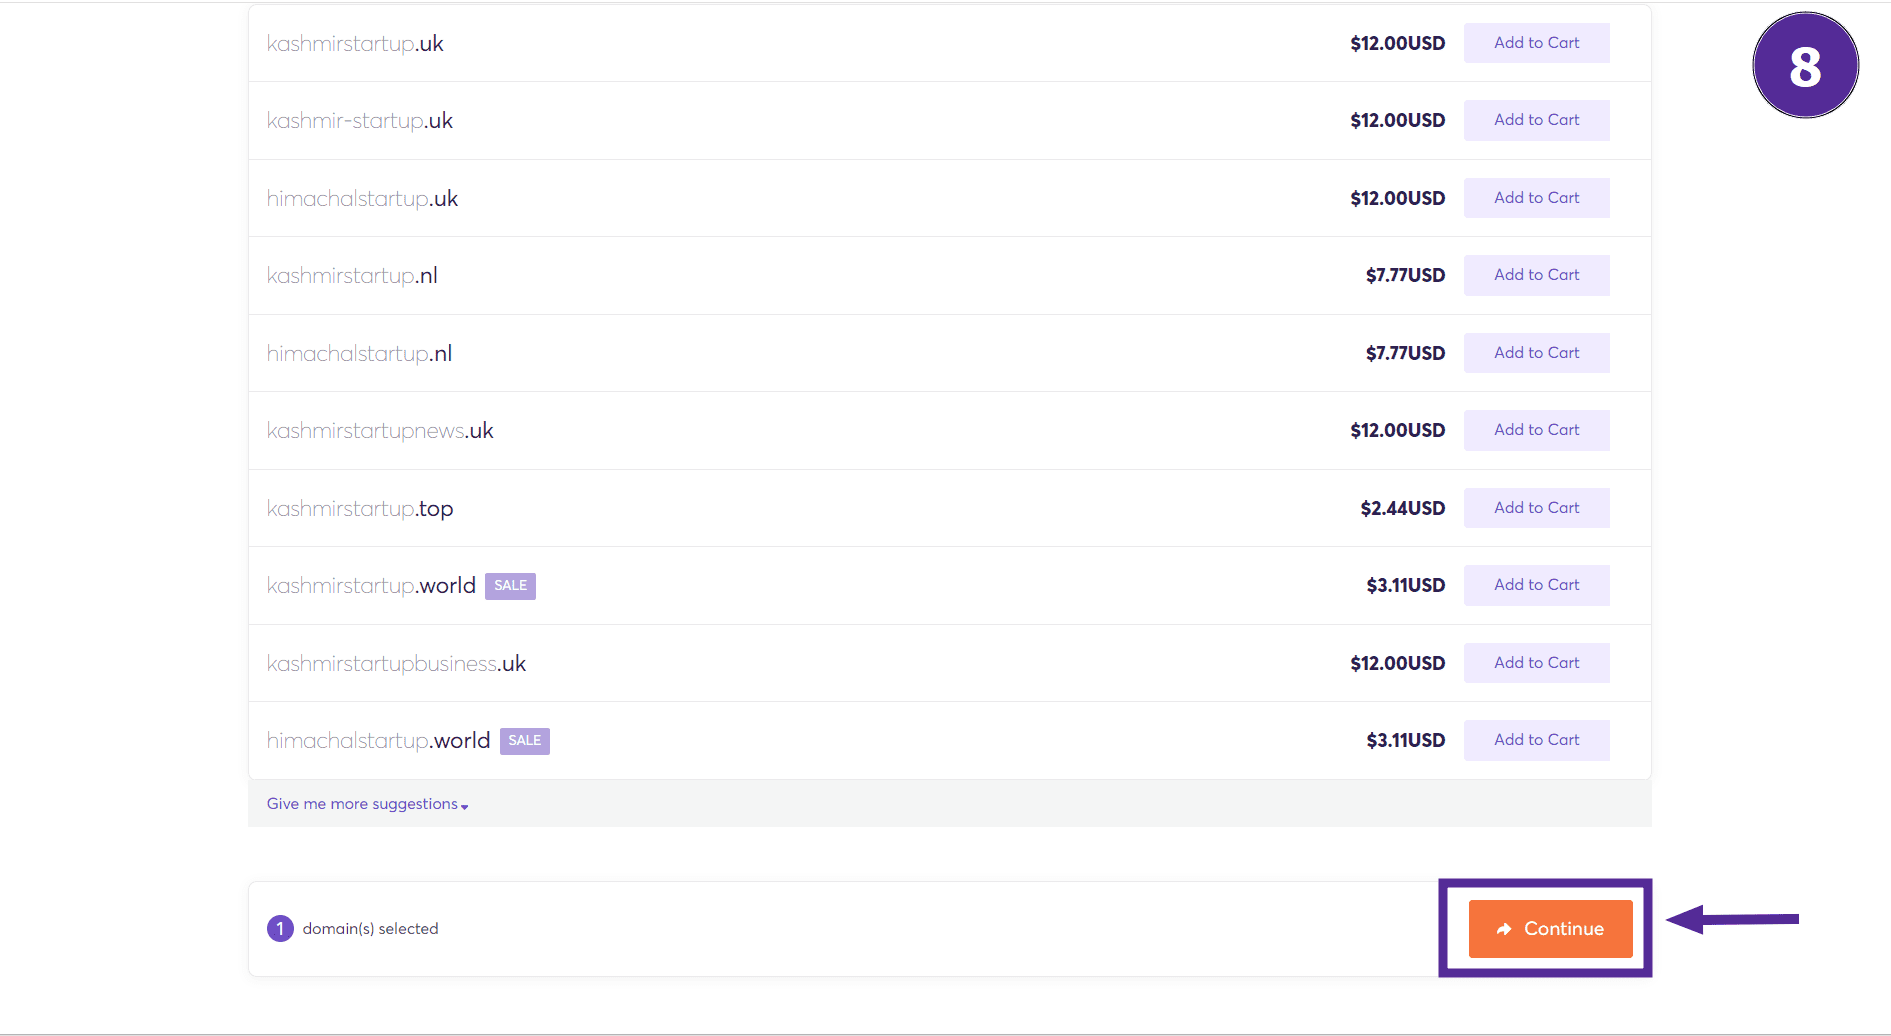
Scroll down to see the pricing of each domain. After adding the domain to your cart, click on the 'Continue' button.
Step 6: Configure Your Hosting
You are now on the Configure page where your chosen plan will be shown.
Scroll down a little and choose the duration for your plan: 1 month, 12 months (1 year), 24 months (2 years), or 36 months (3 years). Note that if you choose 12 months, you will get the domain name free for one year.
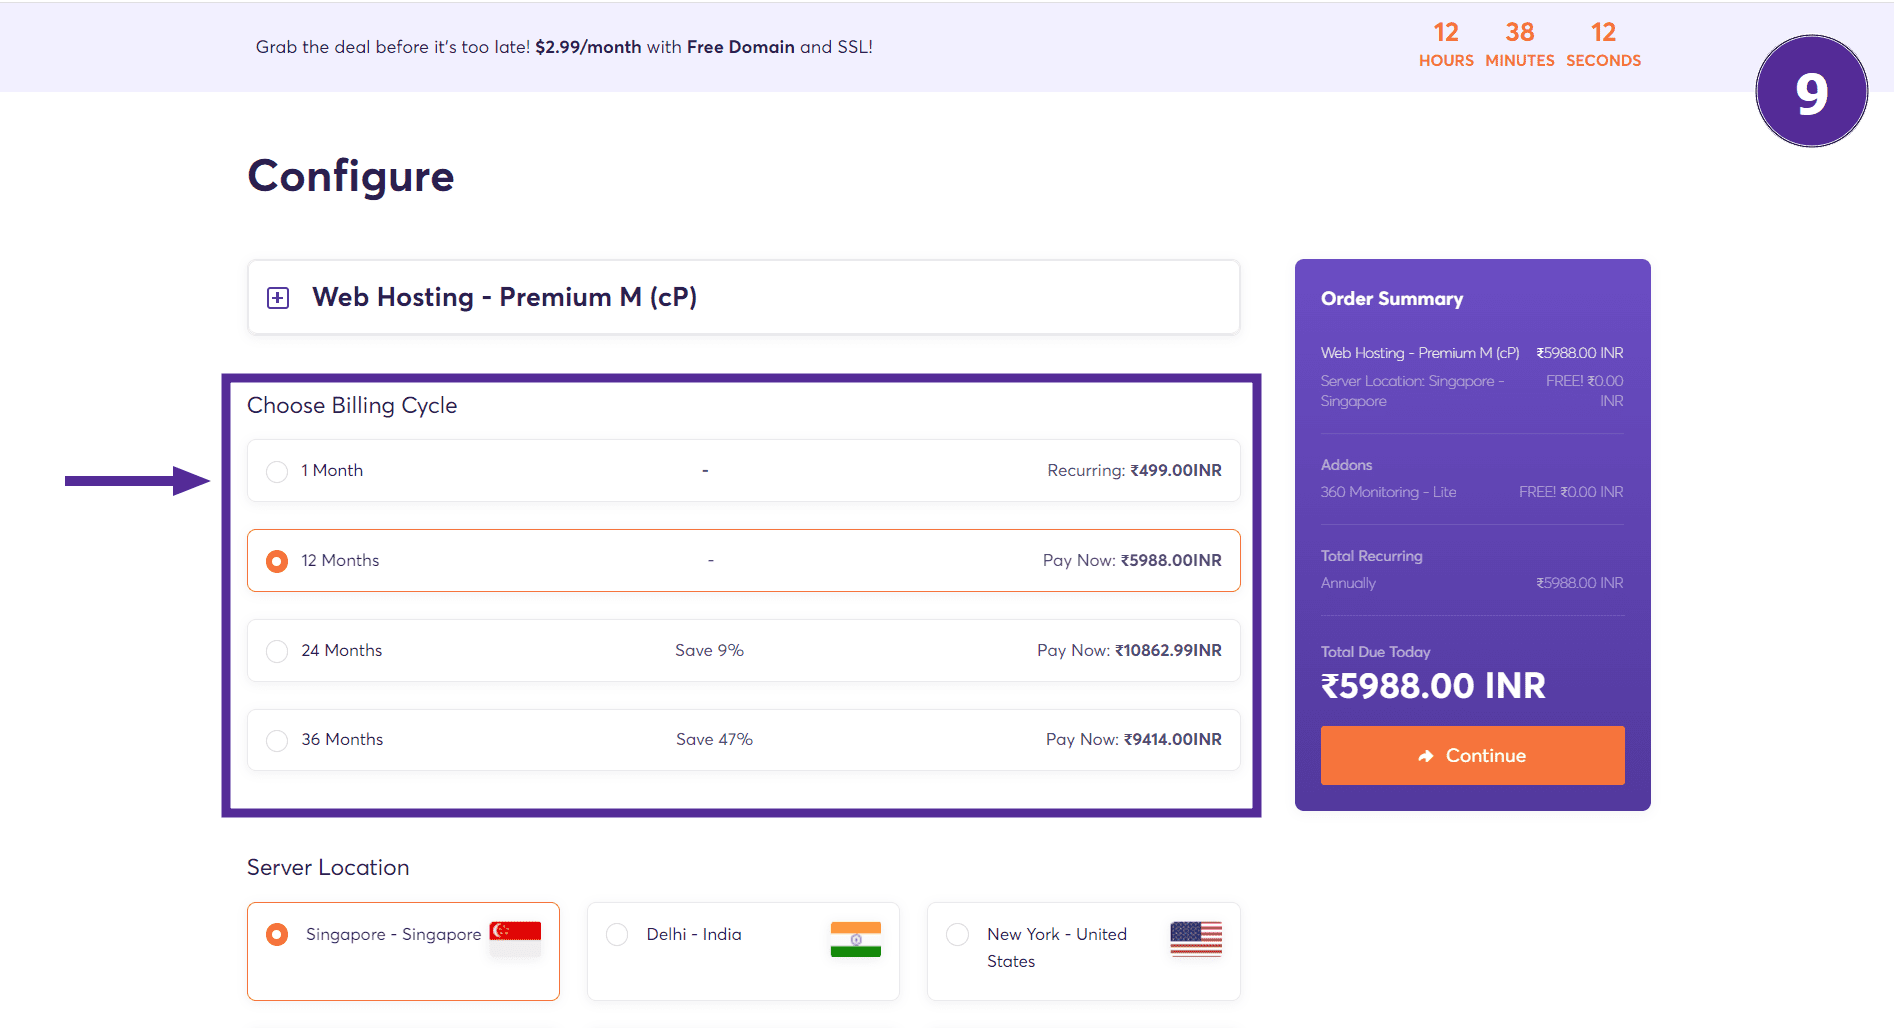
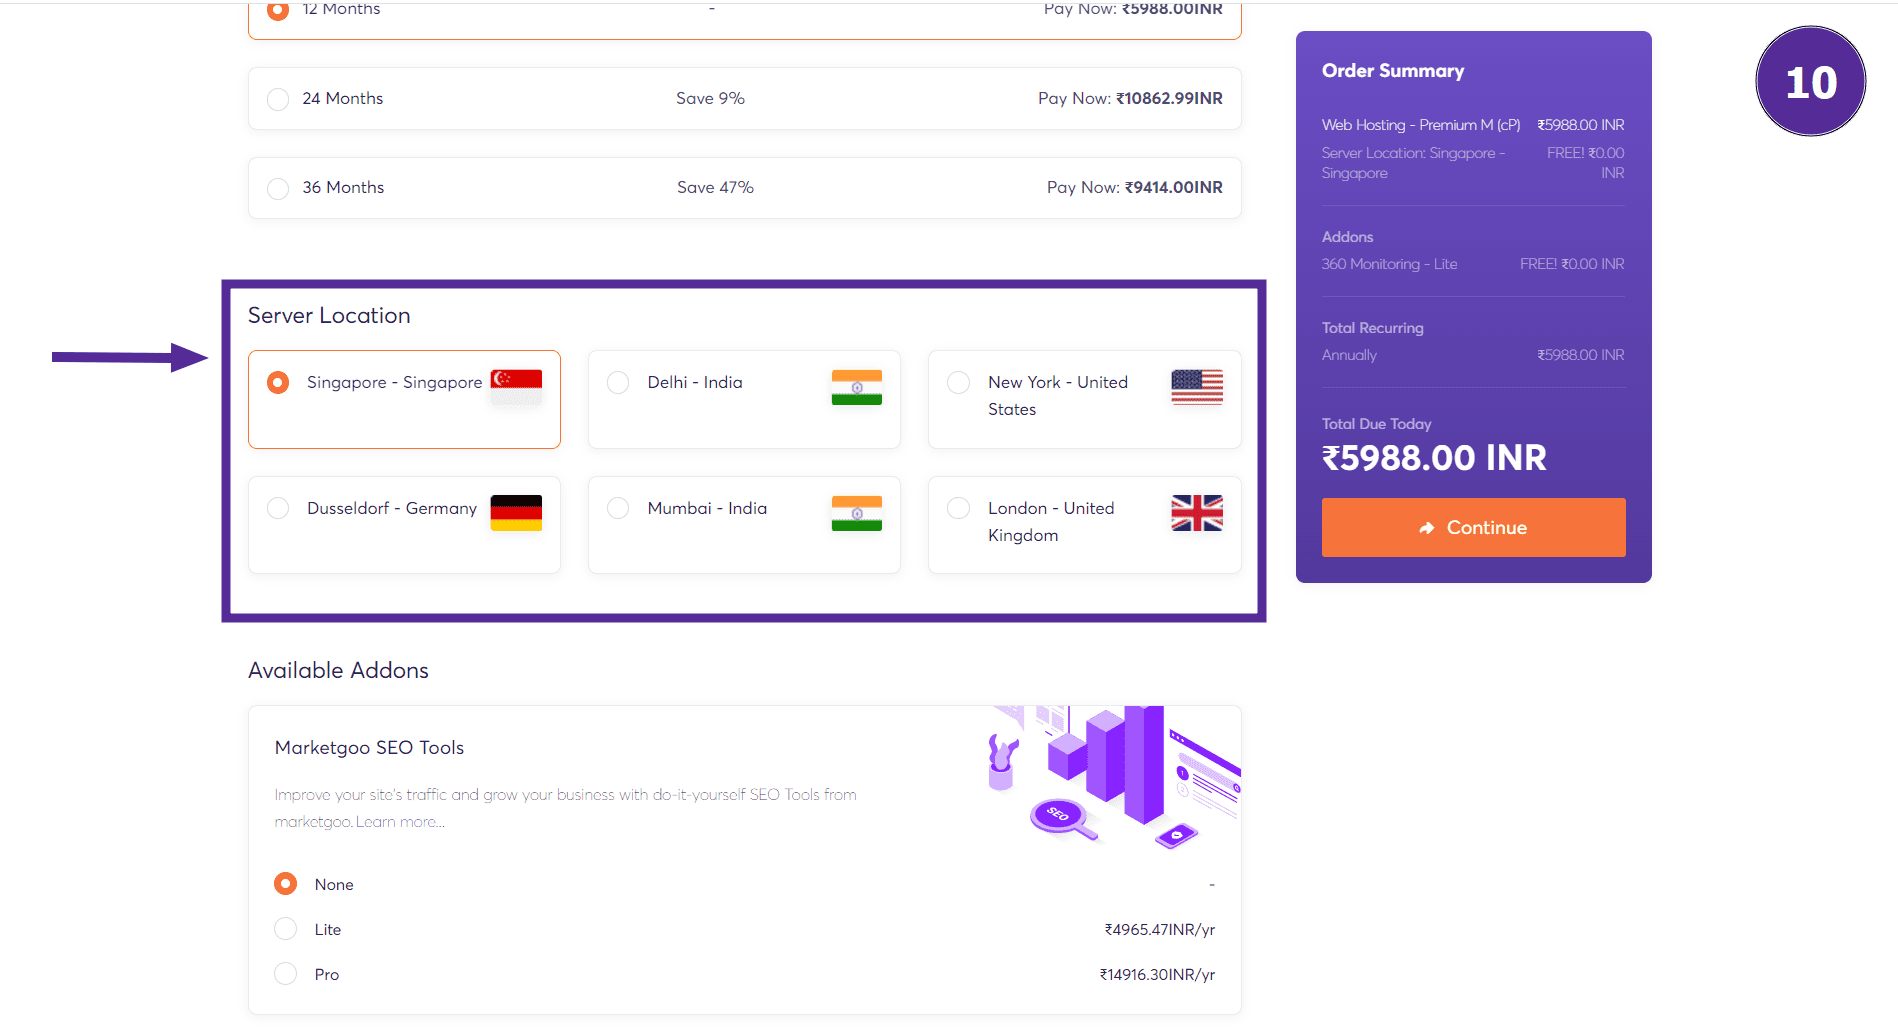
Step 7: Select Server Location
Scroll down again and choose a server location. Singapore is a good option, but you can choose the location closest to you for faster website loading.
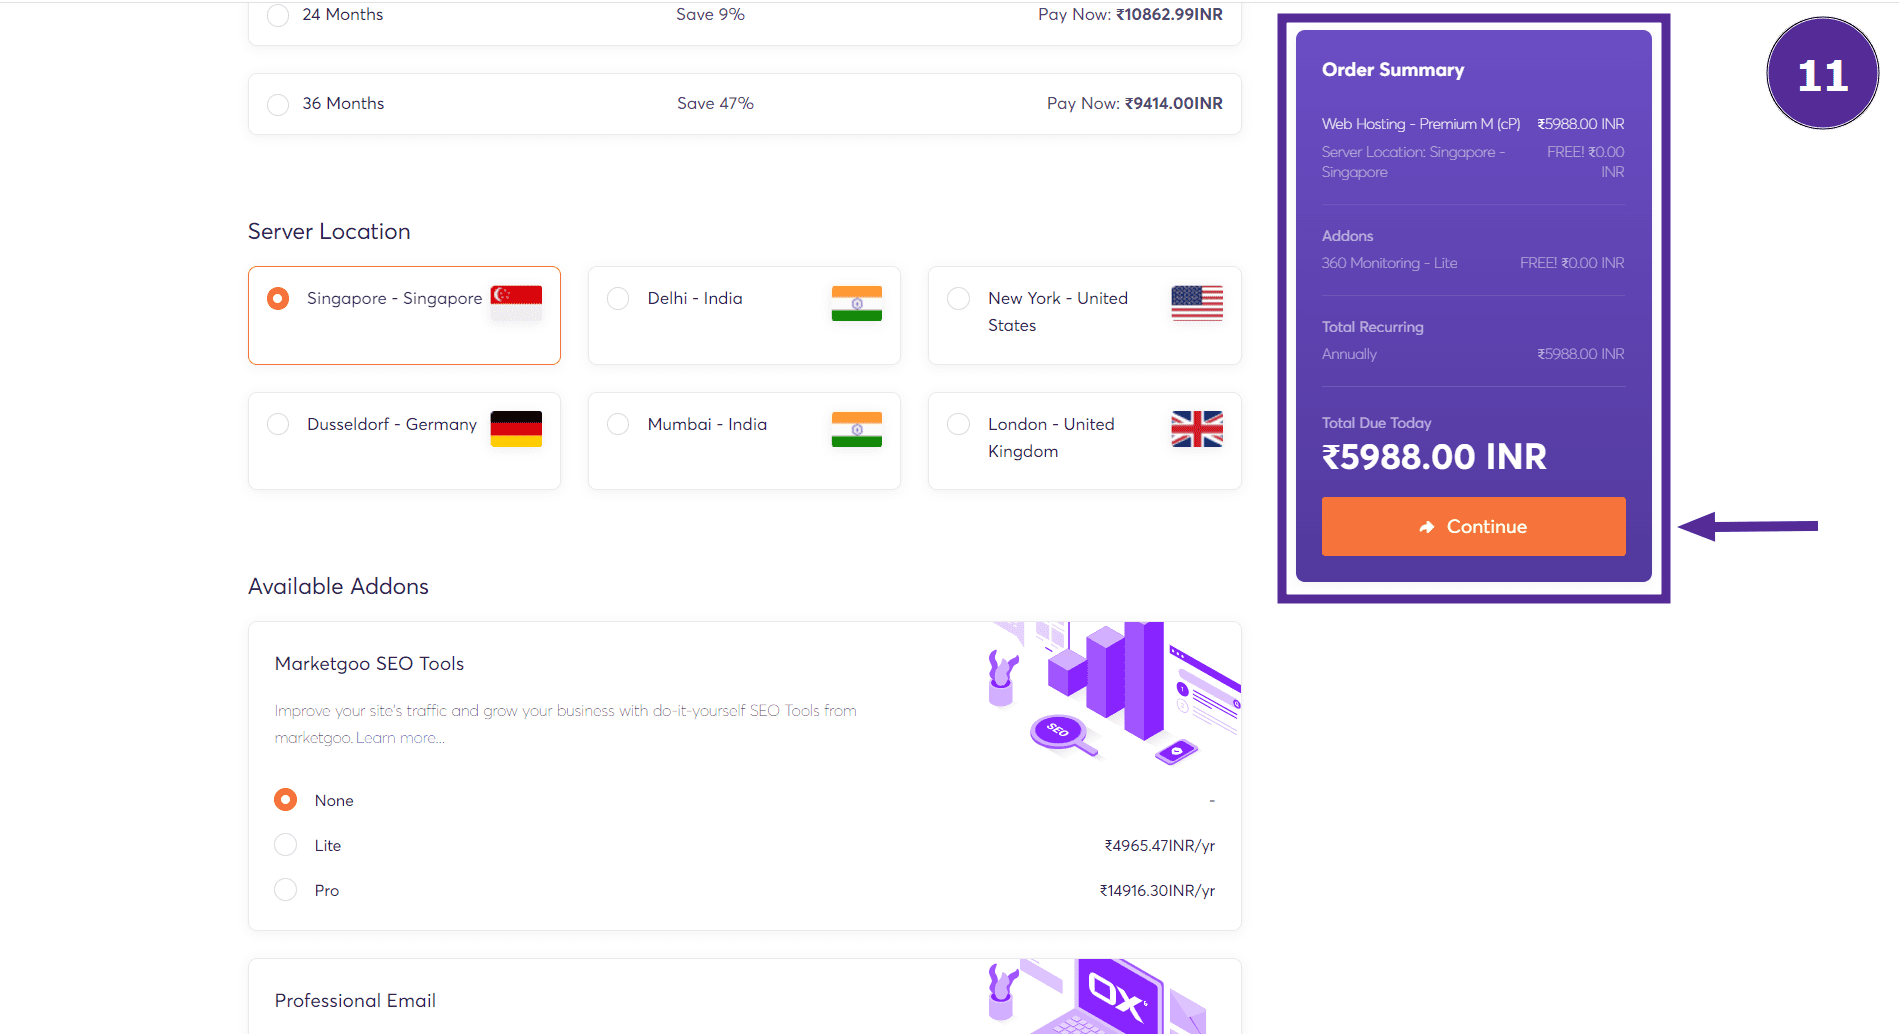
Step 8: Add Additional Options
Ignore the remaining sections and click on 'Continue' on the right side of the page.
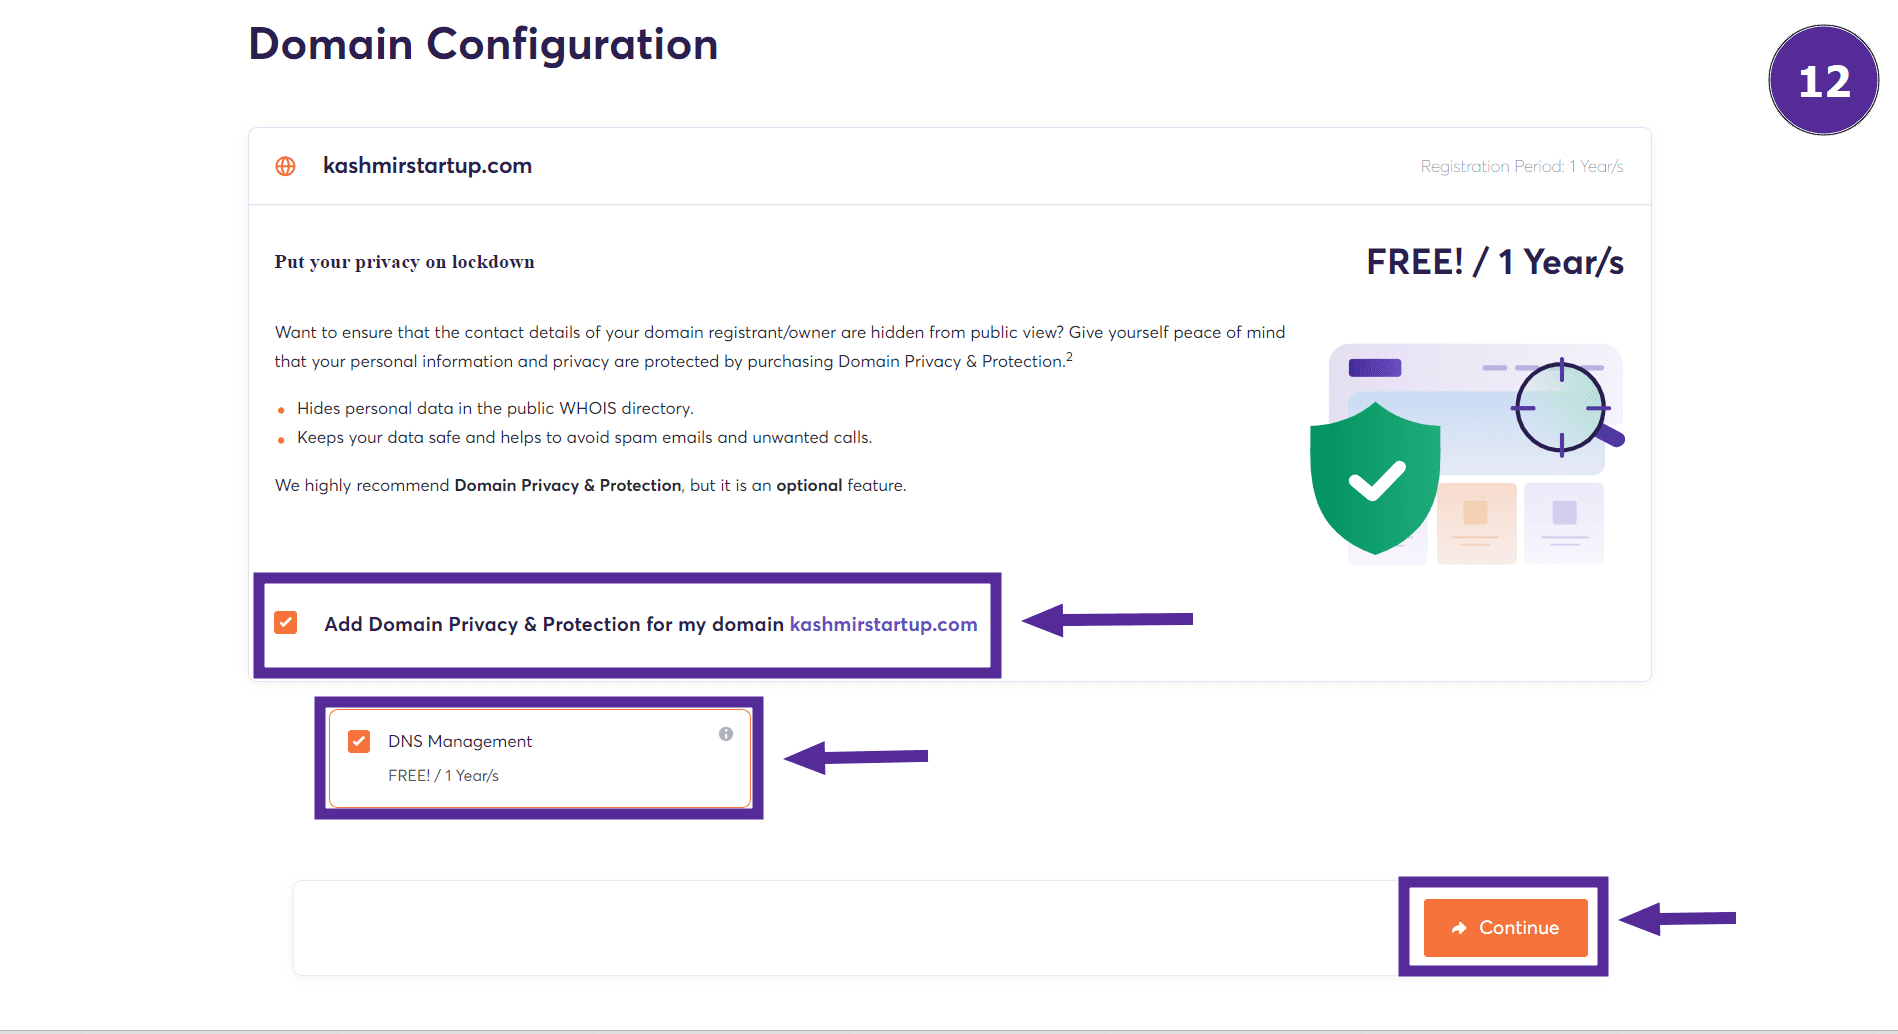
Step 9: Domain Configuration
You will be redirected to the domain configuration page. Select domain privacy and protection, and DNS management as they are free. Click on 'Continue.'
Step 10: Review and Checkout
You are now on the review and checkout page where you need to fill in your details. You will see that you have added two services to your cart: web hosting and your domain name. You can make changes by clicking on the pencil icon or remove services by clicking on the bin icon.

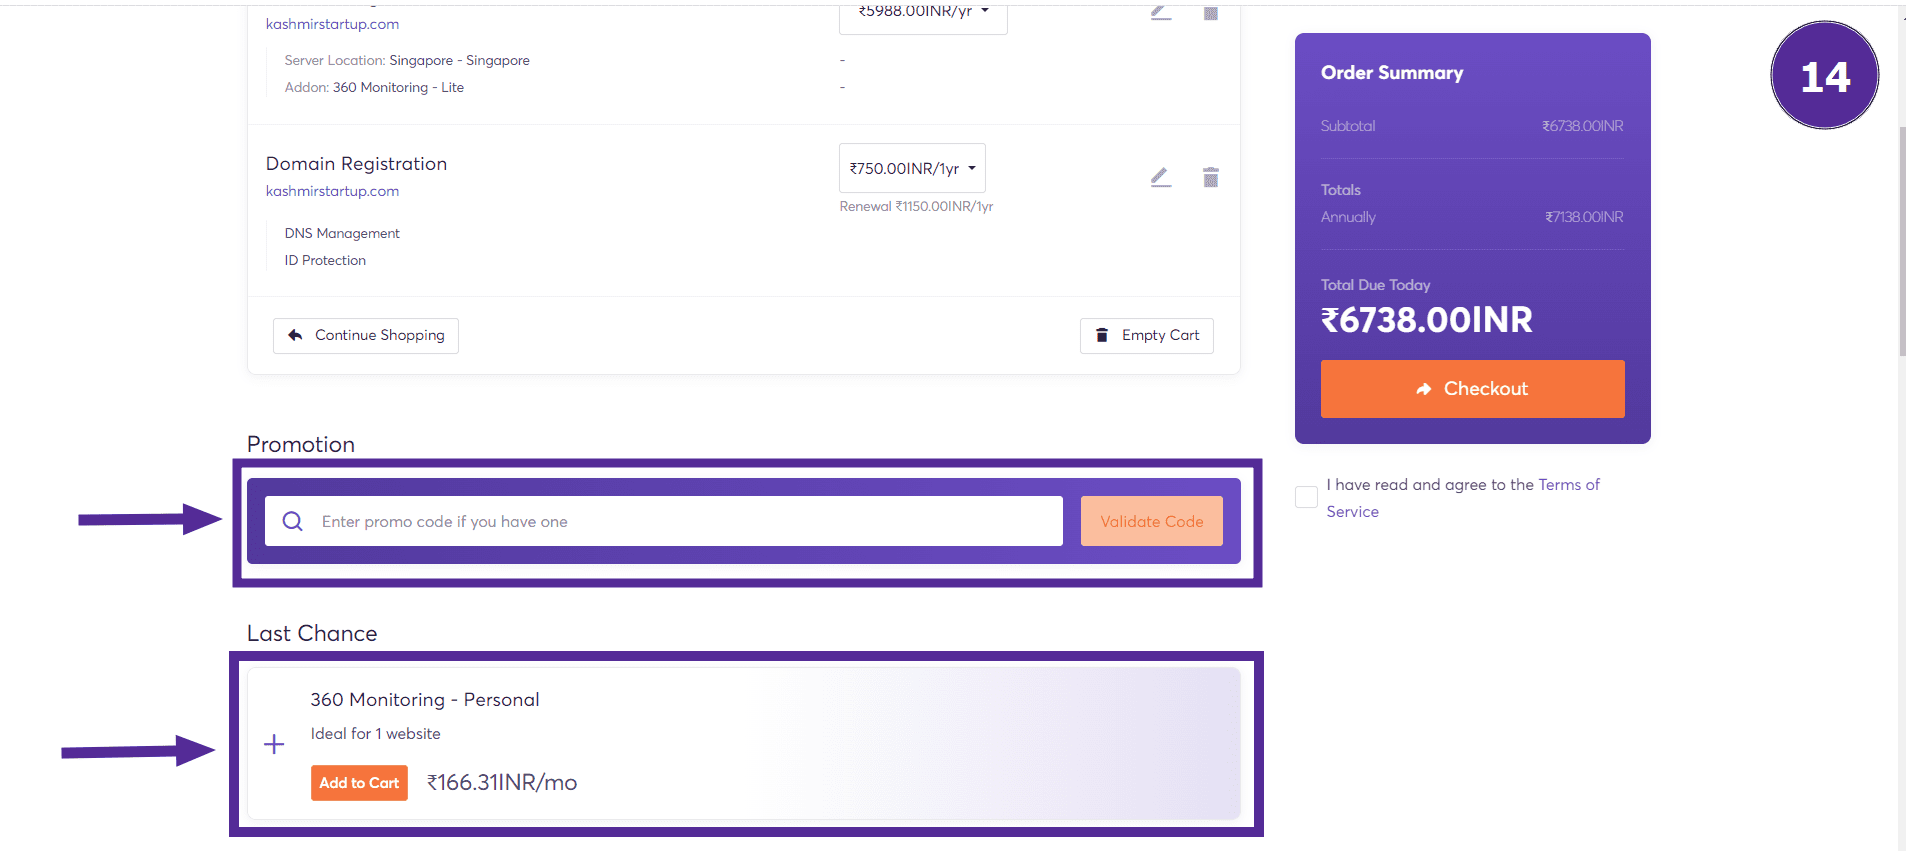
Step 11: Apply Promo Code
Scroll down a little and enter your promo code if you have one to get a discount on your services. You can also add '360 Monitoring,' which provides continuous surveillance of various aspects of your web hosting service.
Step 12: Provide Billing Details
If you already have an account on ElySpace, click on 'Existing Customer Login,' enter your email address and password, and click on 'Login.'

But if you don’t have an account, click on 'Create a New Account' and enter your personal information such as: First Name, Last Name, Email Address, Phone Number.
Now enter your billing address details such as: Street Address, City, Country, State, Postcode.
Now enter your password and confirm it. You can also generate a password by clicking on 'Generate Password.'
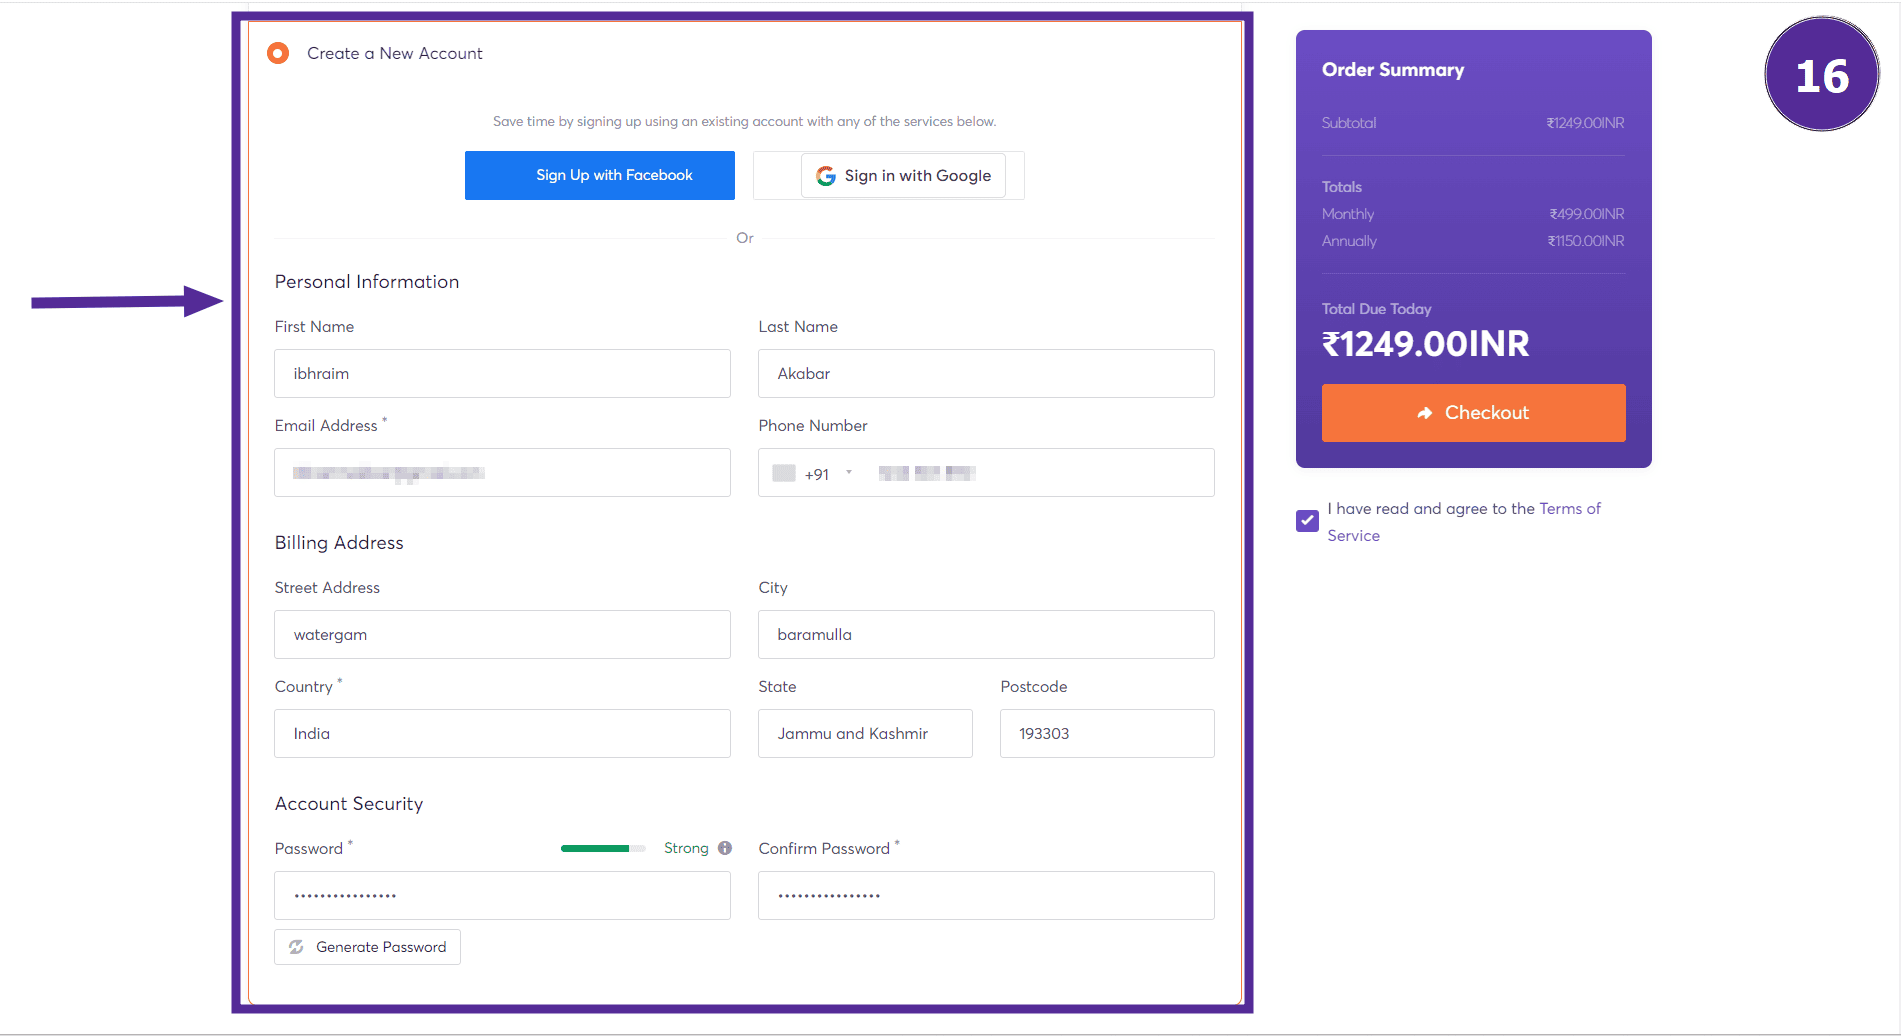
The other sections that are left, like Domain Registrant Information, Mailing List, and Additional Notes, you can simply ignore them.
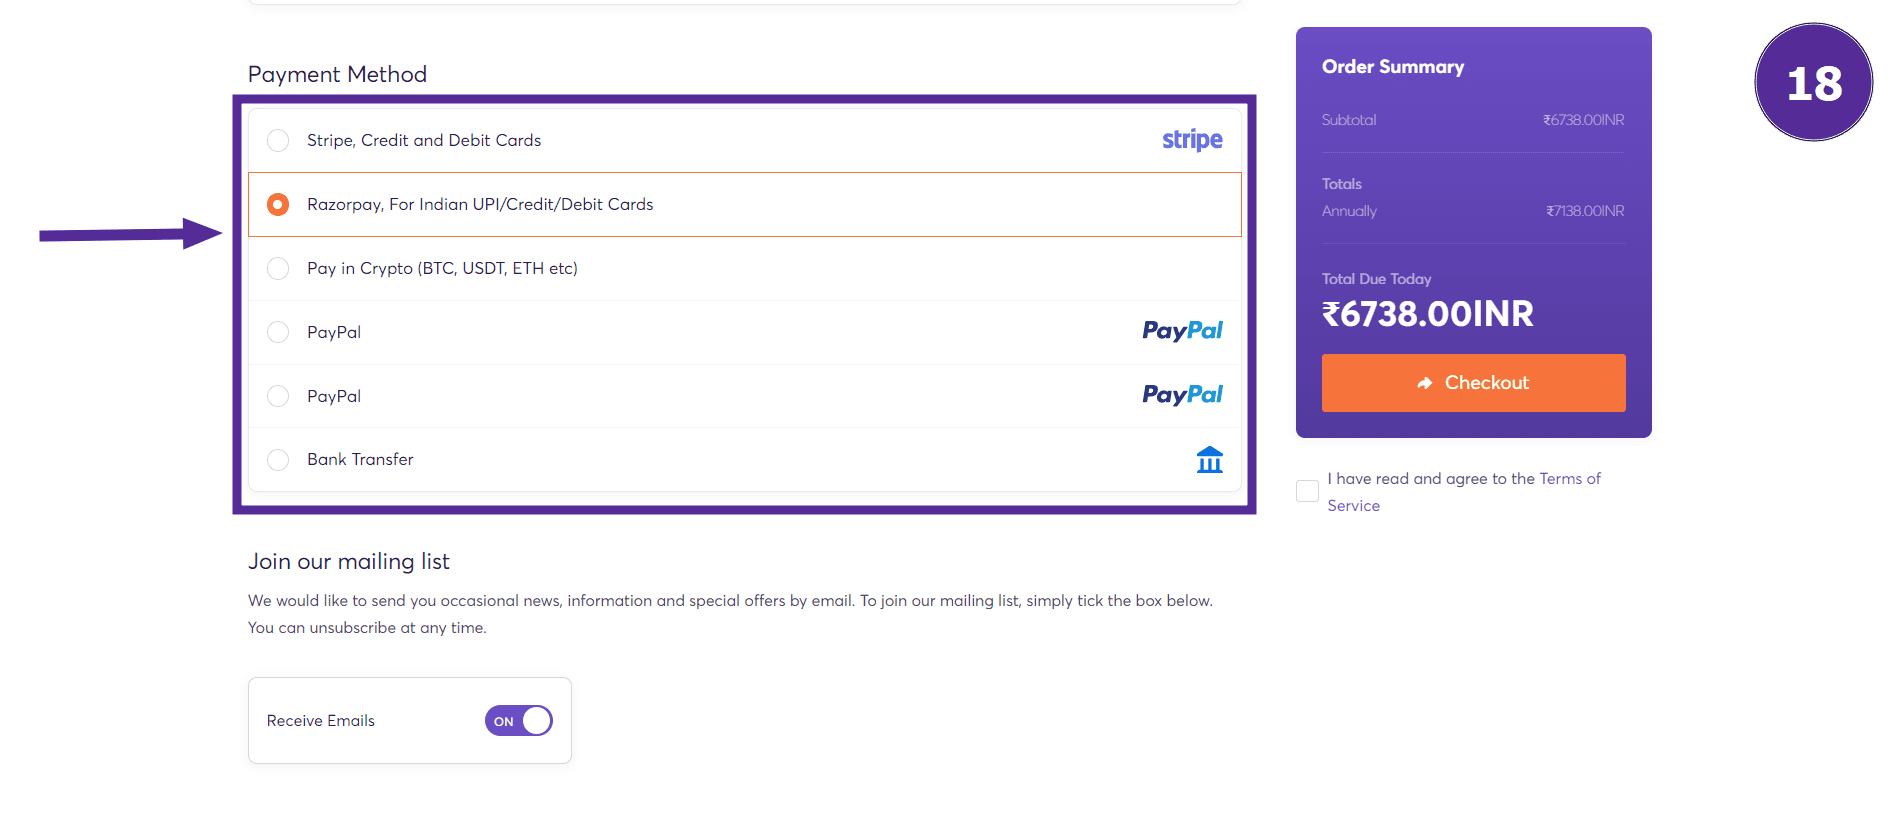
Step 15: Select Payment Method
Scroll down a little and choose your preferred payment method. If you select Stripe or Credit/Debit Cards, you’ll need to provide: Card Number, Expiry Date, CVV/CVC2.
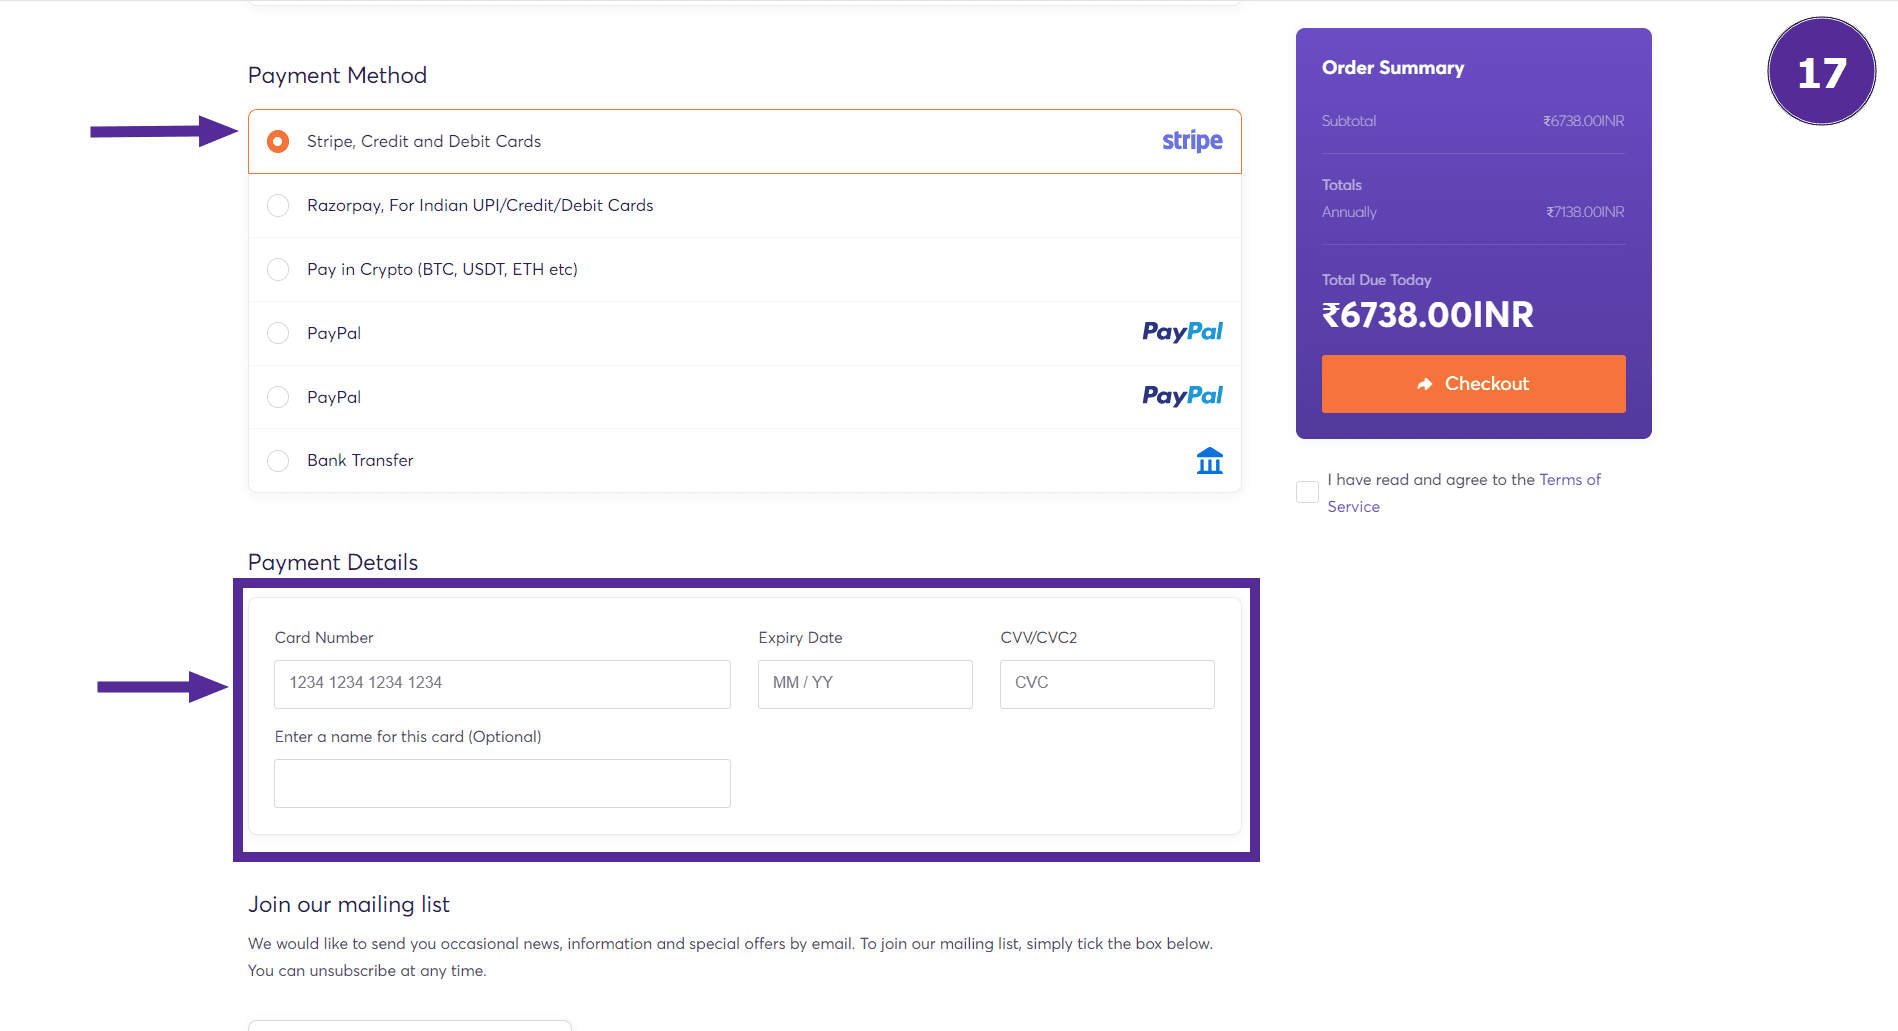
But you can also pay through PayPal or Razorpay. For Indian users, UPI/Credit/Debit Cards are accepted. You can also pay with cryptocurrency like BTC, USDT, ETH, etc.
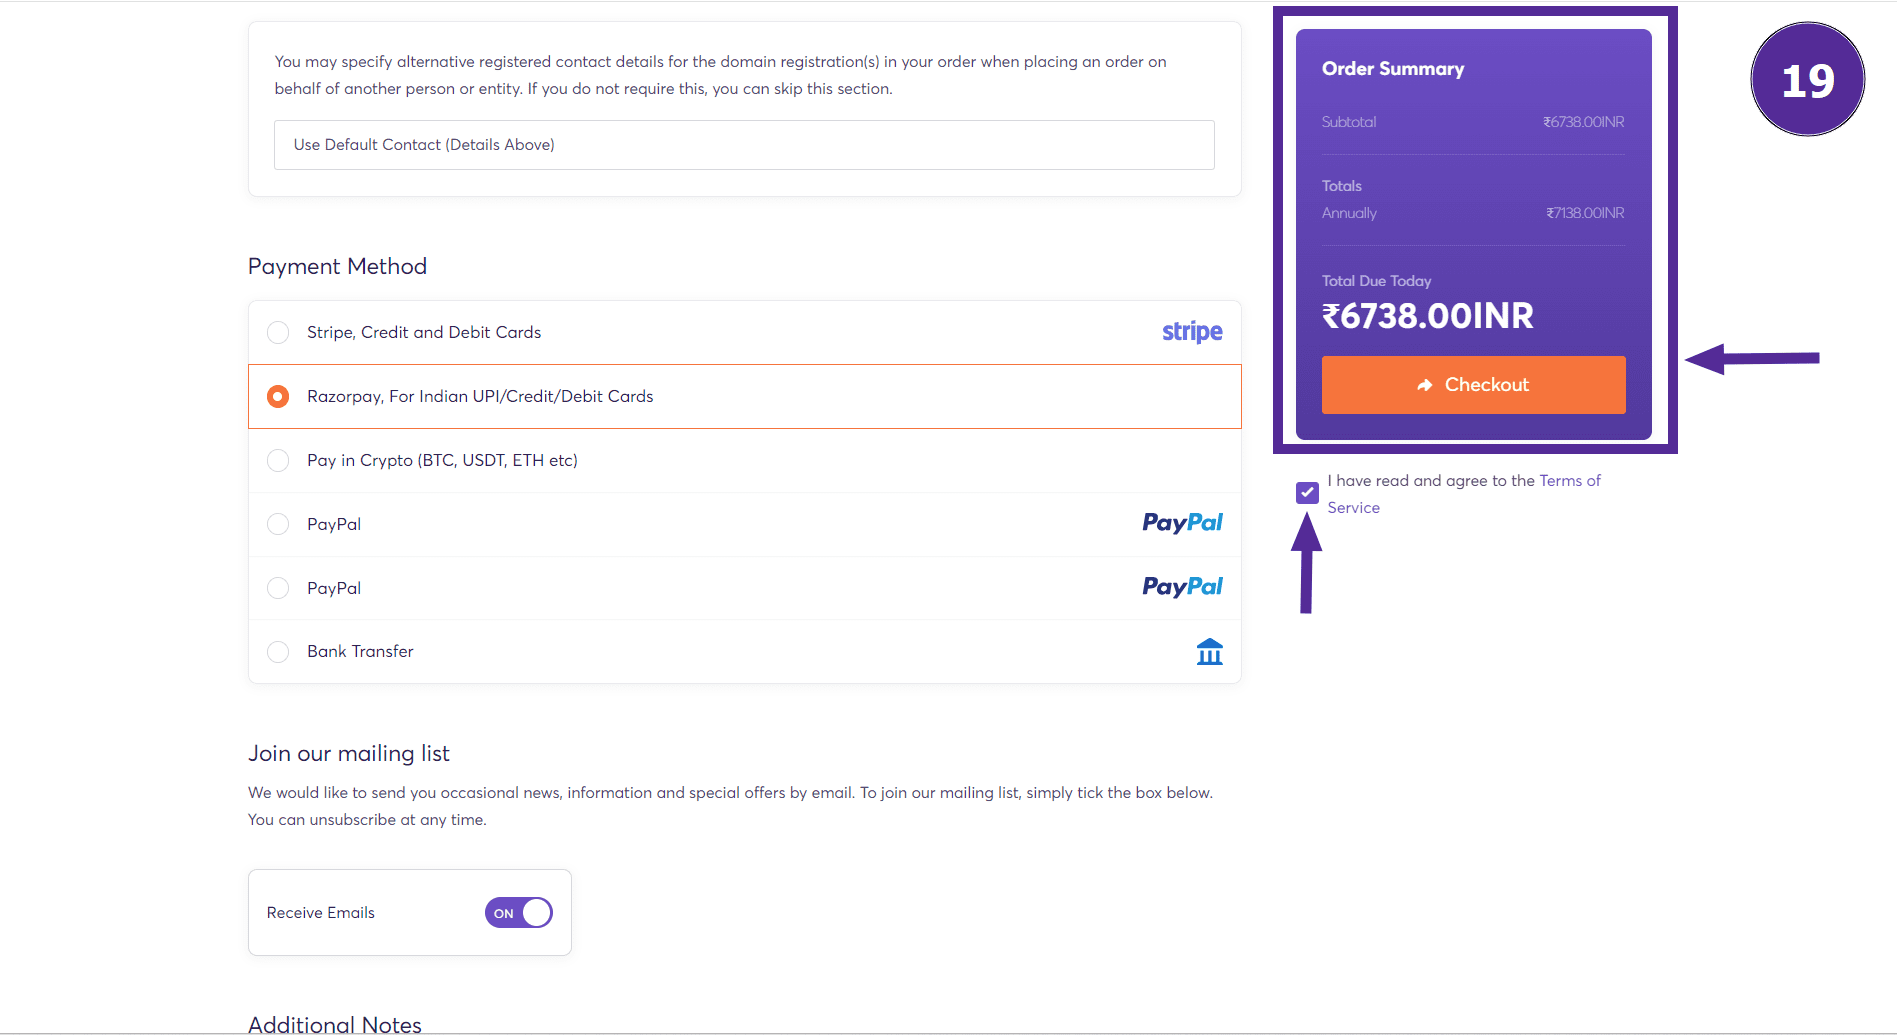
Step 18: Agree to Terms and Checkout
In the order summary, you can see the total cost for all the services you added to the cart. Read and agree to the terms and conditions. Click on the "Checkout" button to complete your order.
Watch Video:


