Introduction
Adding funds to your ElySpace account is a convenient way to manage your payments, avoid multiple small transactions, and ensure that any new invoices are automatically taken care of. Follow these simple steps to add funds to your account.
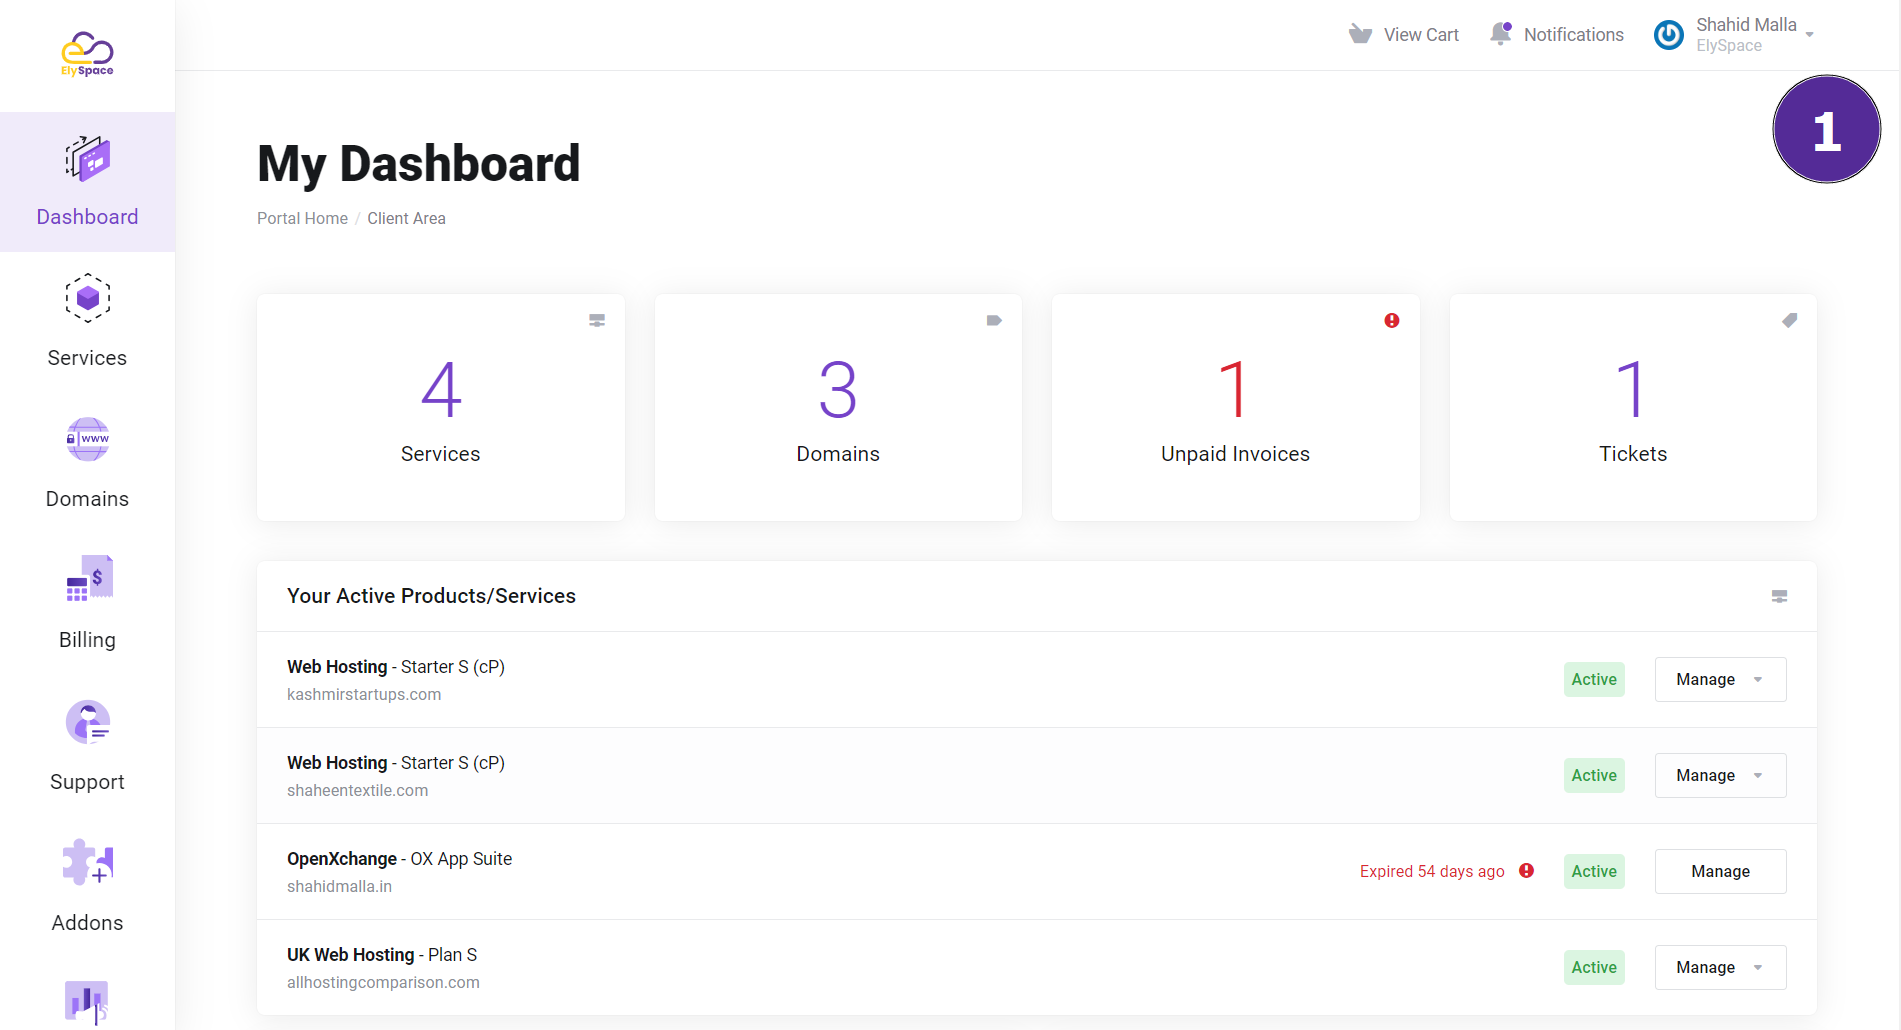
Step 1: Go to the ElySpace Dashboard
Log in to your ElySpace account and navigate to your dashboard.
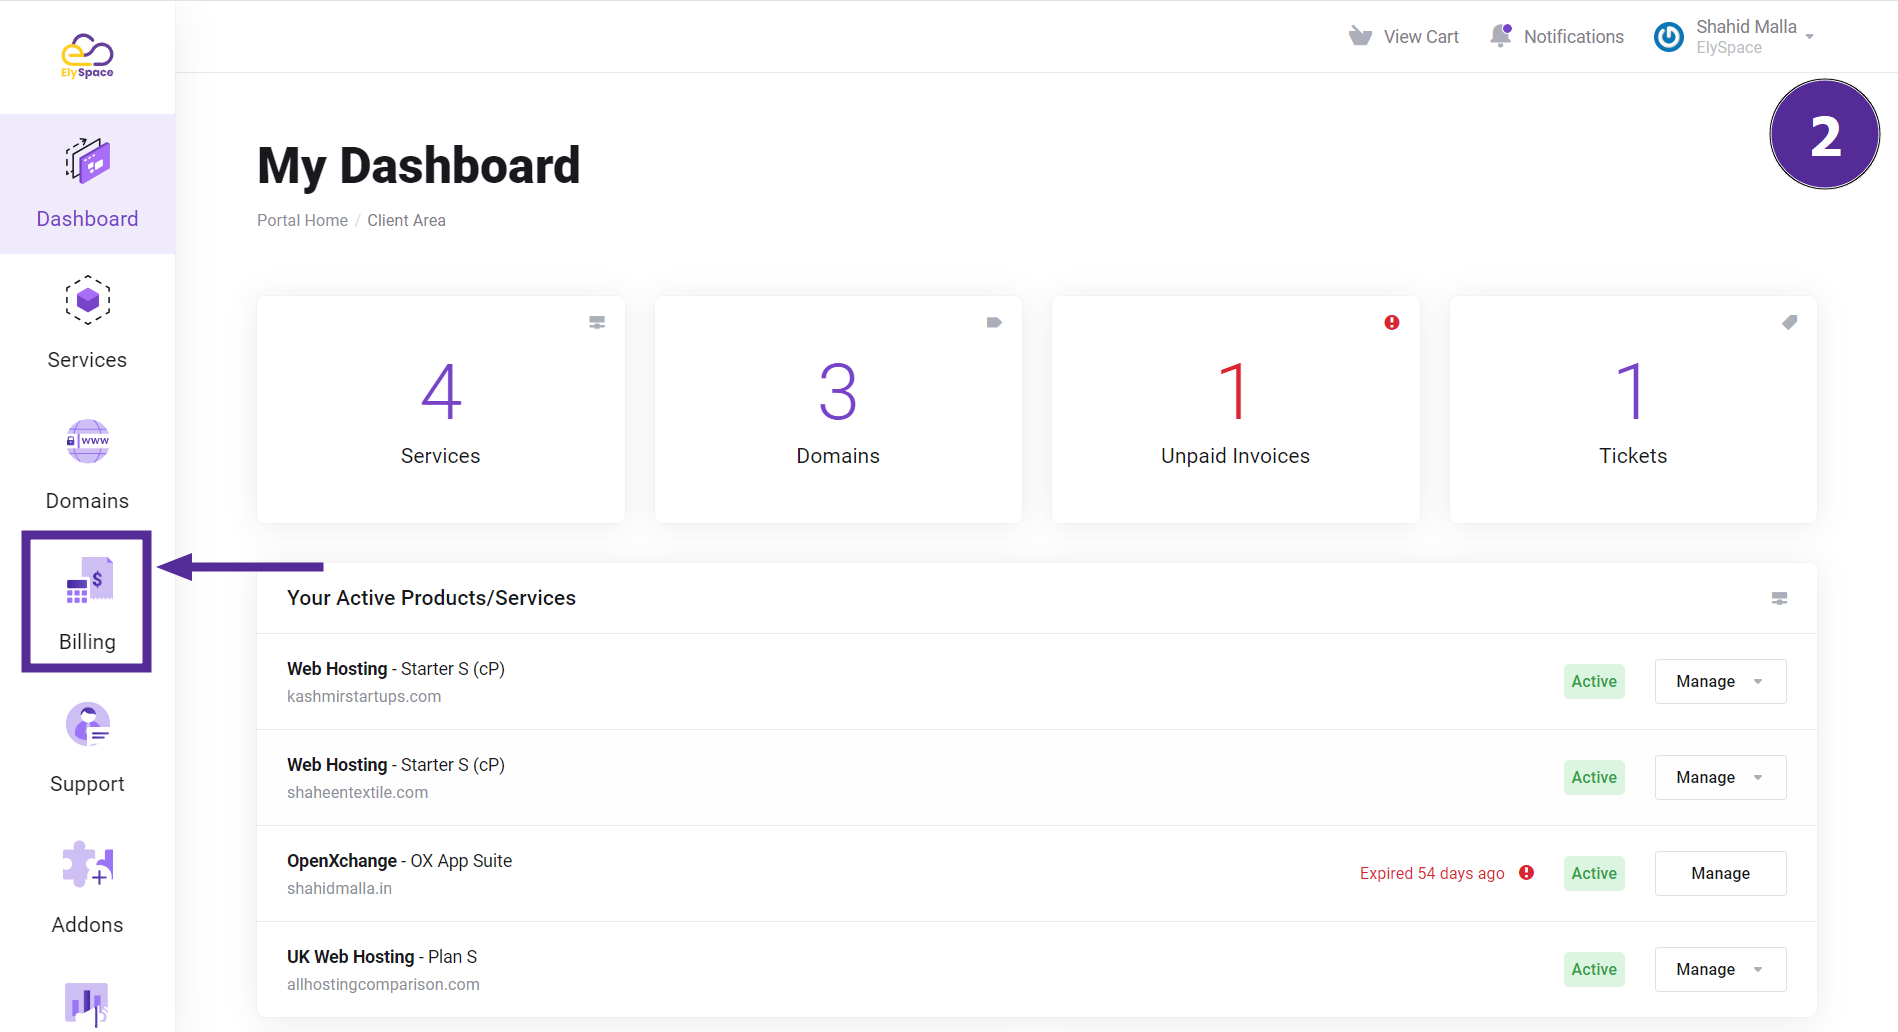
Step 2: Access the Billing Section
On the left side of your dashboard, locate and click on the Billing option.
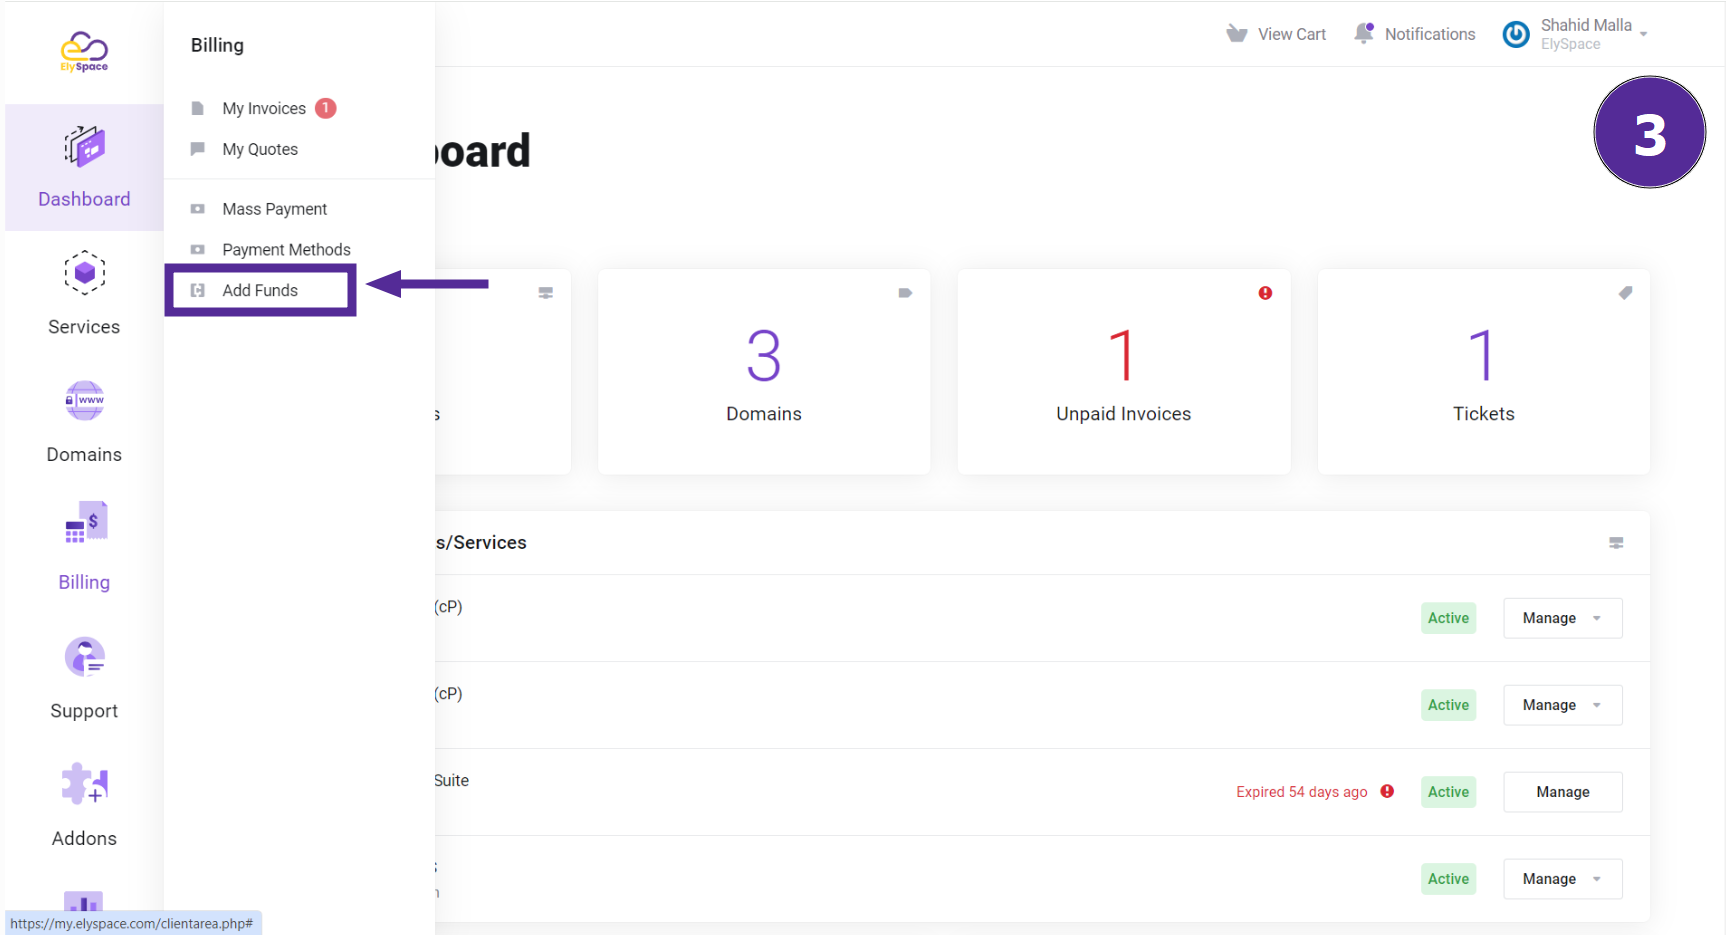
Step 3: Click on 'Add Funds'
In the Billing section, you will see the option to Add Funds. Click on it.
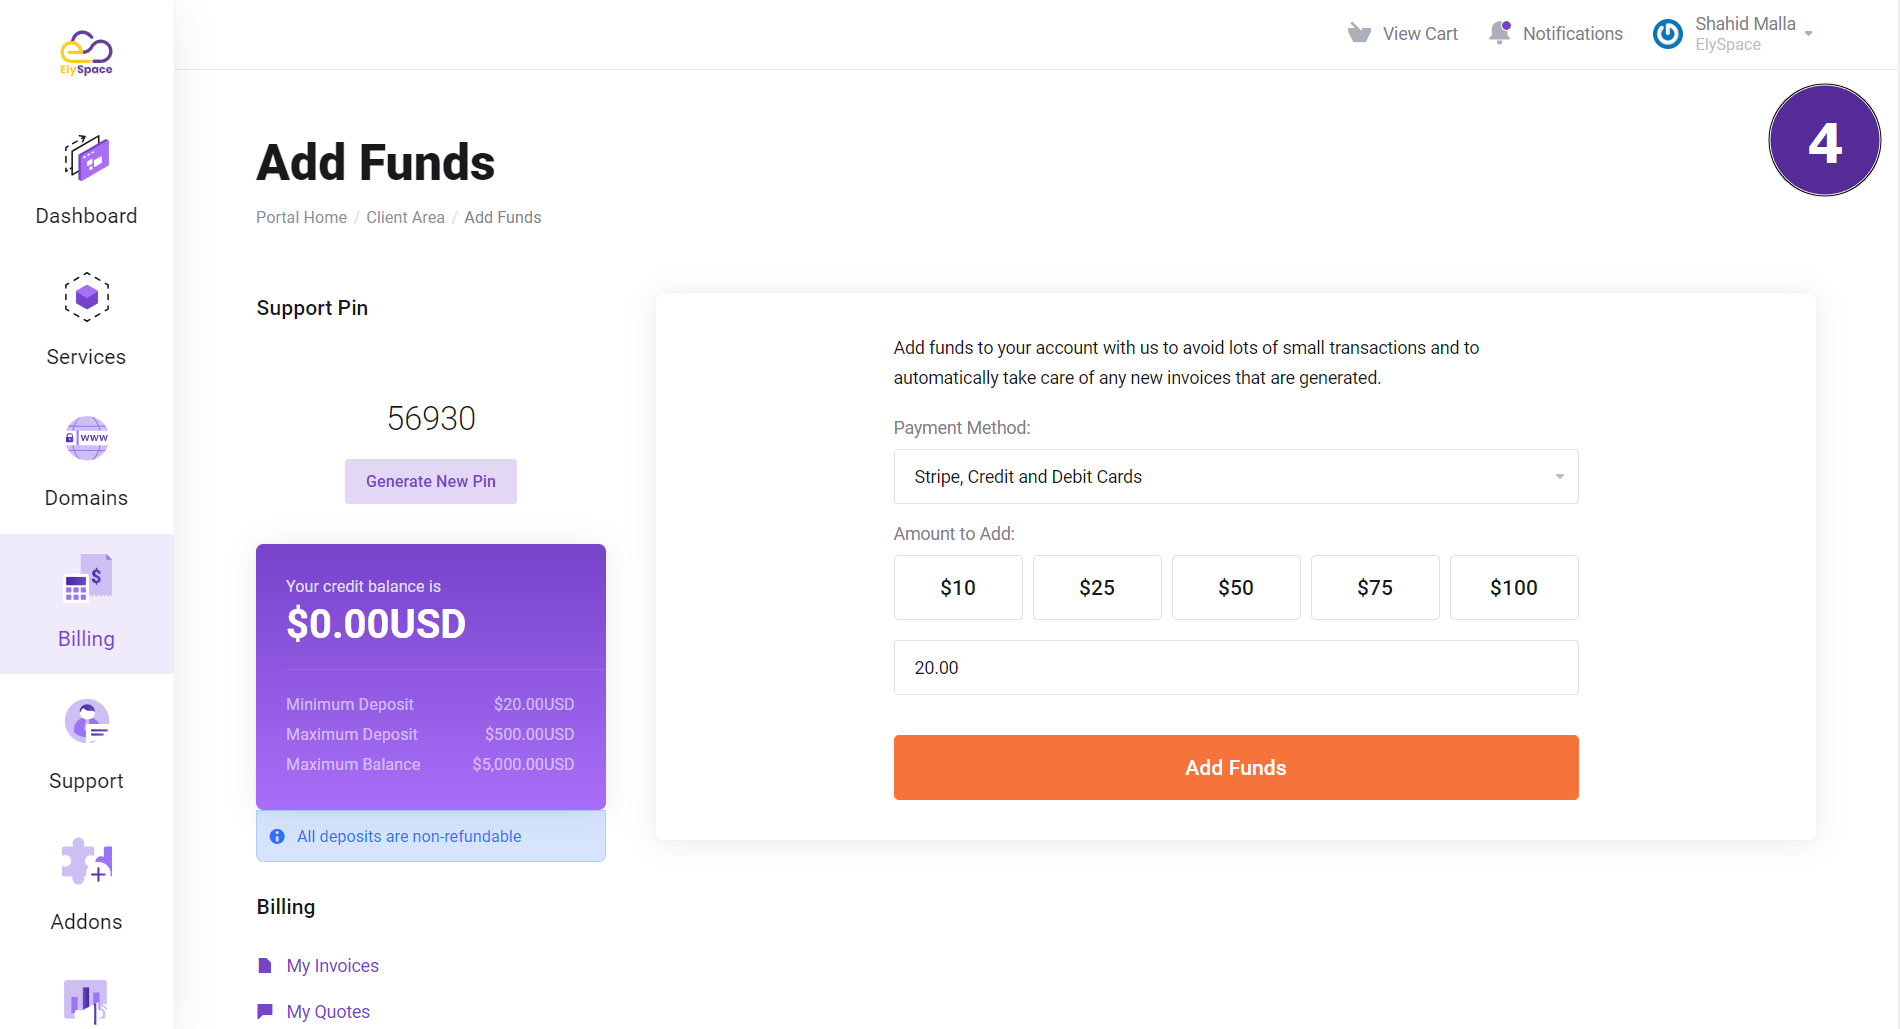
Step 4: Navigate to the Add Funds Page
You will be redirected to the Add Funds page, where you can add the desired amount of funds to your account.
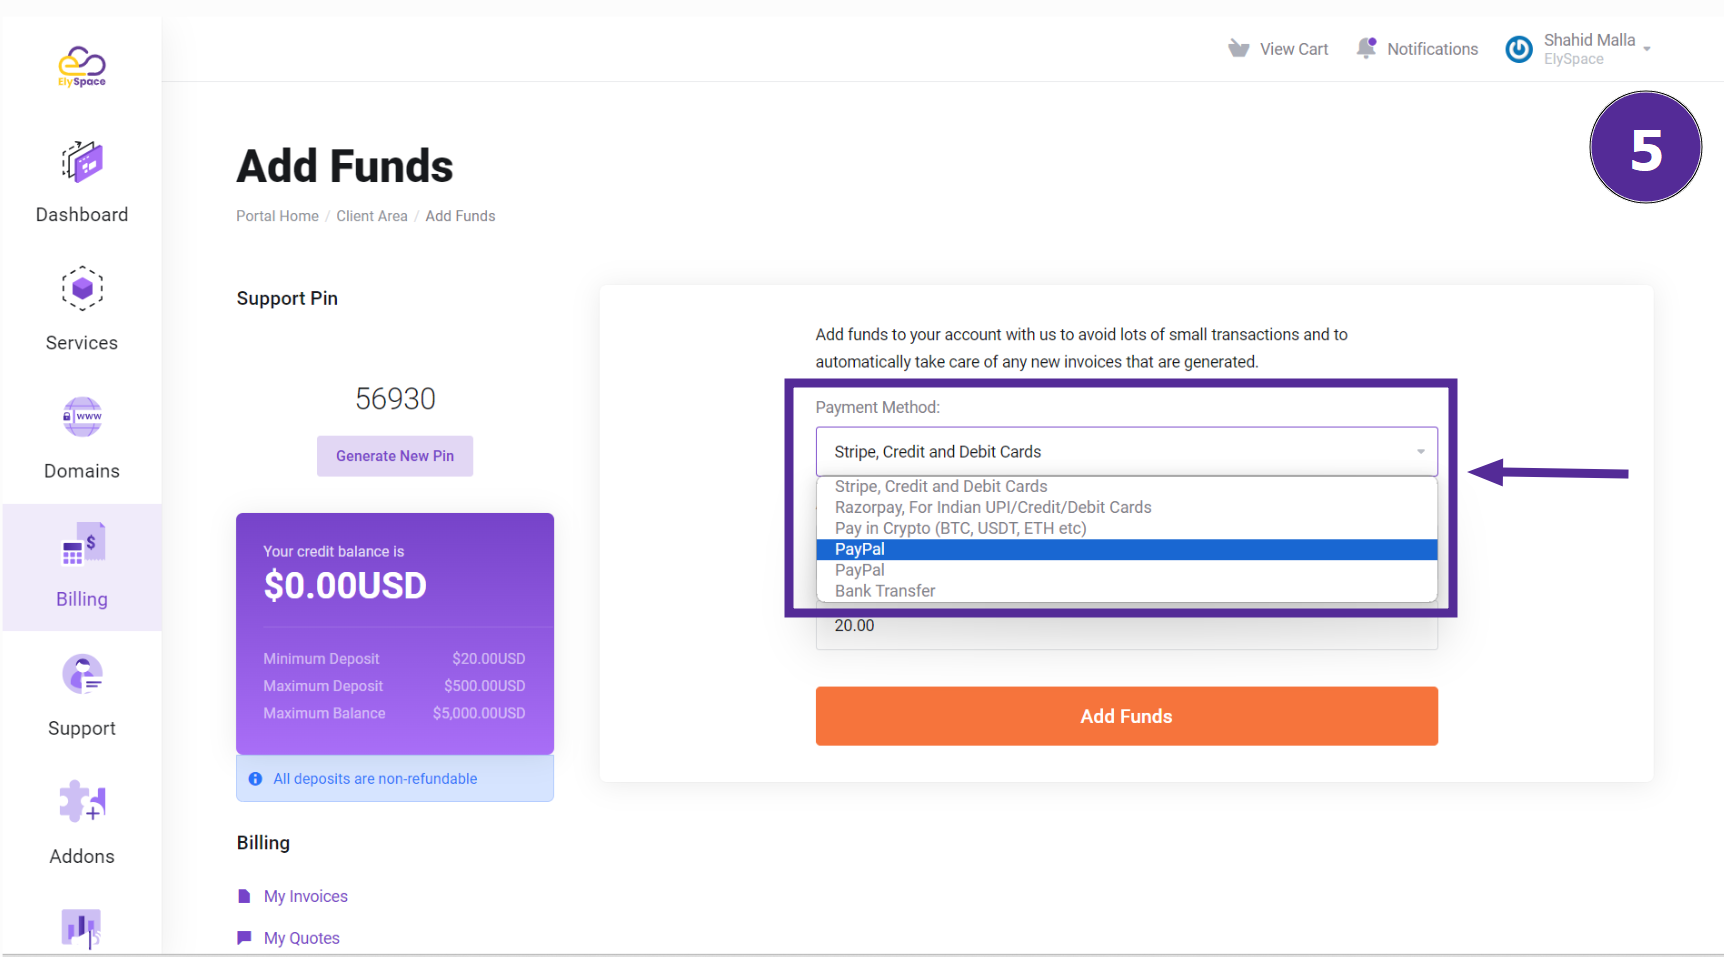
Step 5: Select Your Payment Method
On the Add Funds page, select your preferred Payment Method from the available options.
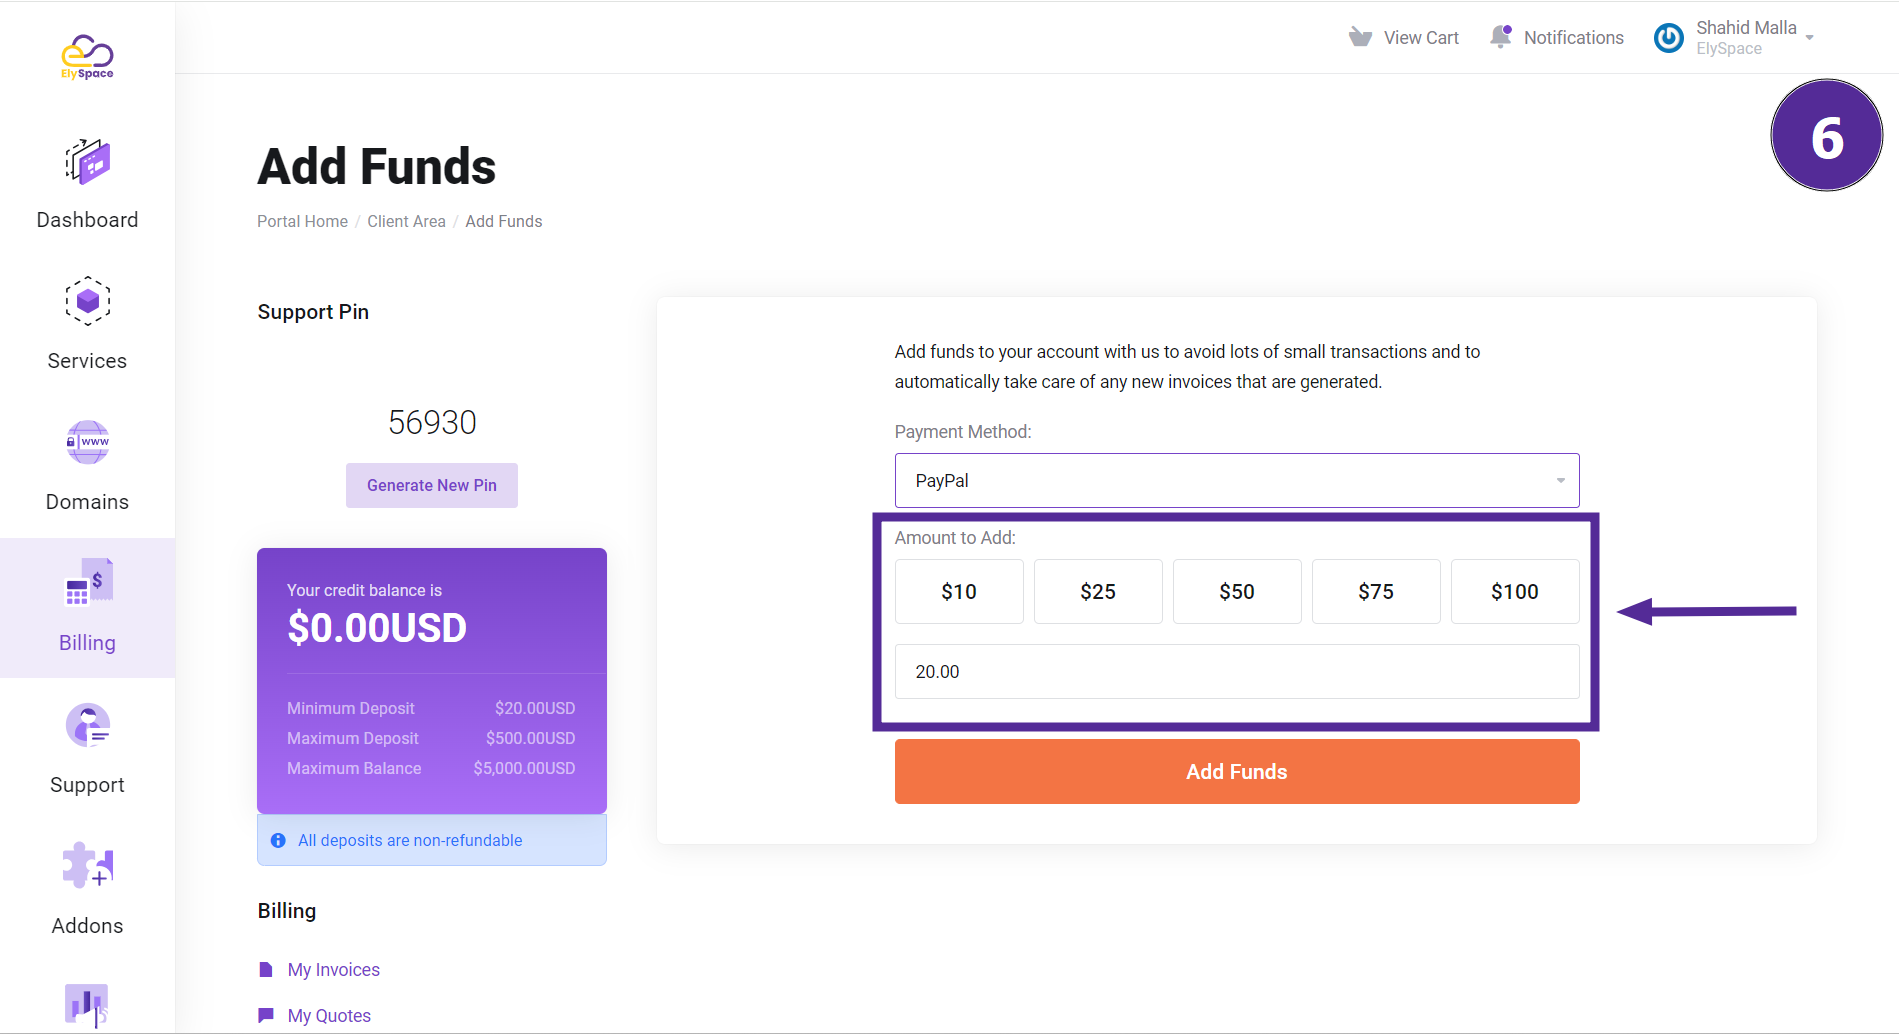
Step 6: Enter the Amount to Add
Enter the amount you wish to add in the Amount to Add field.
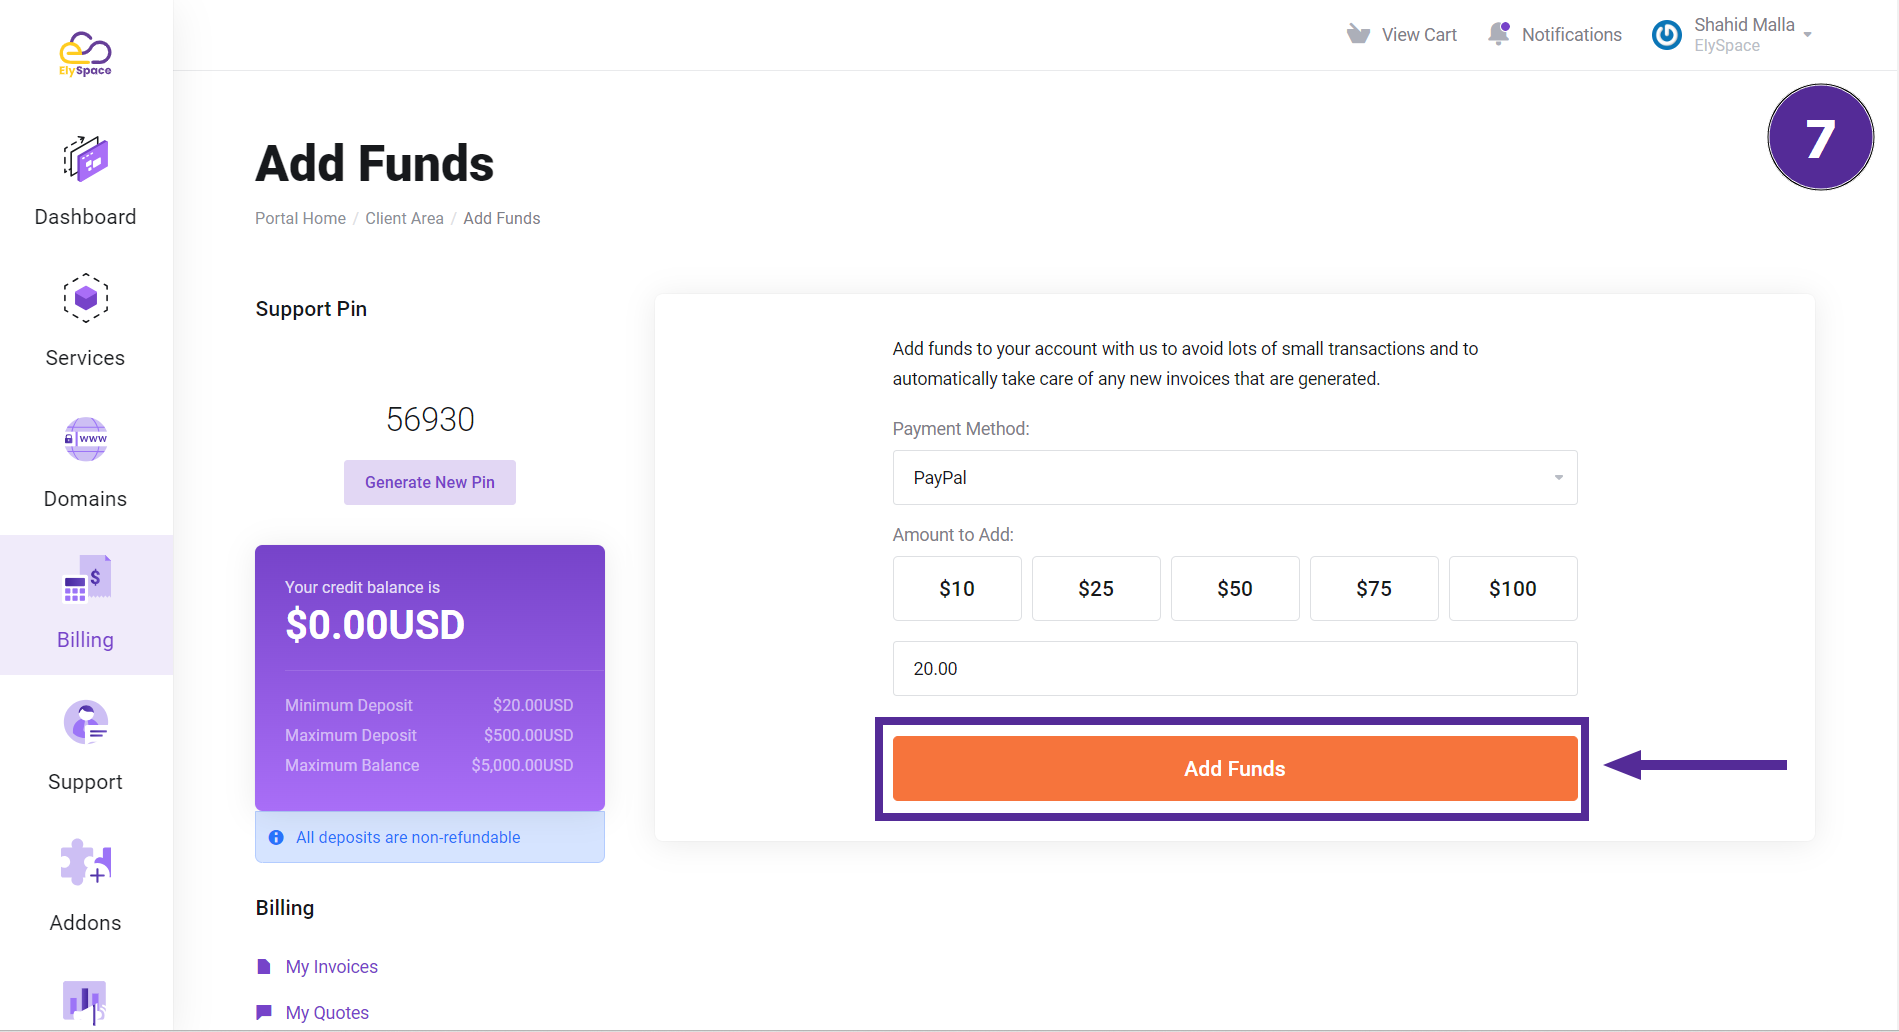
Step 7: Click on 'Add Funds'
Once you have entered the required information, click on the Add Funds button to complete the process.
Conclusion
By following these steps, you can easily add funds to your ElySpace account and manage your payments efficiently. This process helps in avoiding multiple small transactions and ensures that your invoices are automatically settled.


