Introduction
Managing your domain name is crucial for maintaining your online presence. One essential aspect is the auto-renewal status, which ensures your domain remains registered without interruption. In this article, we’ll guide you through the process of changing the auto-renewal status of your domain name on Elyspace.
Step-by-Step Guide to Change Auto-Renewal Status
Step 1: Log into Your Elyspace Account
Begin by visiting the Elyspace website and logging into your account. Enter your username and password to access your dashboard.

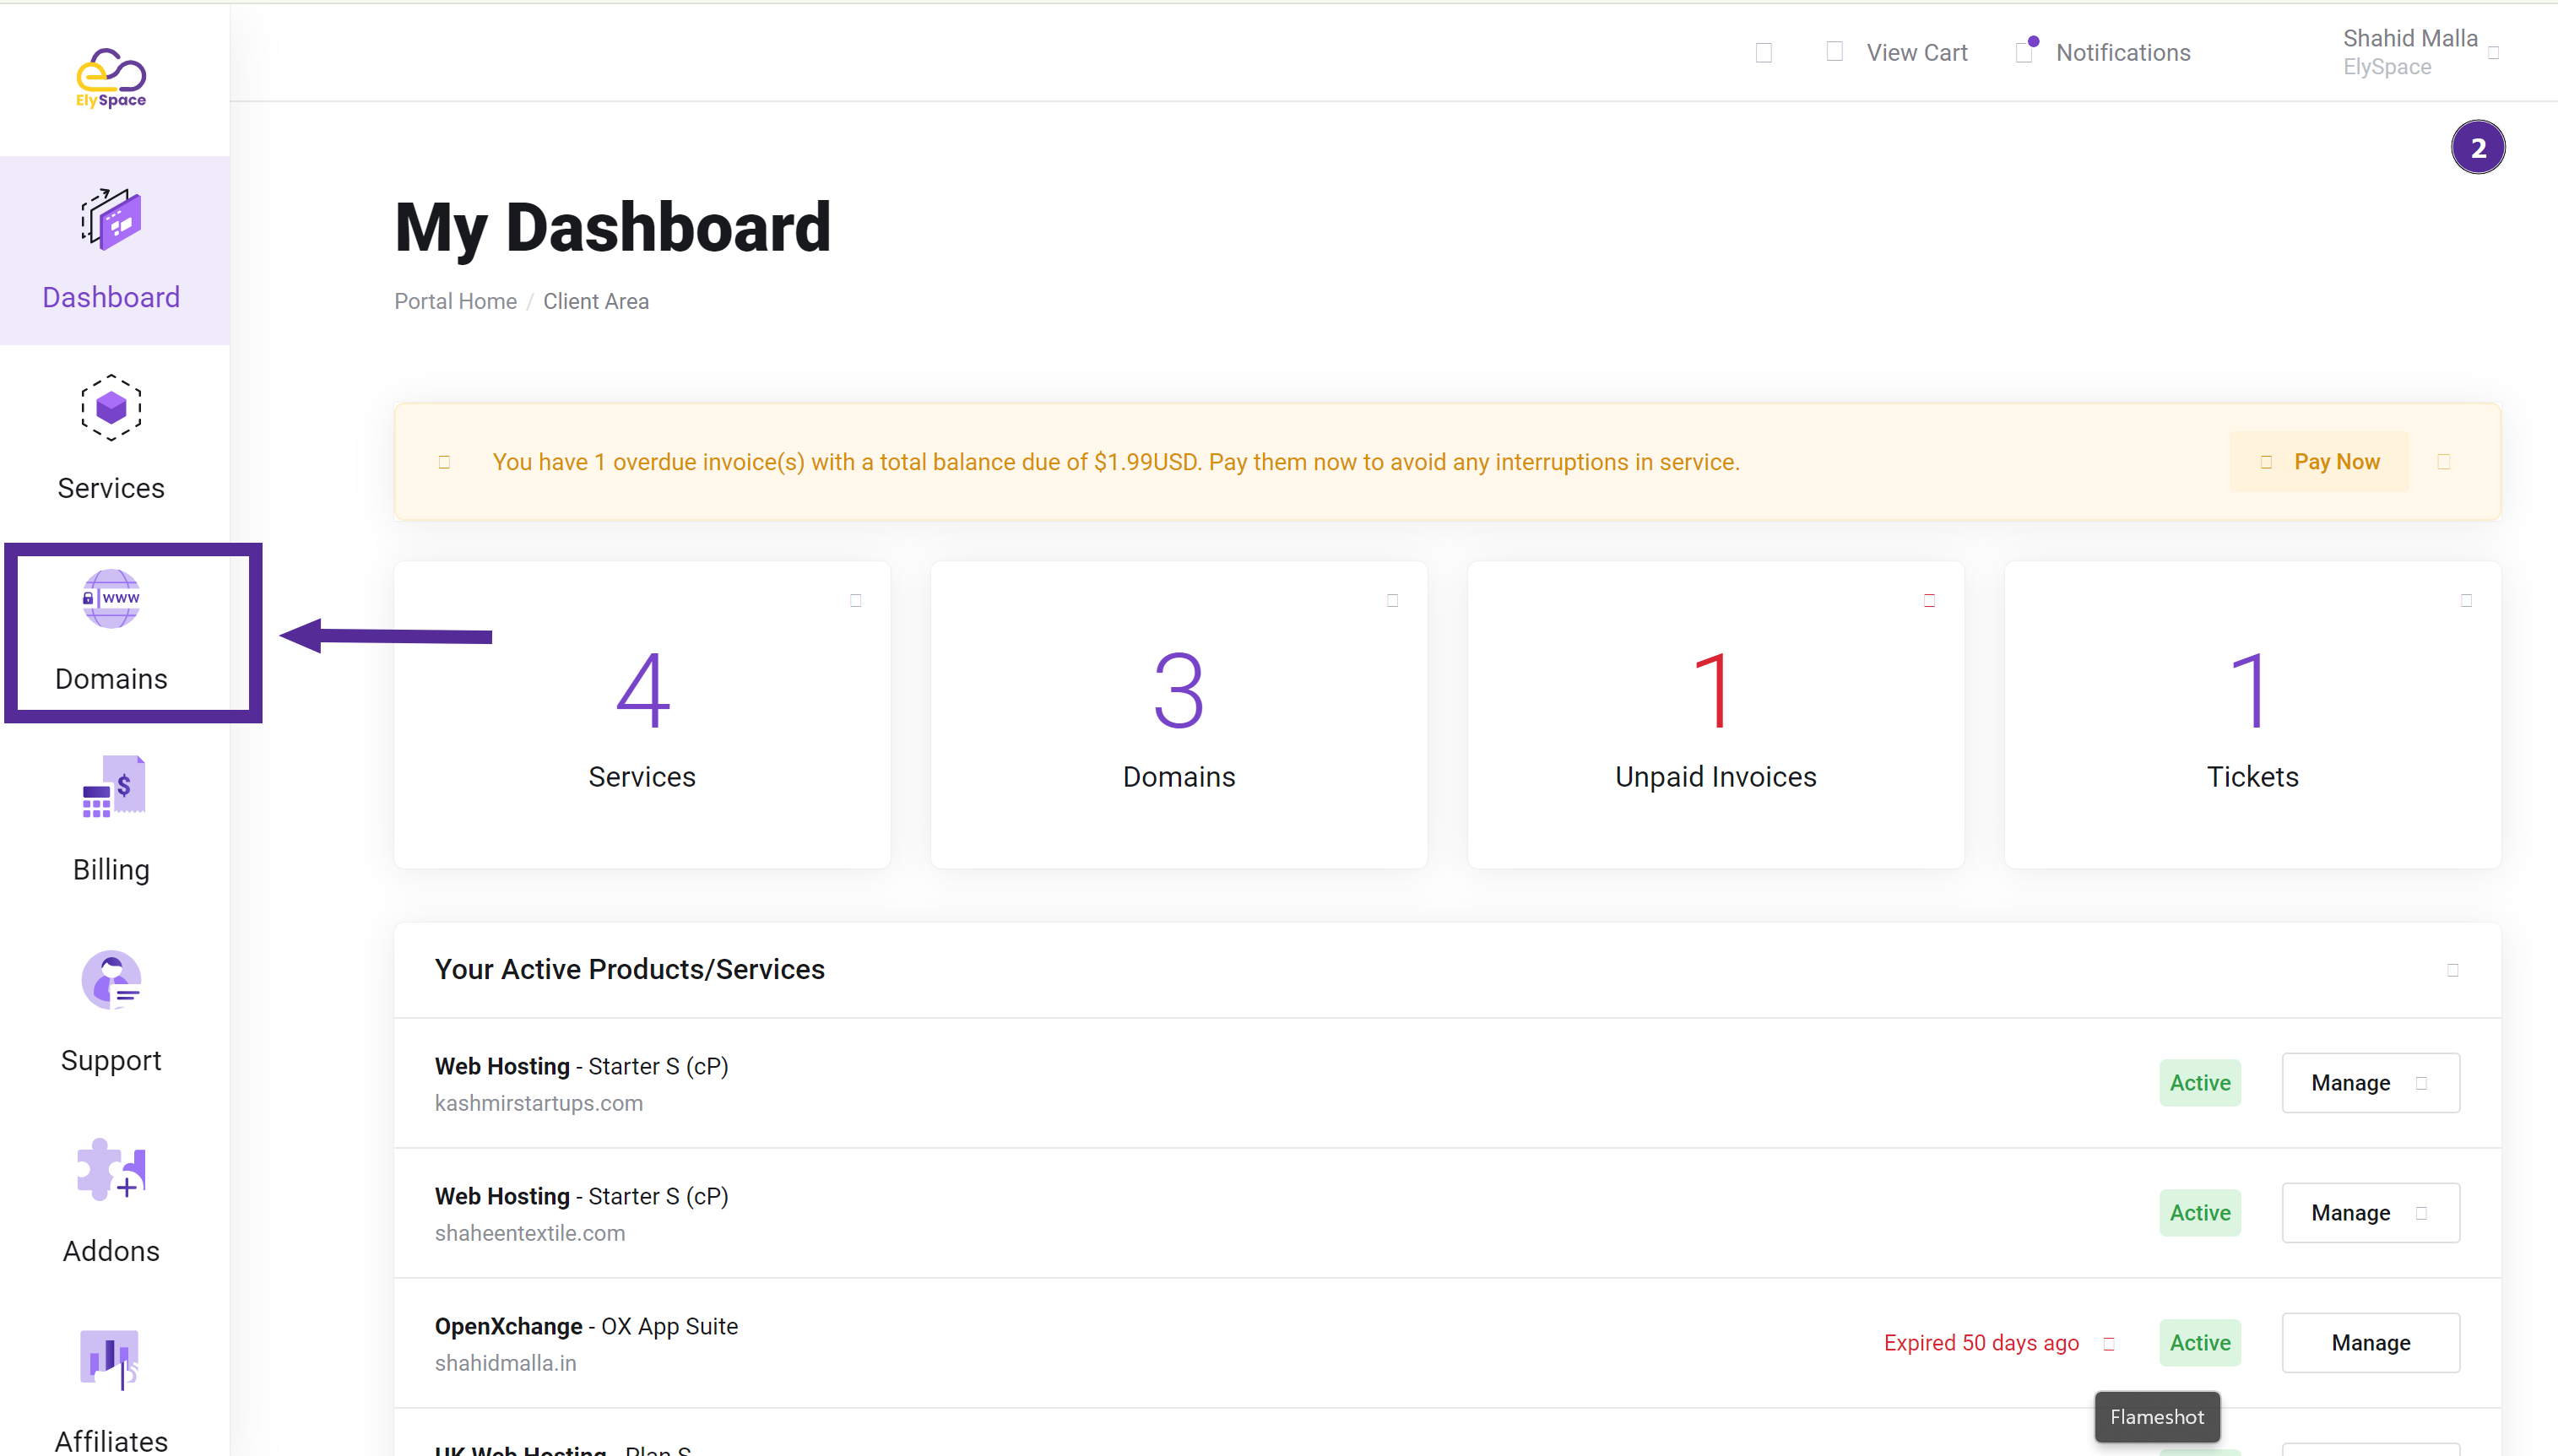
Step 2: Click on the Domains Button
Once you're logged in, locate the "Domains" button in the navigation menu. This button will direct you to all the domains associated with your account.
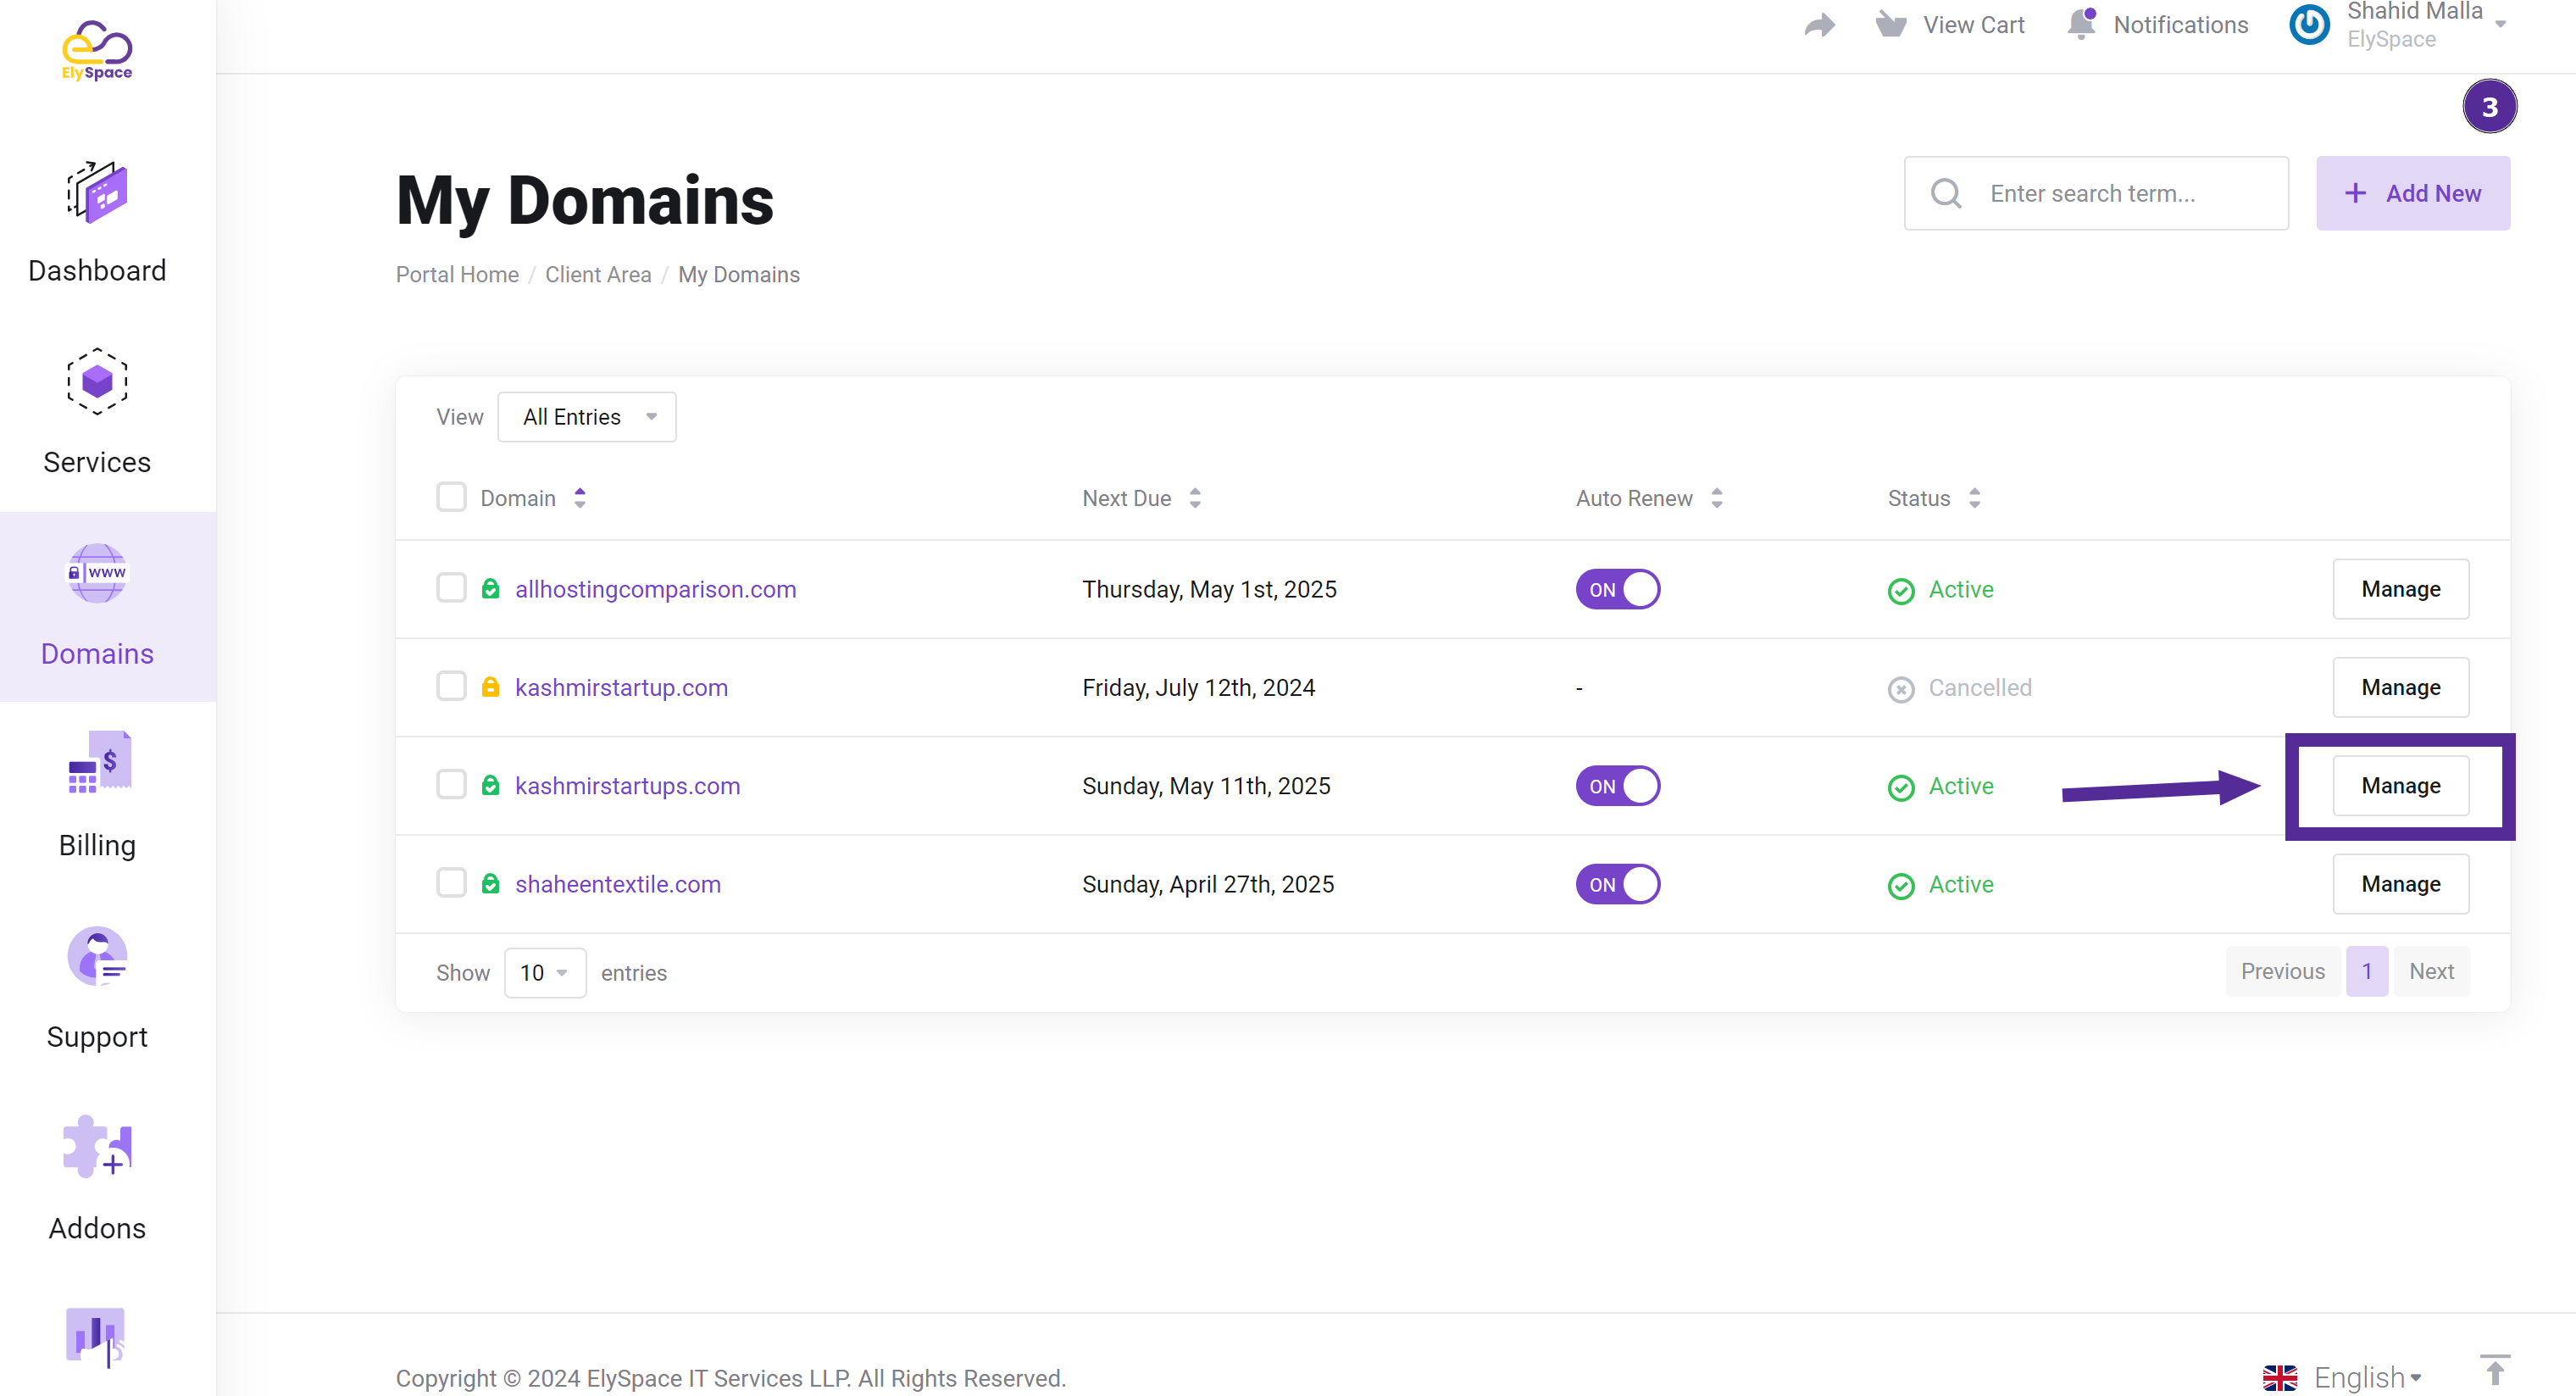
Step 3: Select the Domain for Auto-Renewal Changes
From the list of your domains, select the domain for which you want to change the auto-renewal status. Click on the domain name to proceed.
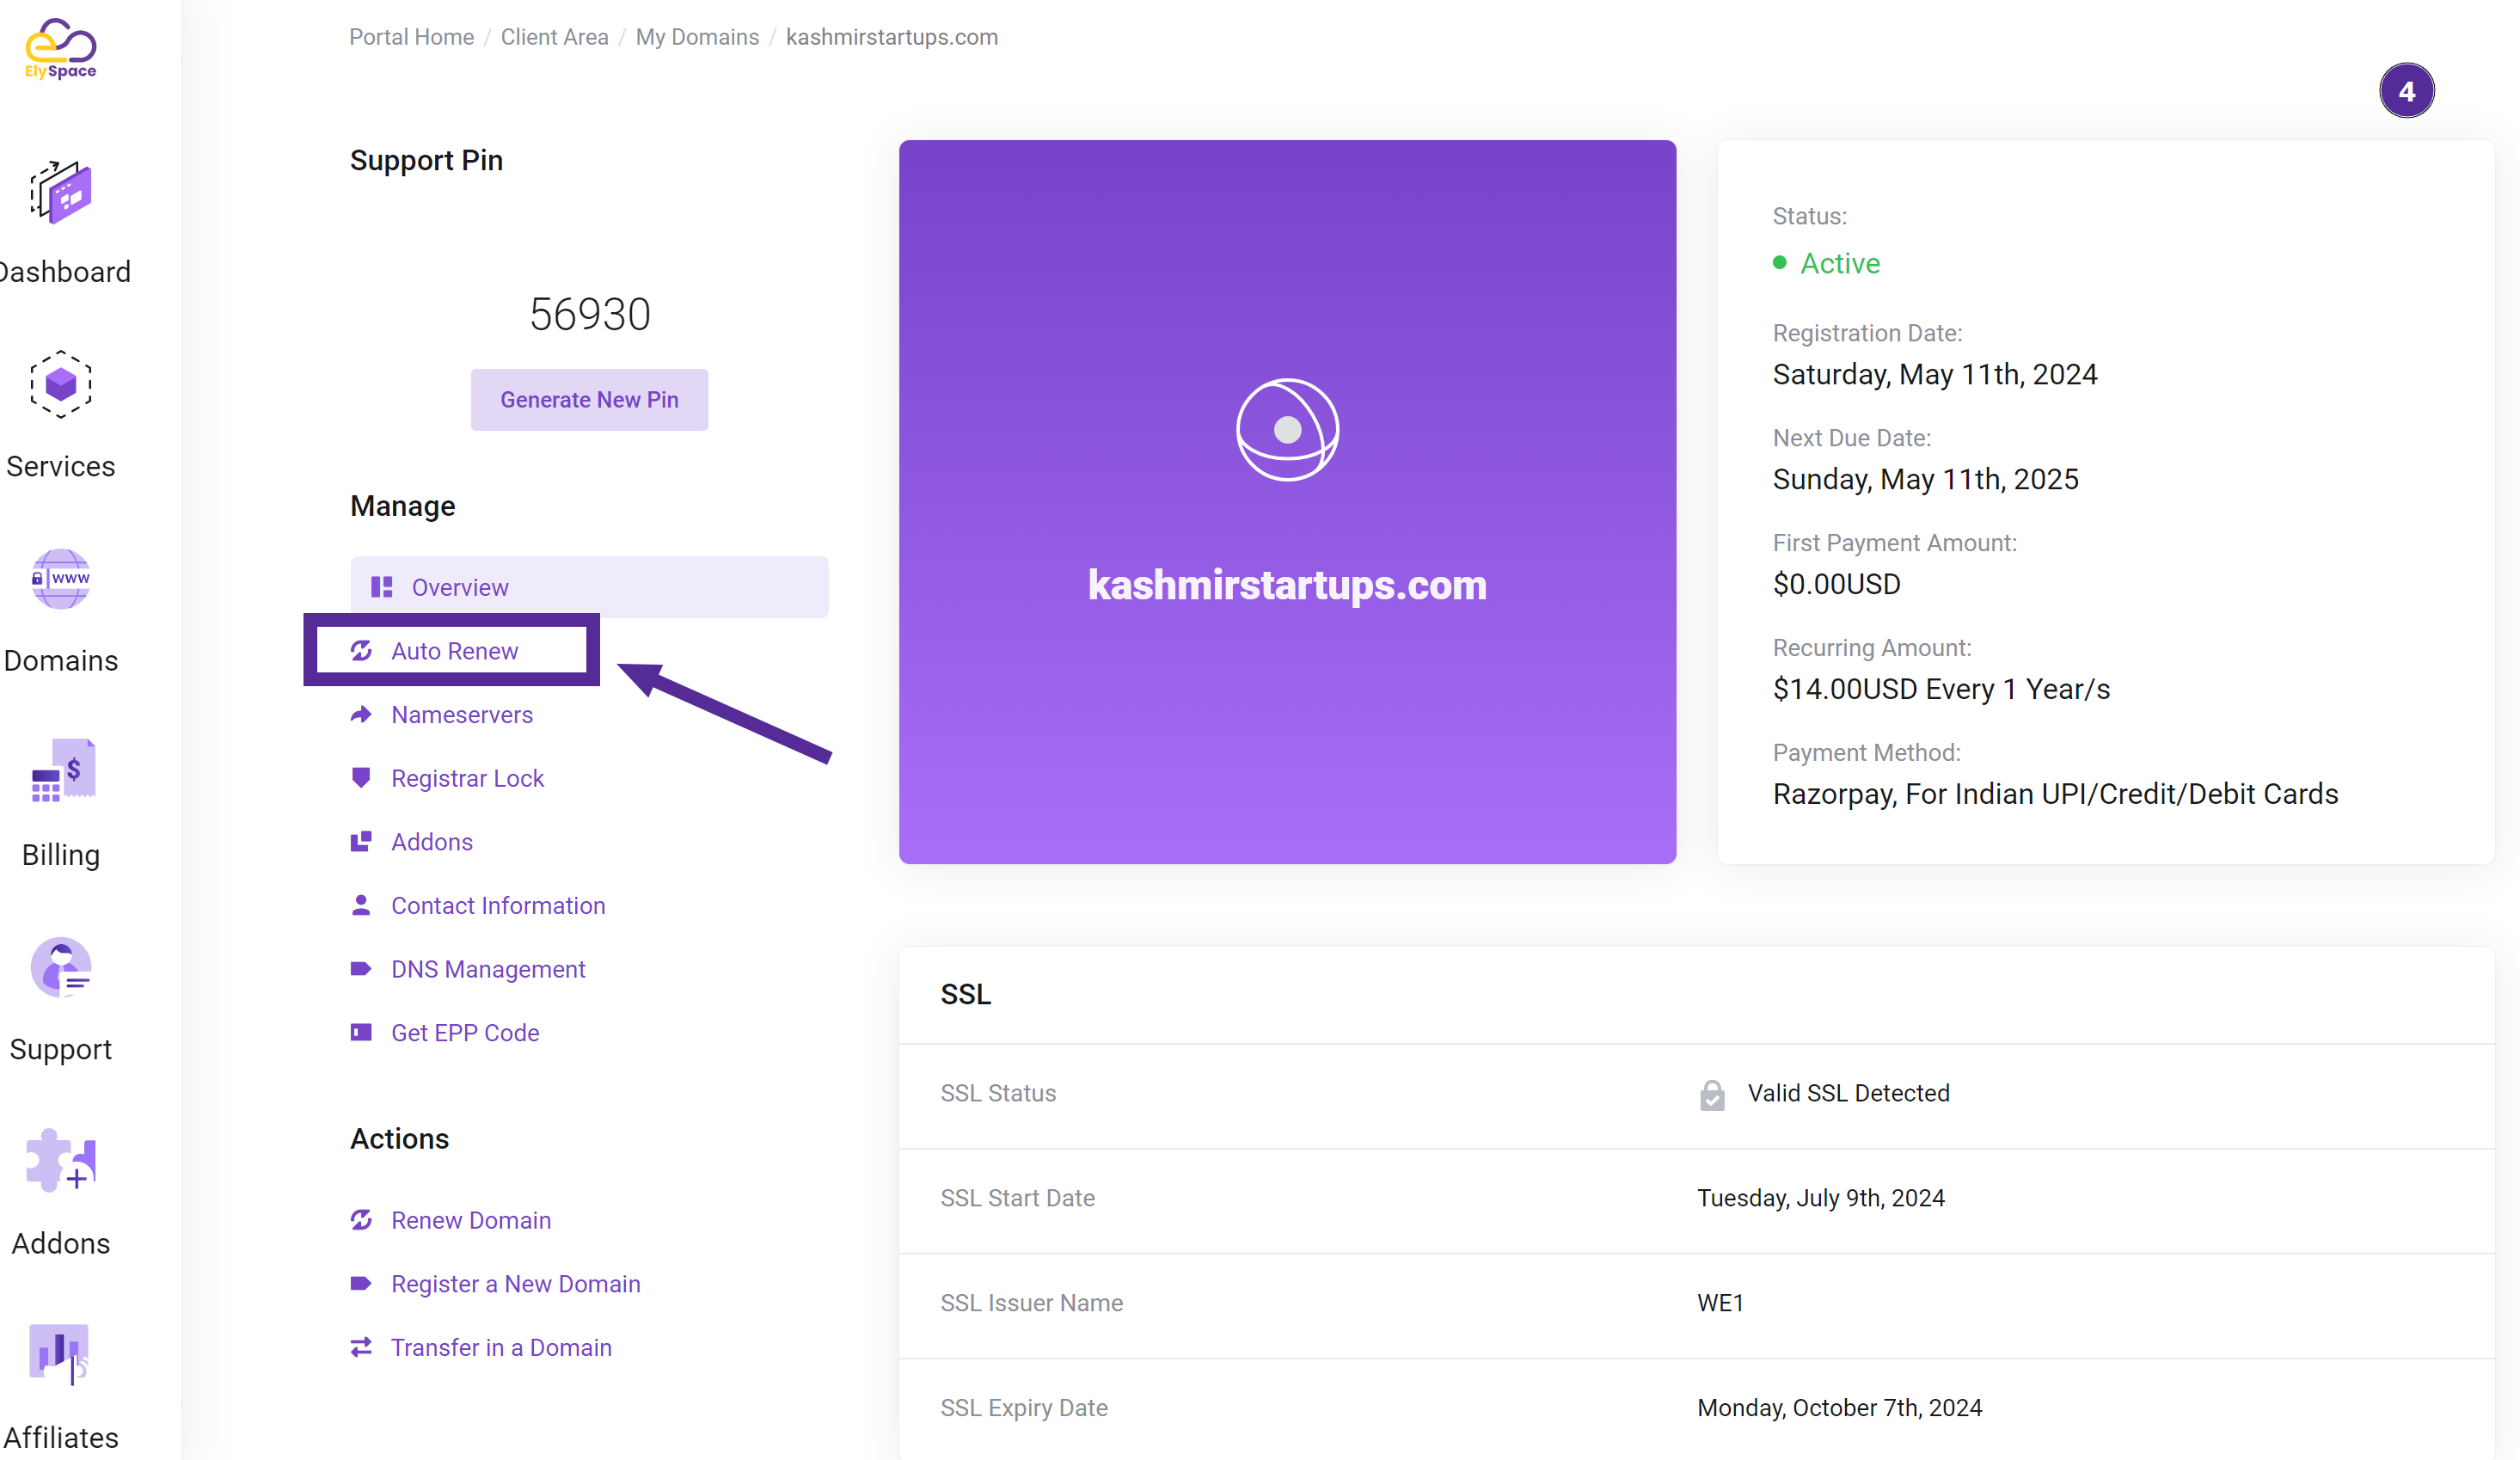
Step 4: Click on Auto Renew
On the left side of the screen, you will see various options related to your domain management. Click on "Auto Renew" to access the auto-renewal settings for your selected domain.
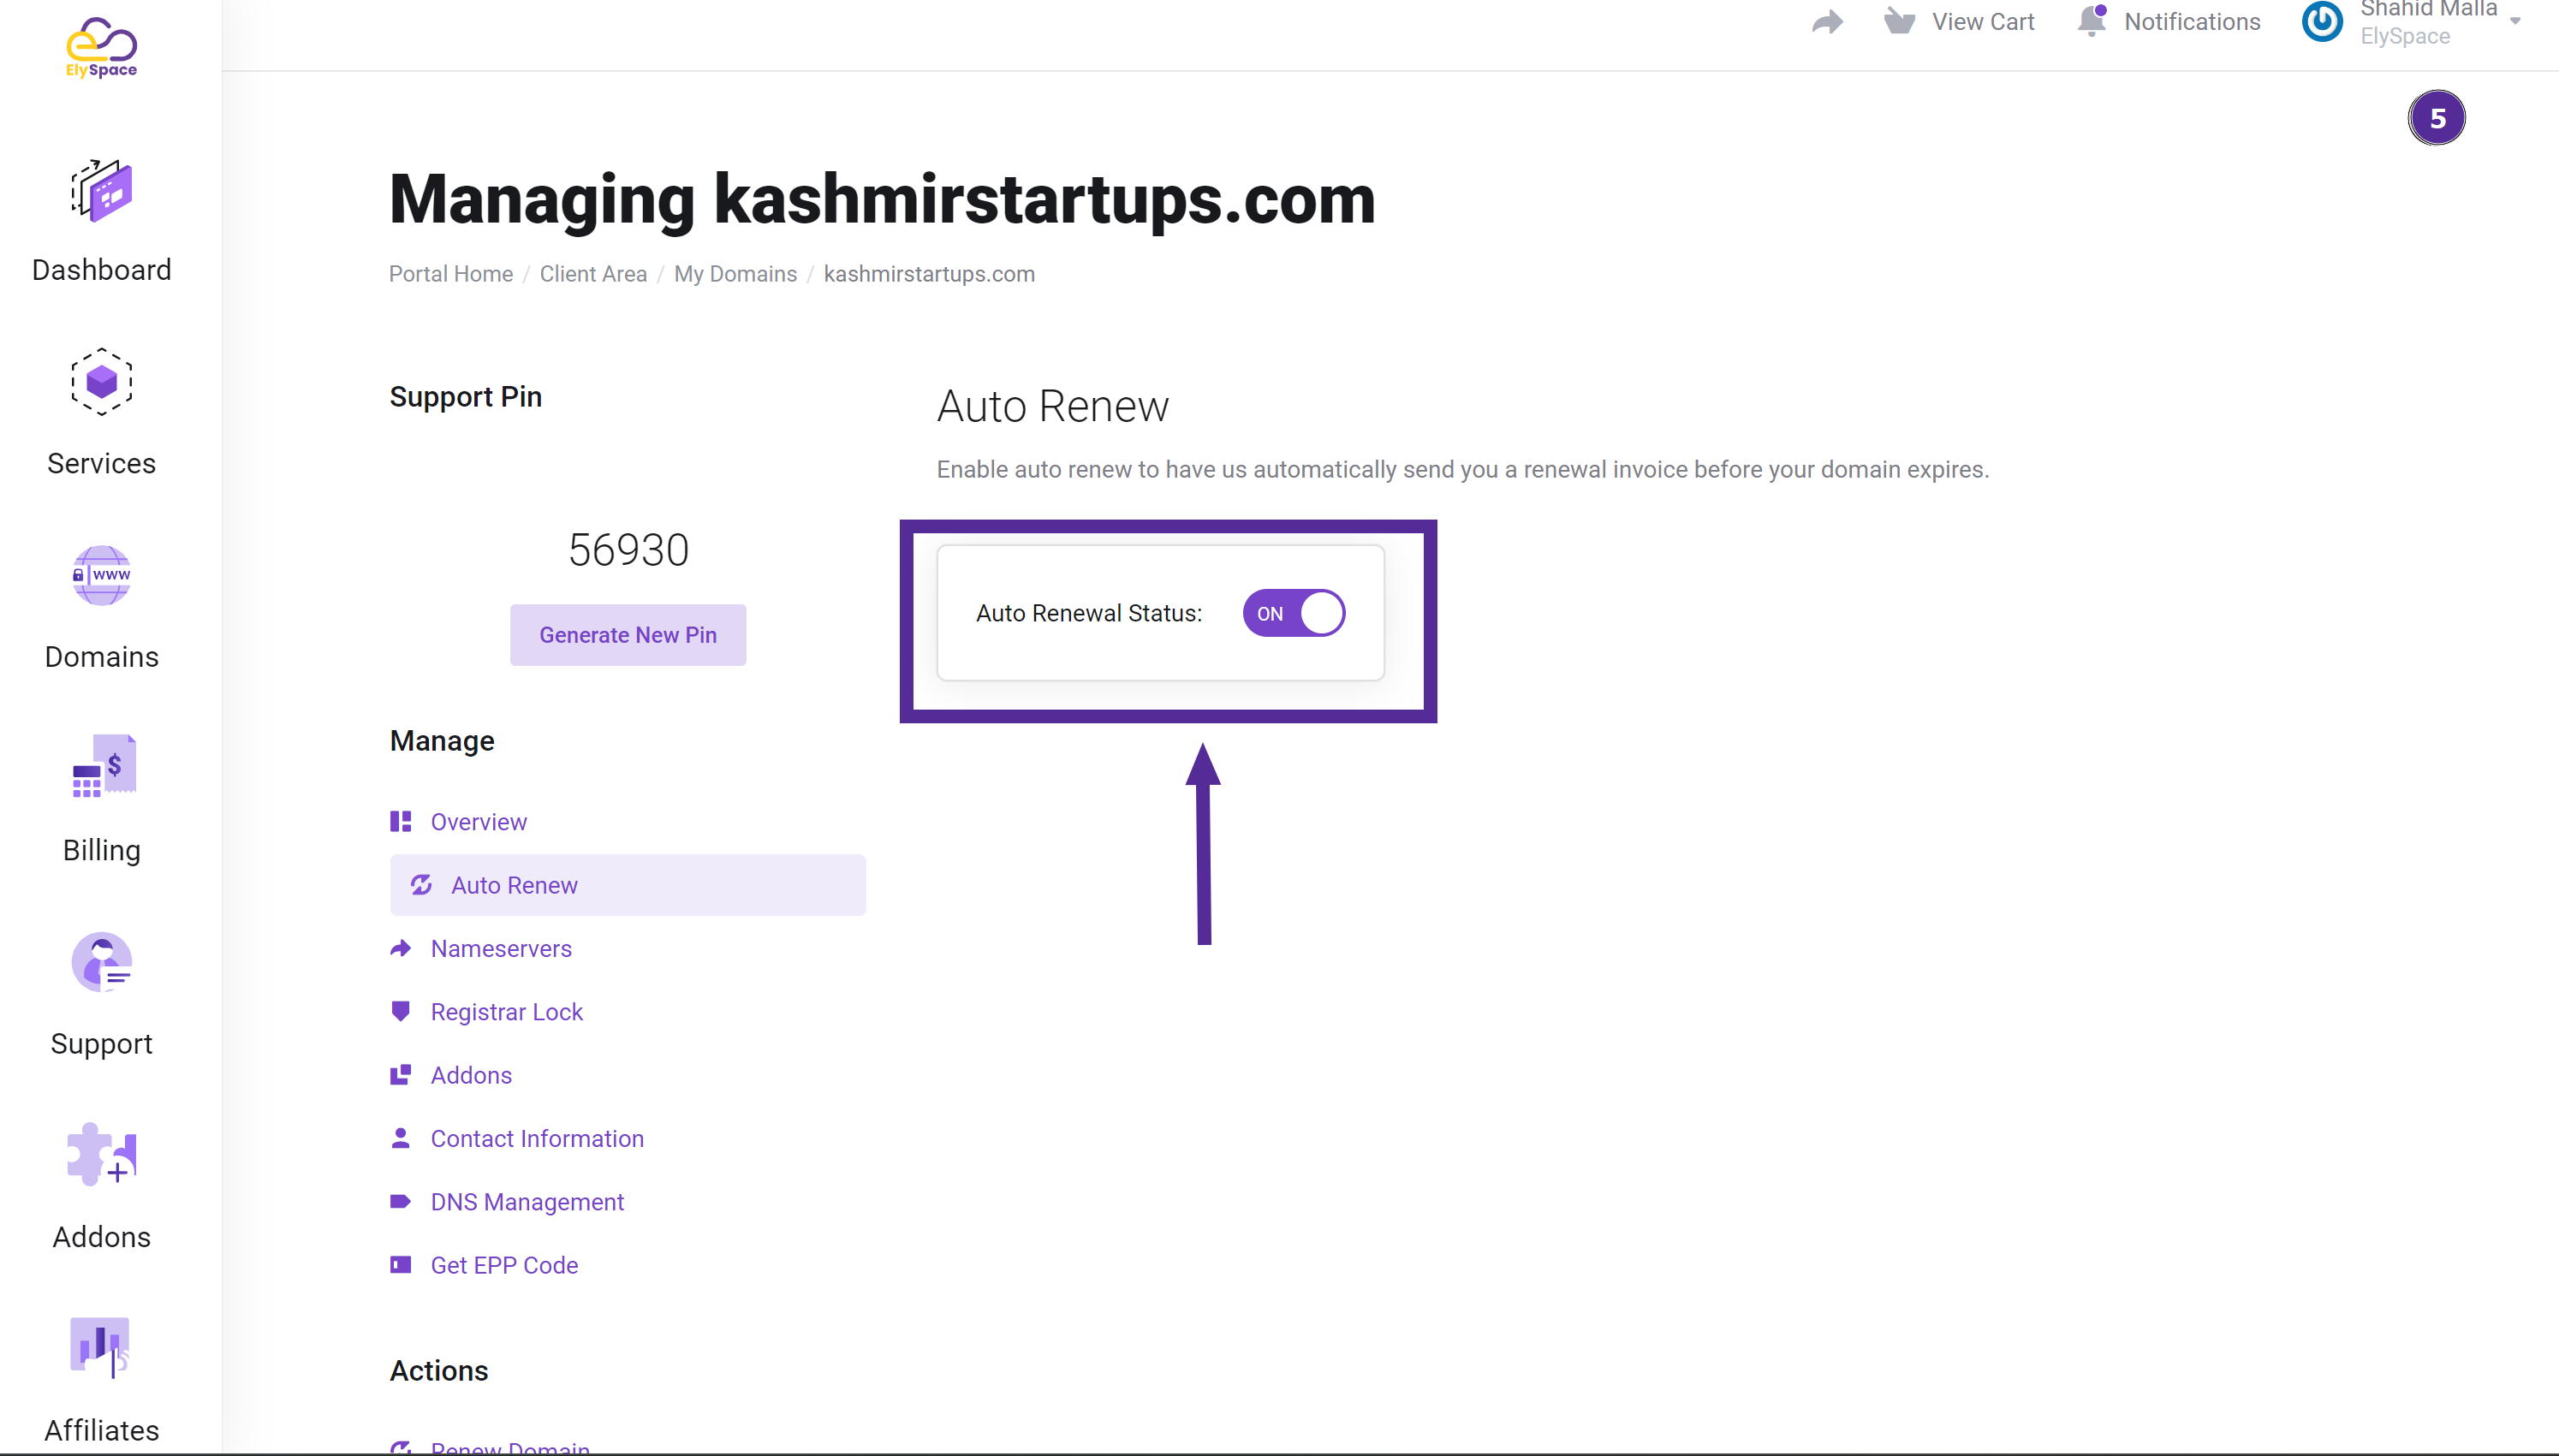
Step 5: Change Auto-Renewal Status
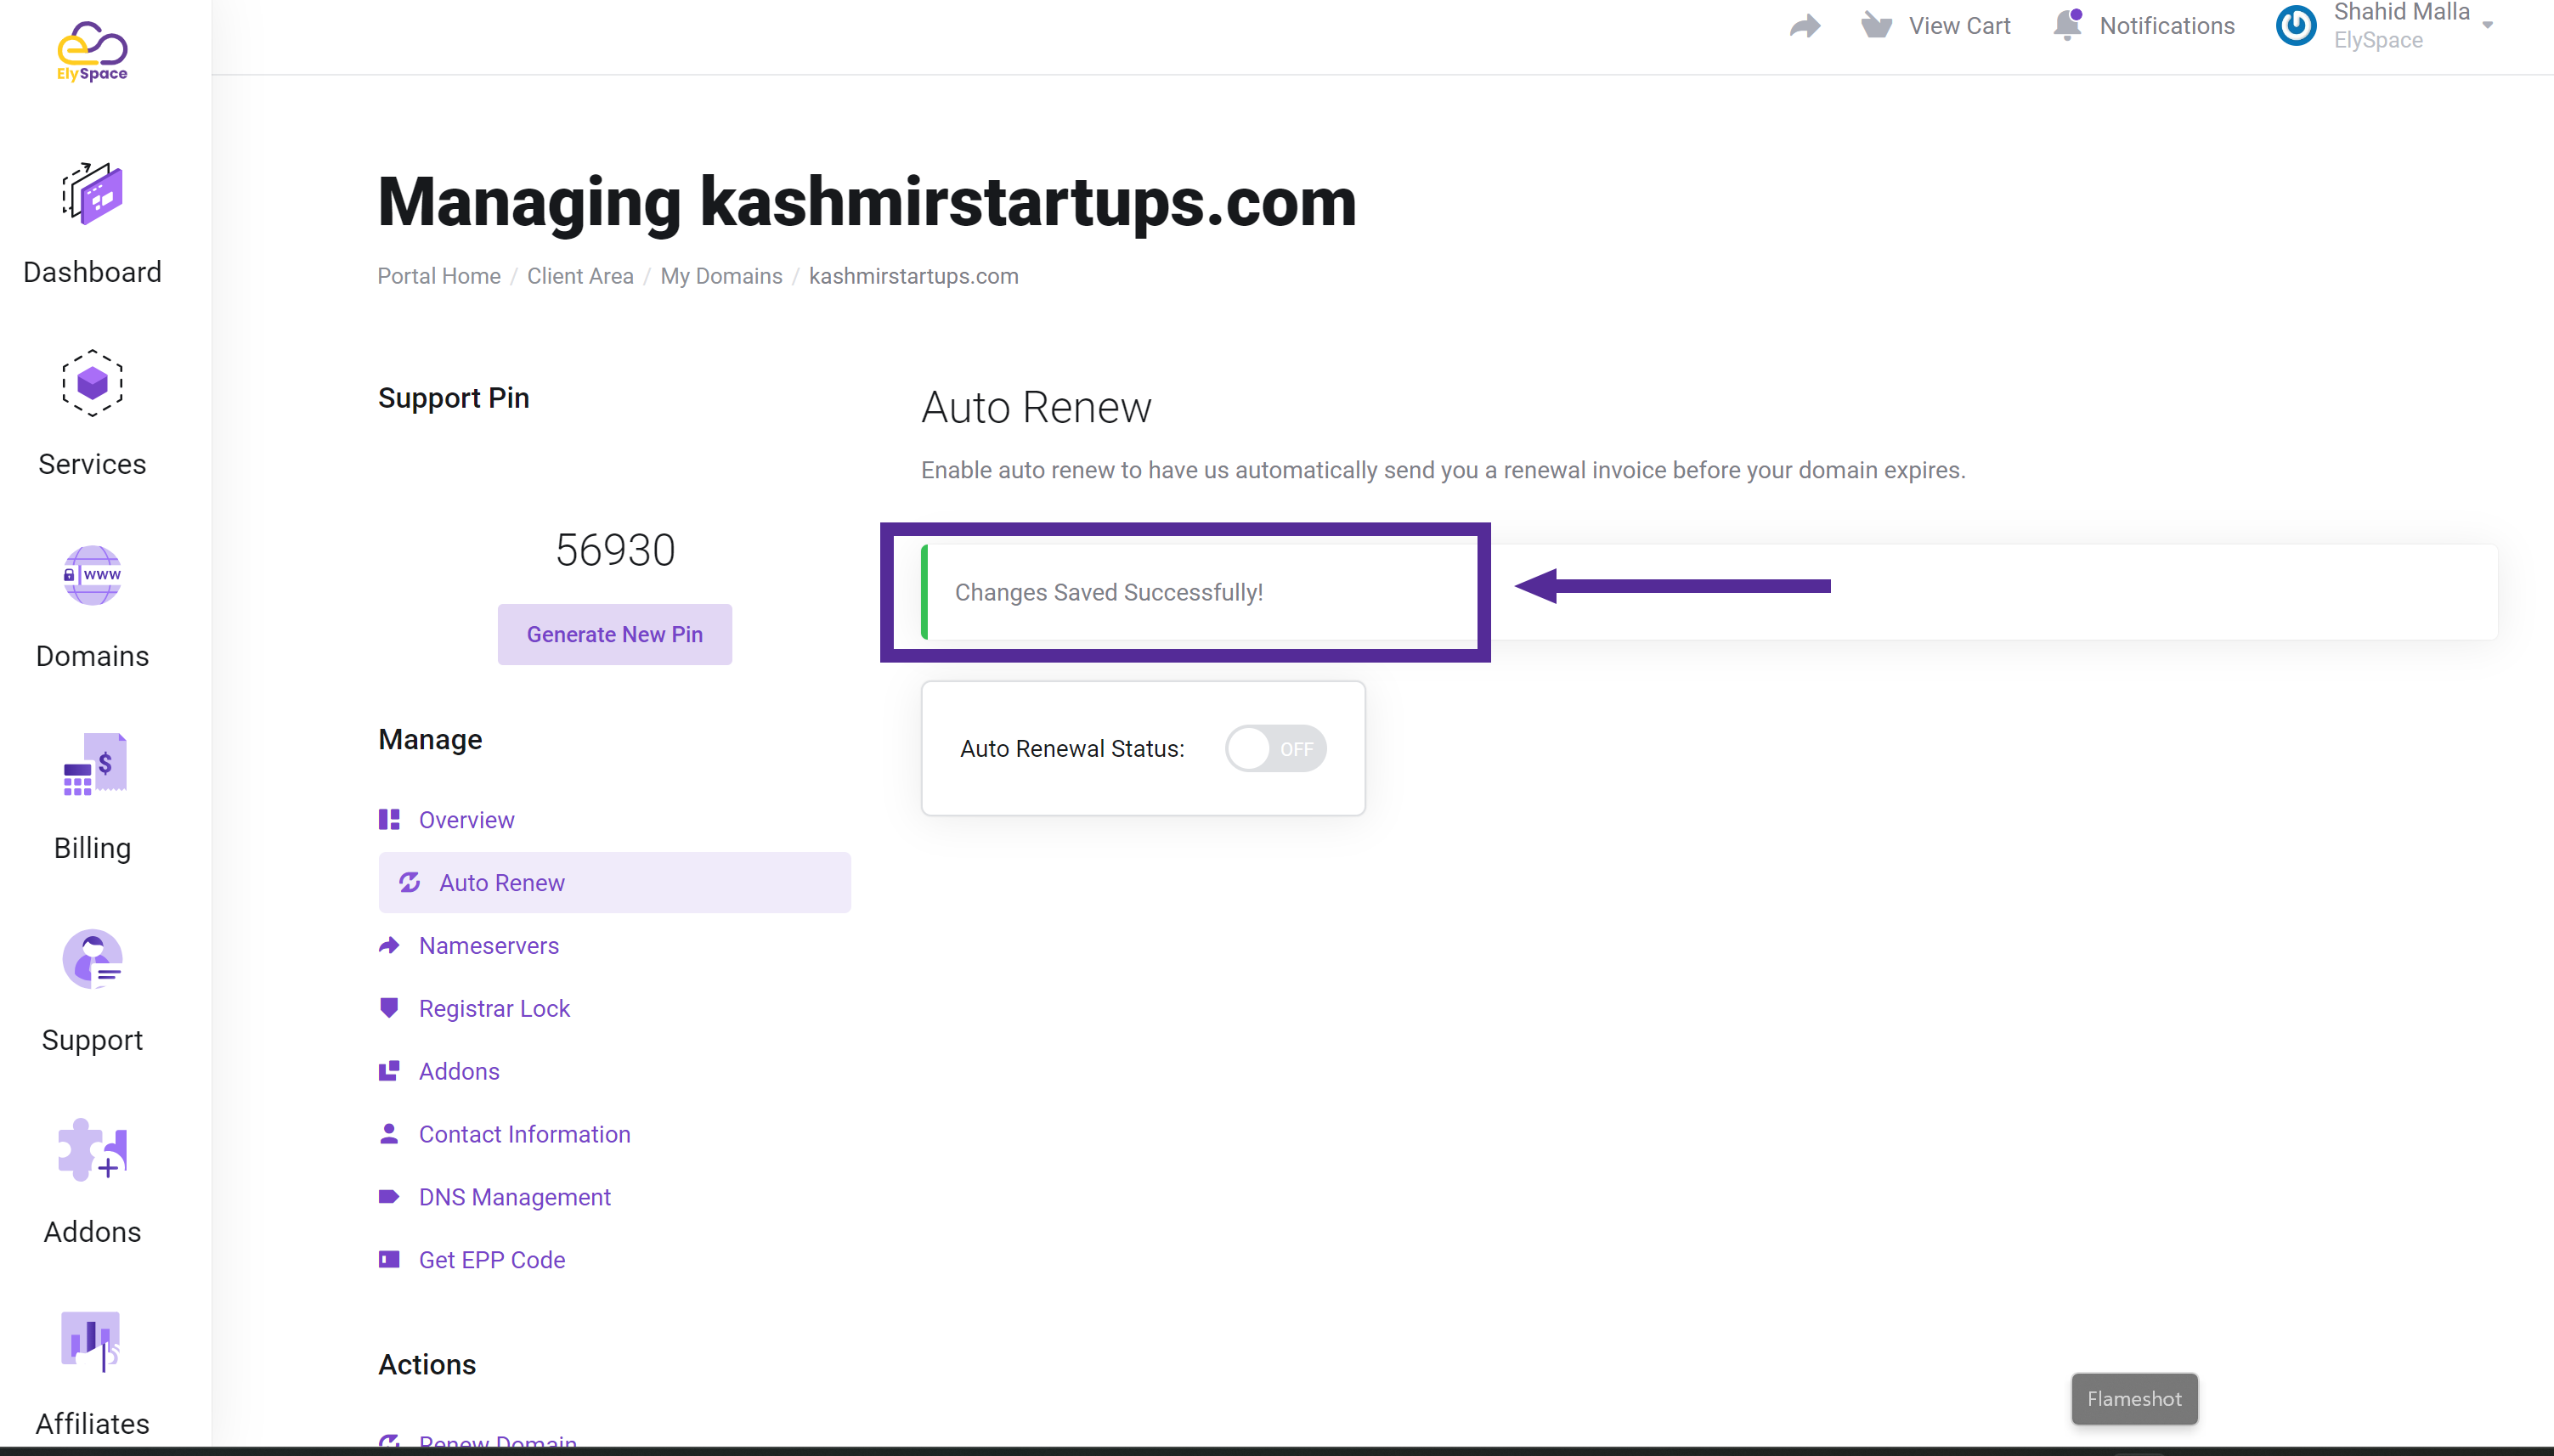
In the Auto Renew section, you will see the option to enable or disable auto-renewal. If you want to turn it on, simply toggle the setting to "On." If you prefer to turn it off, switch it to "Off."
Step 6: Confirmation
After making your changes, a notification will appear confirming that your auto-renewal status has been successfully updated. Make sure to check this notification to ensure your changes were applied.
Conclusion
Changing the auto-renewal status of your domain name on Elyspace is a straightforward process that helps you manage your domain effectively. By following these steps, you can easily keep your domain registration active and avoid any potential disruptions to your online presence. If you have any further questions or need assistance, feel free to reach out to our support team.


