Introduction
Creating a subdomain allows you to create separate sections of your website using the same main domain. For example, you can have `blog.example.com` in addition to your main site `example.com`. This guide will walk you through the steps to create a subdomain in cPanel.
Step-by-Step Instructions
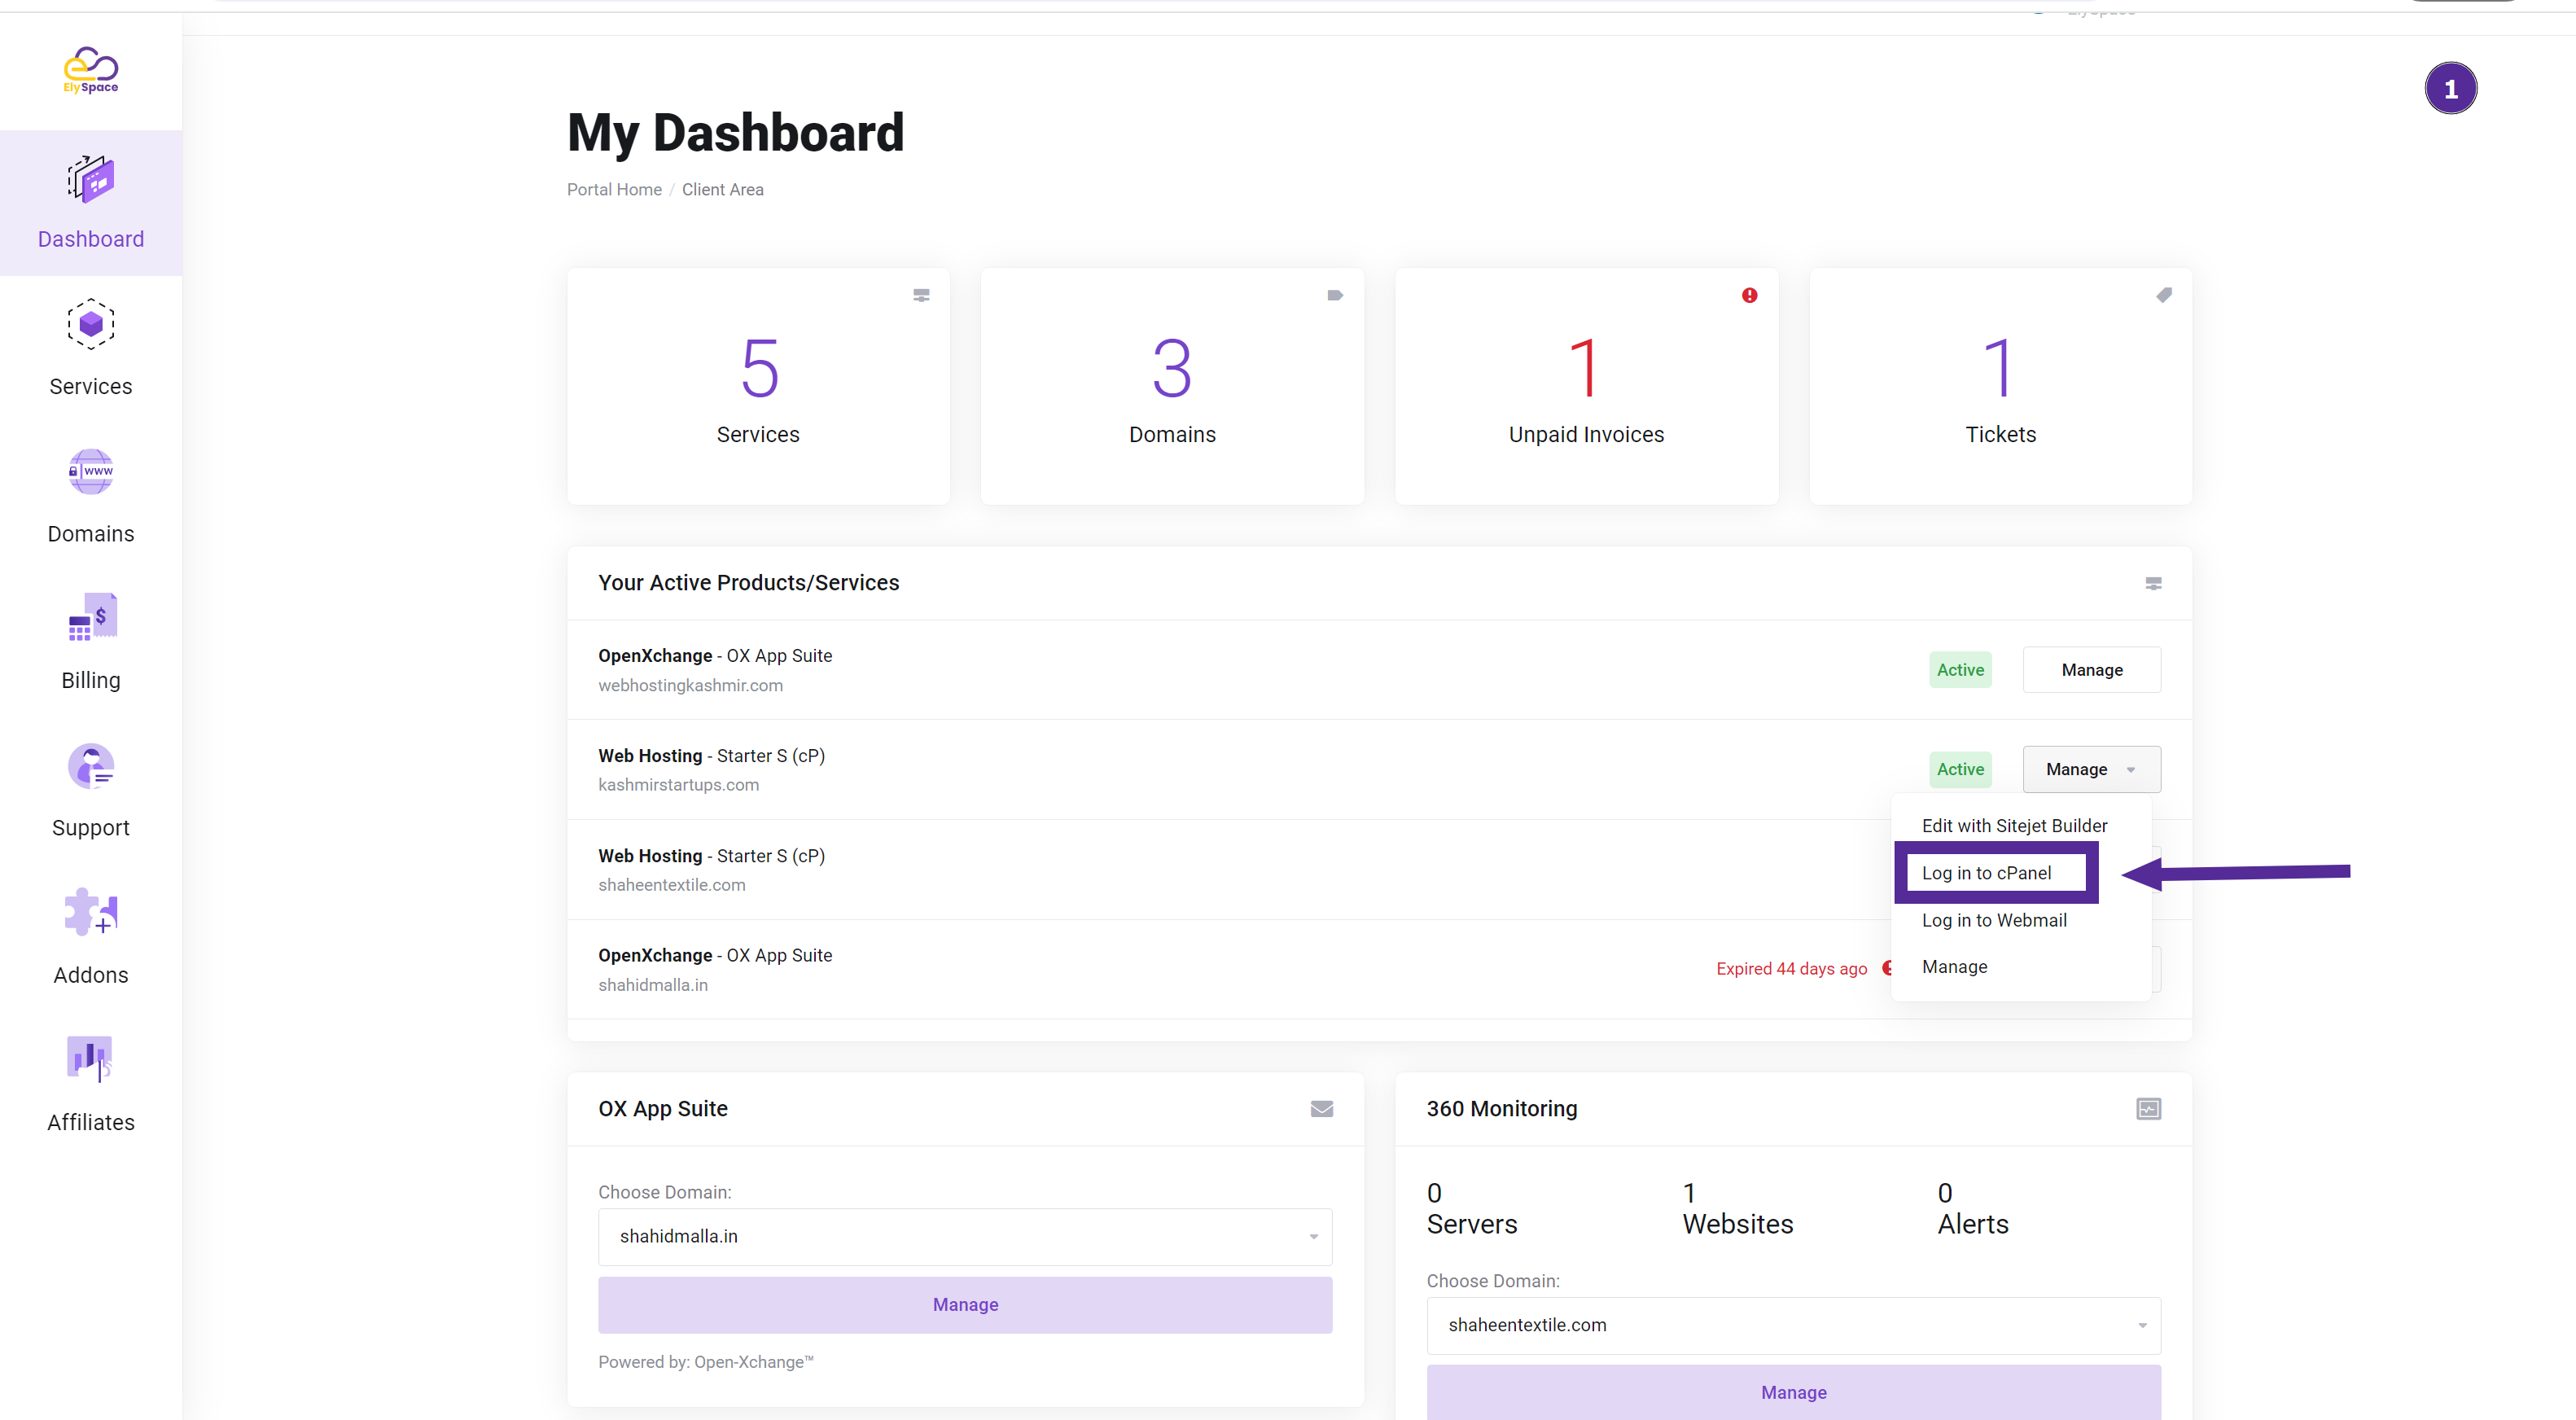
Step 1: Log in to cPanel.
First, log in to your cPanel account using your username and password.
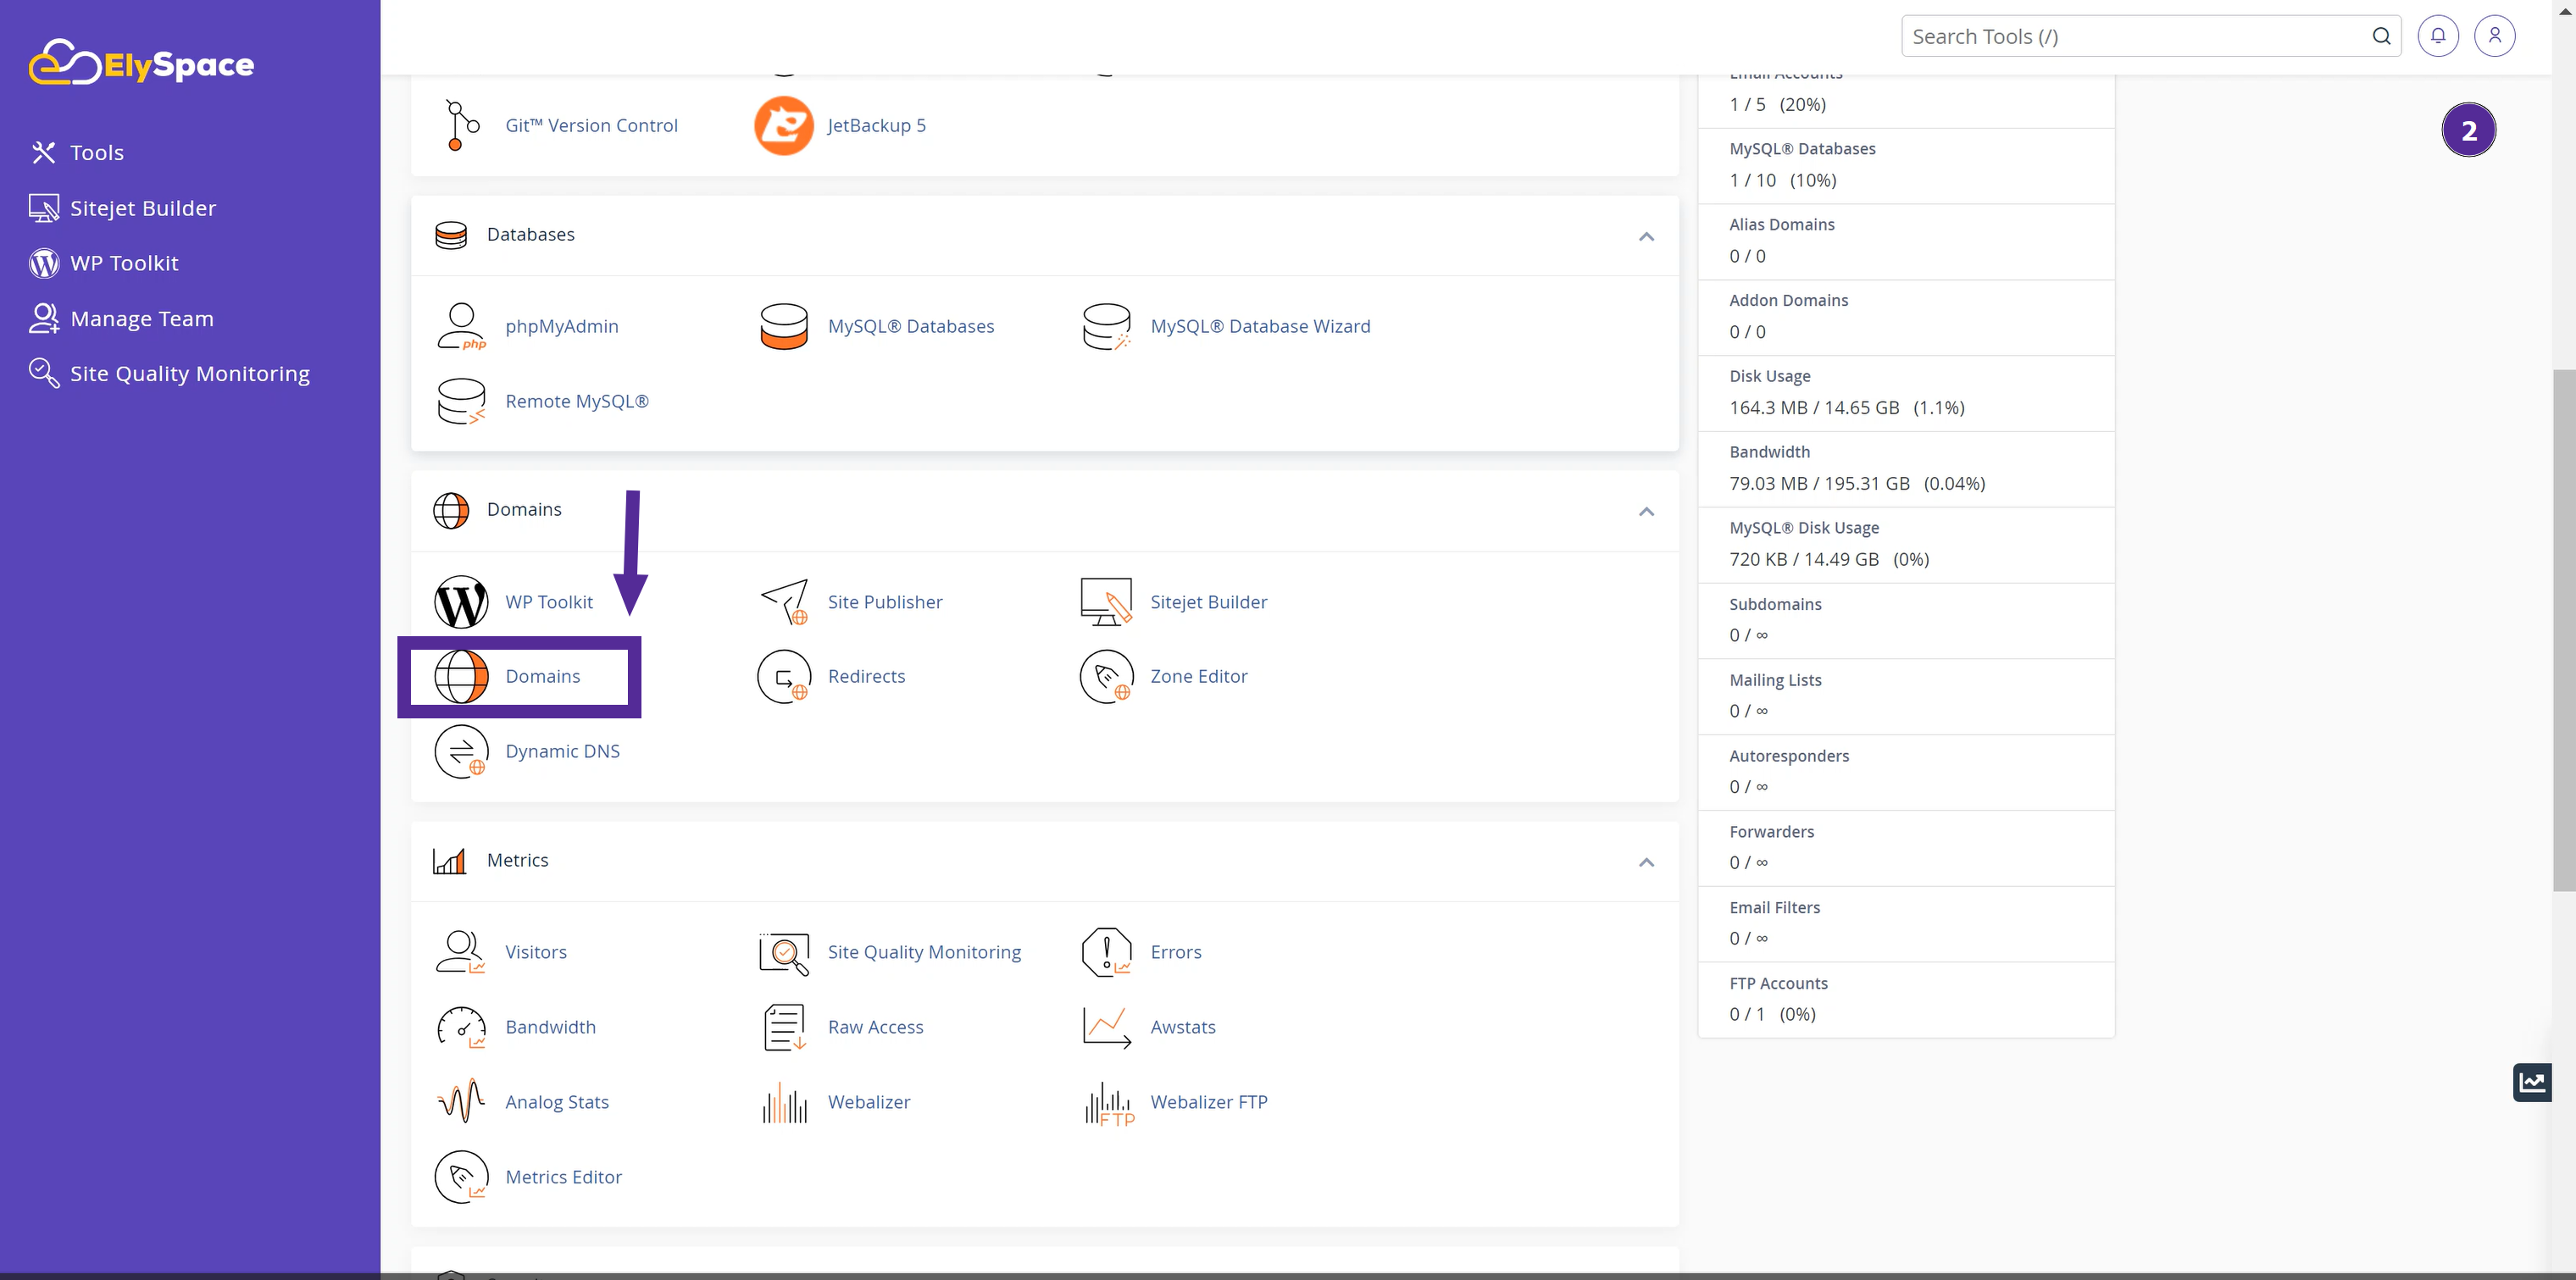
Step 2: Click on the Domains Icon
Once logged in, scroll down to the "Domains" section and click on the "Domains" icon.
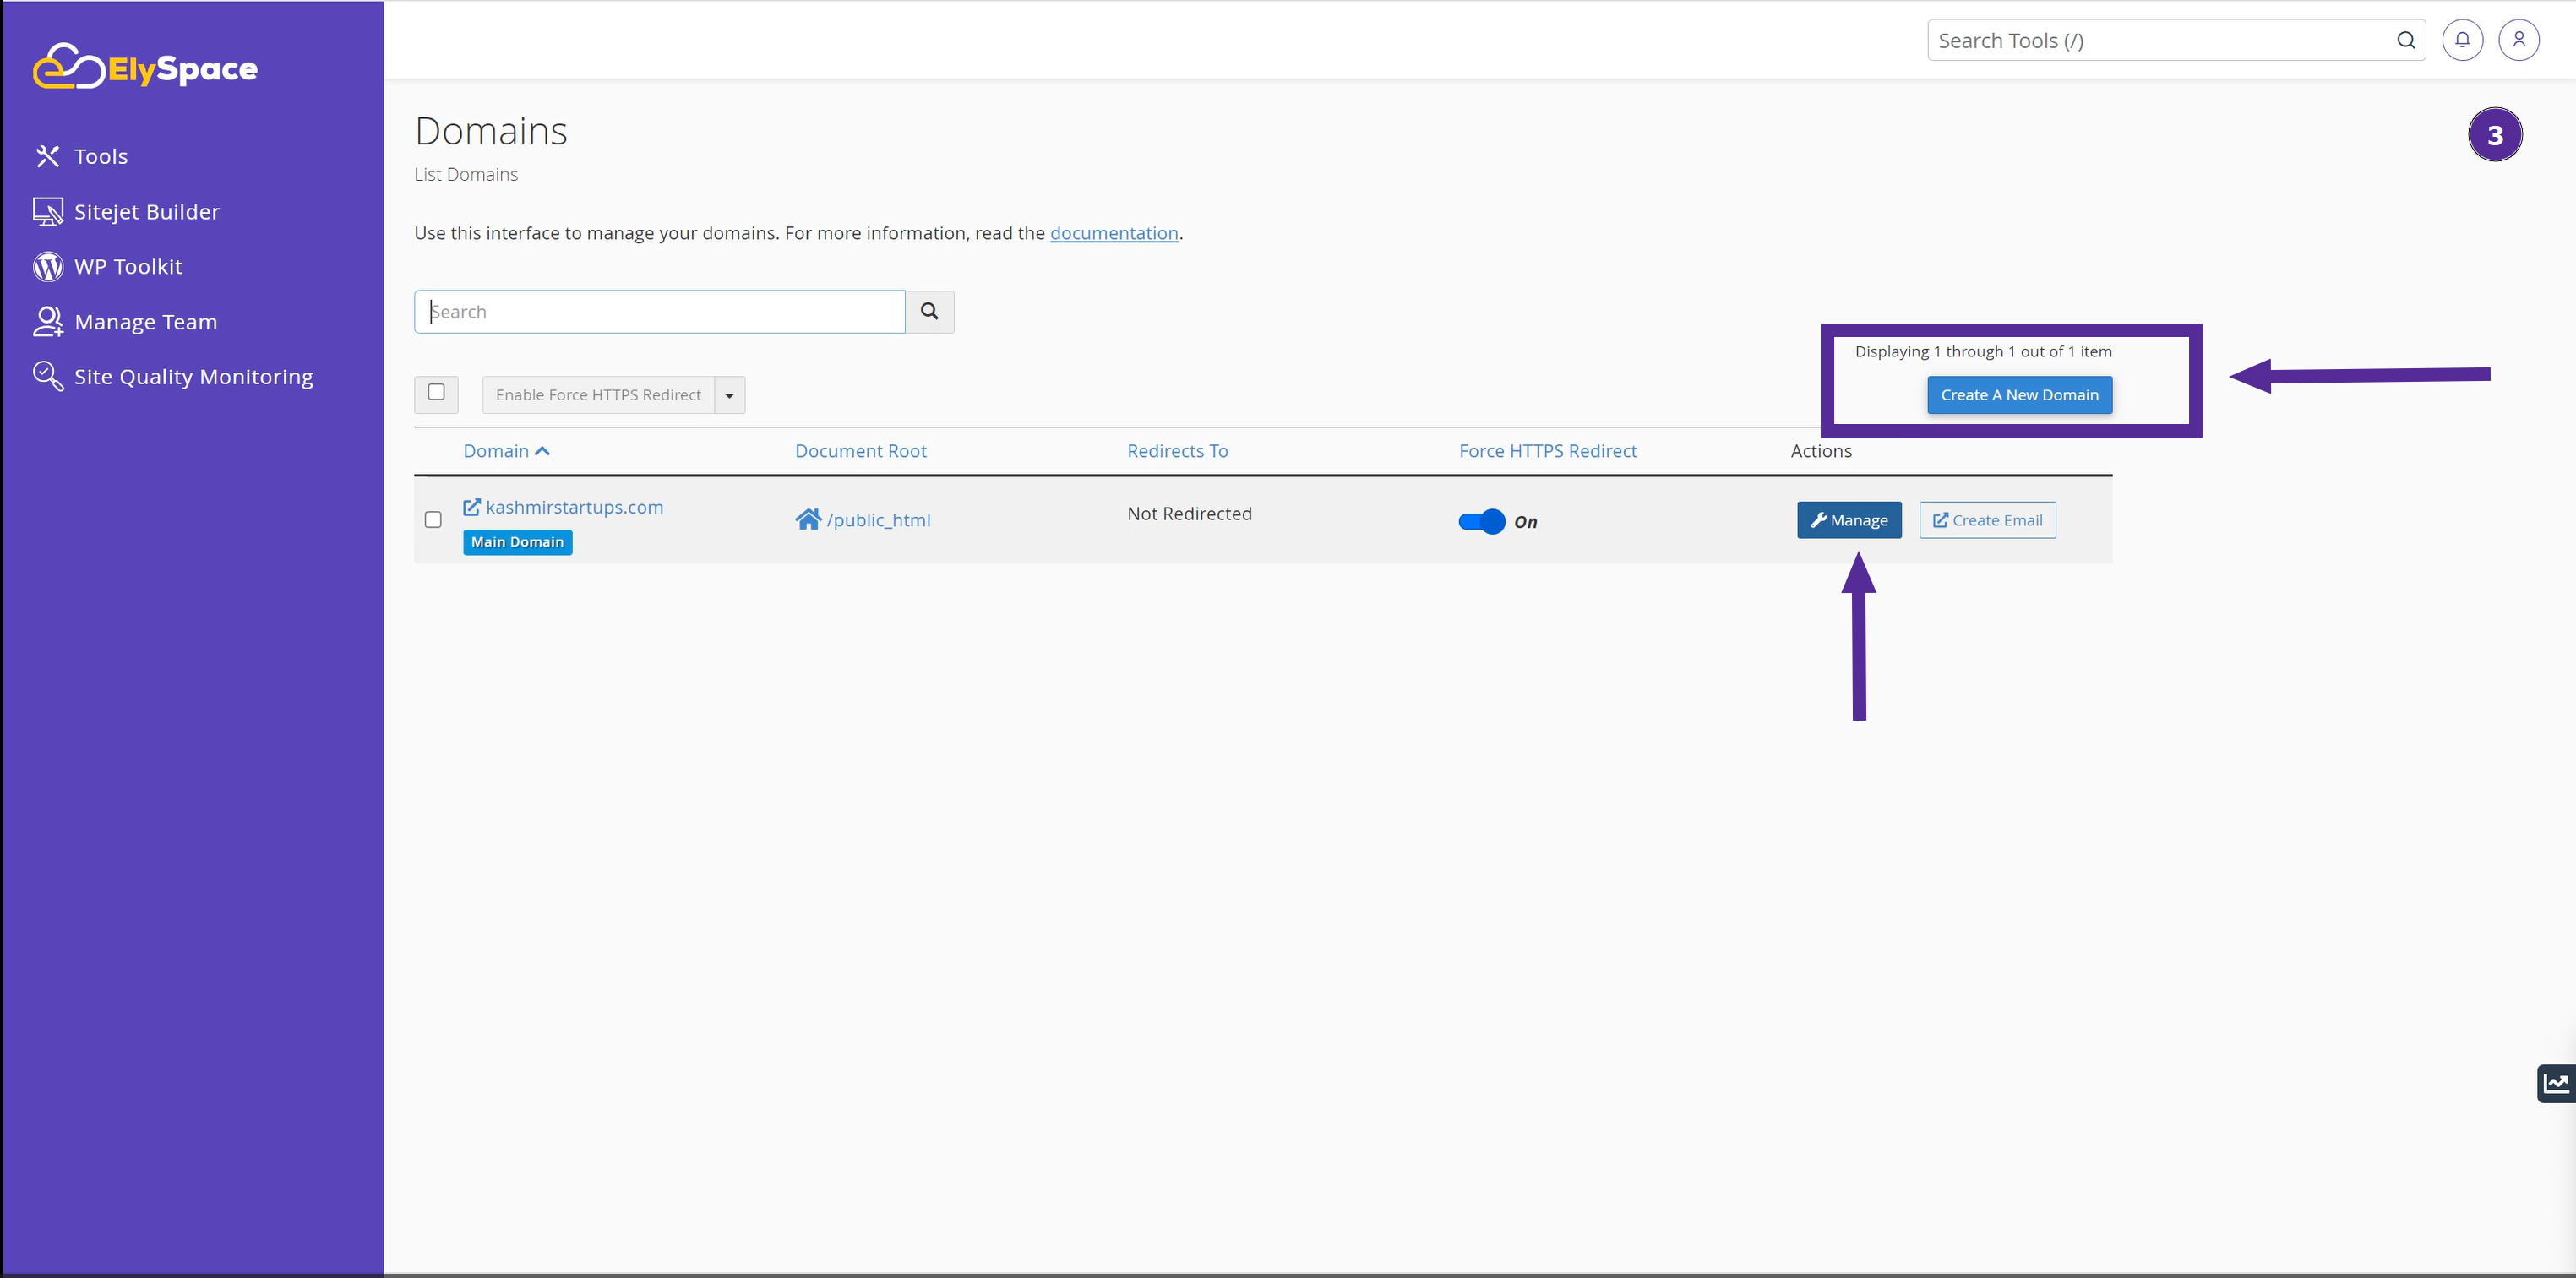
Step 3: Create a New Domain
In the Domains section, click on "Create a New Domain." Here, you can manage your domains and subdomains.
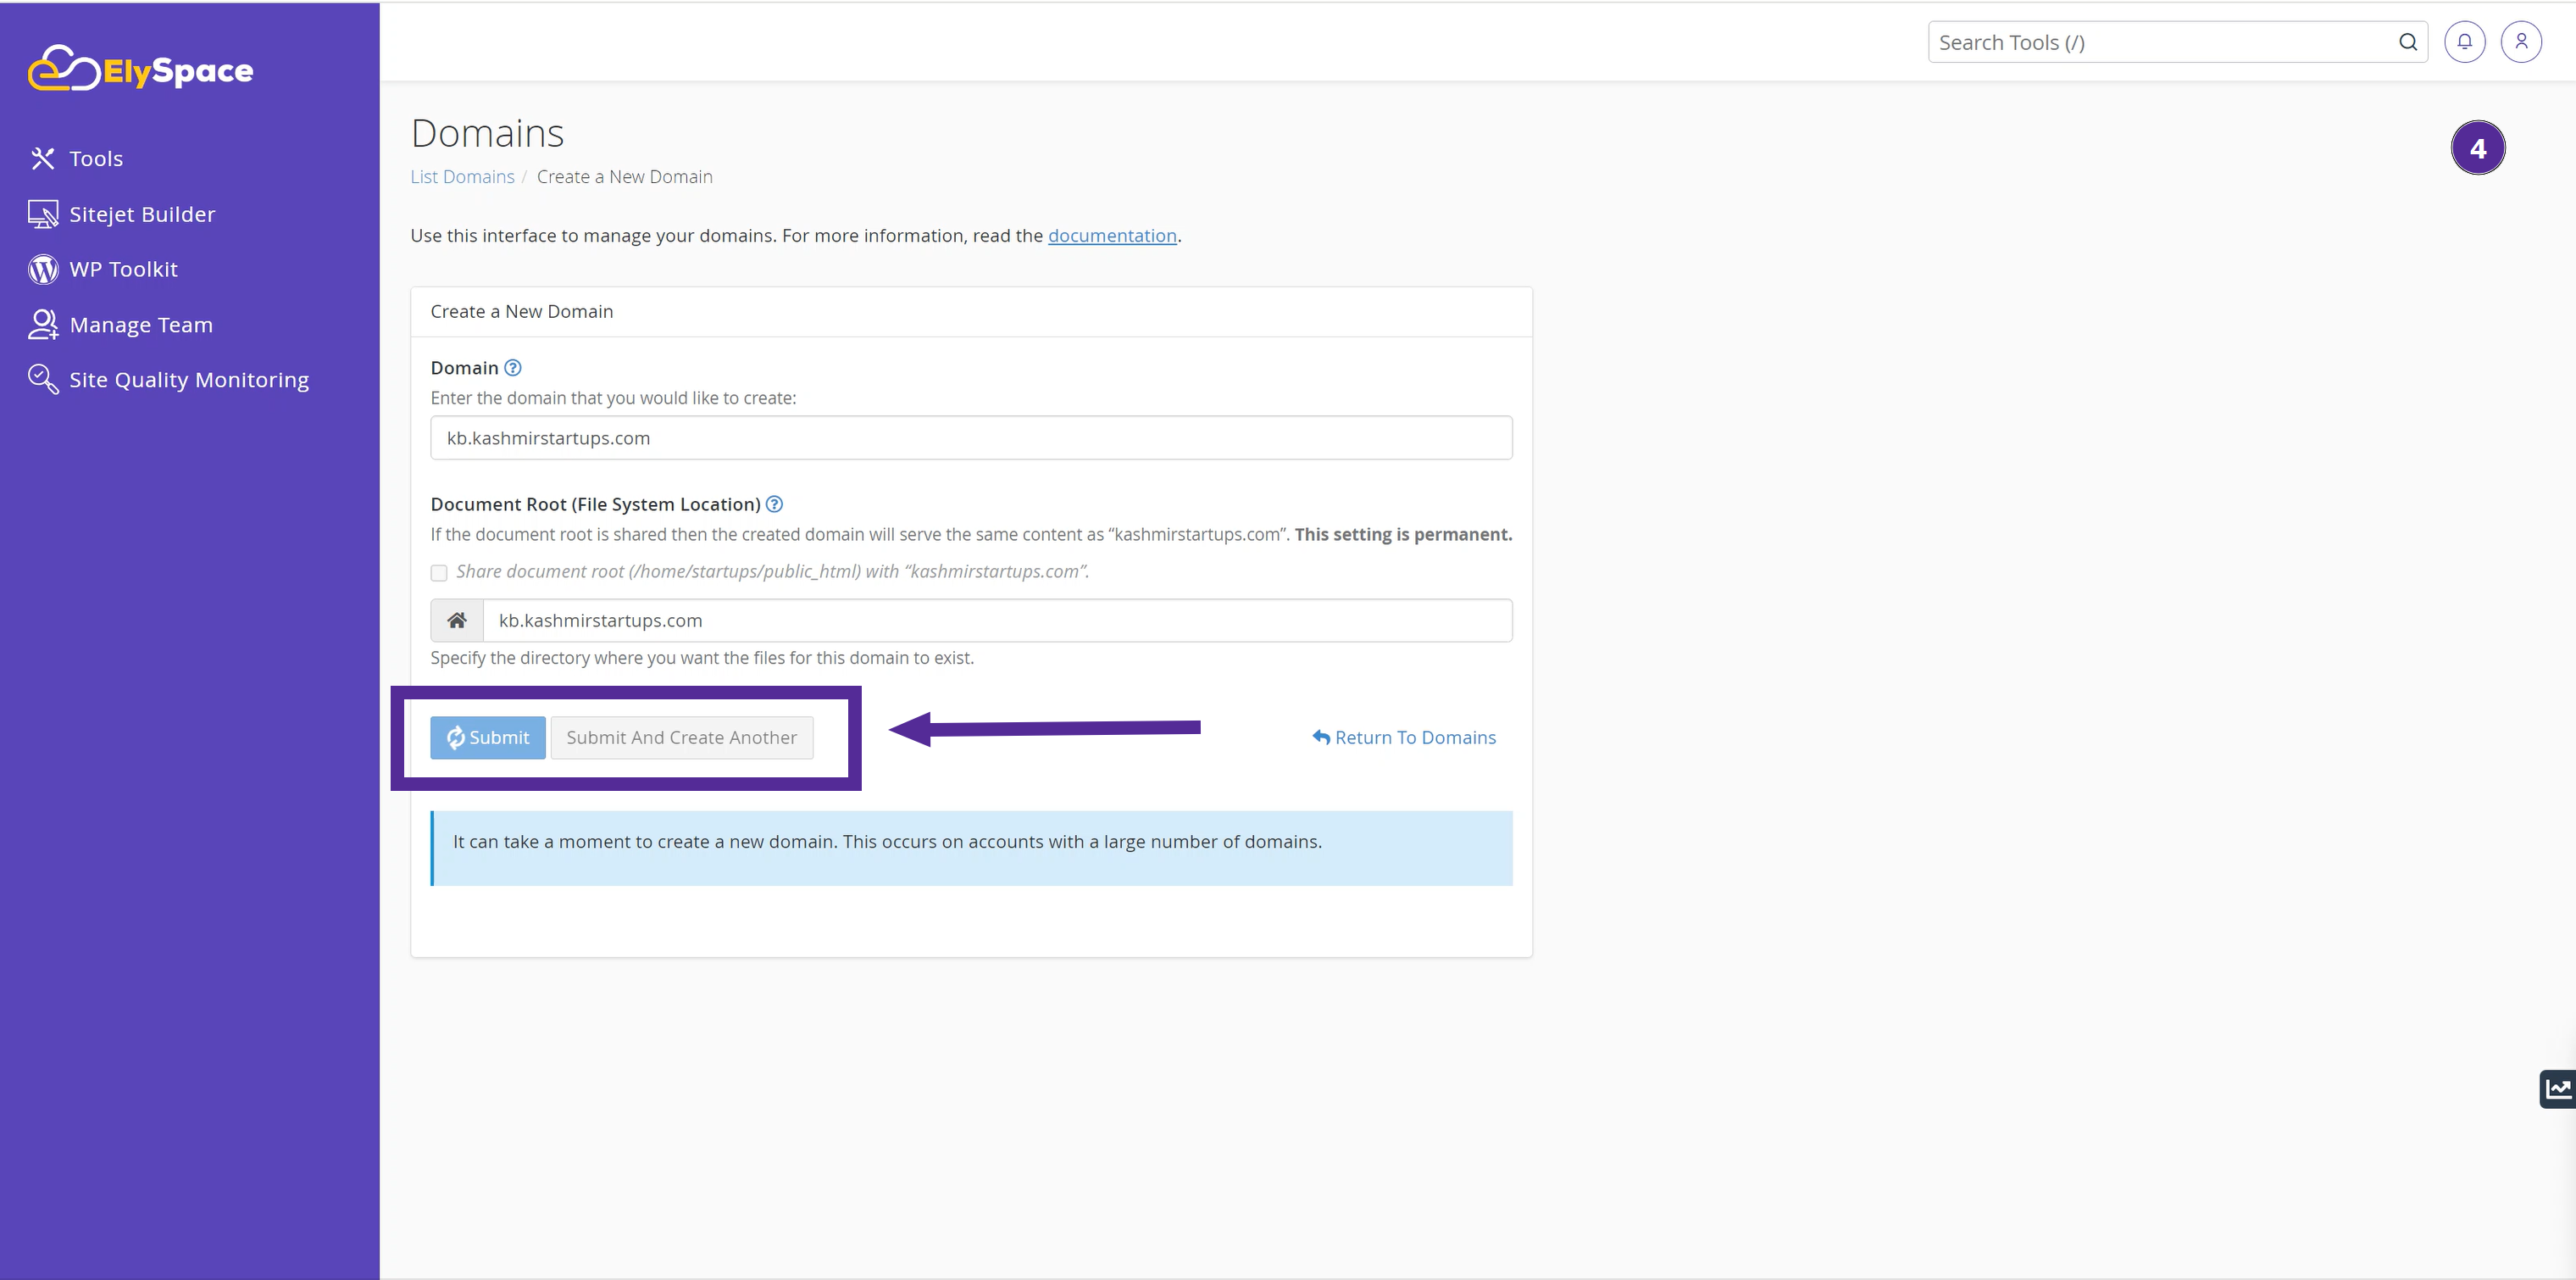
Step 4: Enter Your Subdomain
Type in your desired subdomain name, followed by a period, and your main domain. For example, if you want `test.example.com`, type `test`.
The document root is where your subdomain files are stored. cPanel will automatically fill in the root path using the subdomain name you entered. If you want to store your subdomain files in a different directory, enter the full path here.
Once ready, click "Submit." It may take a few minutes to create your subdomain.
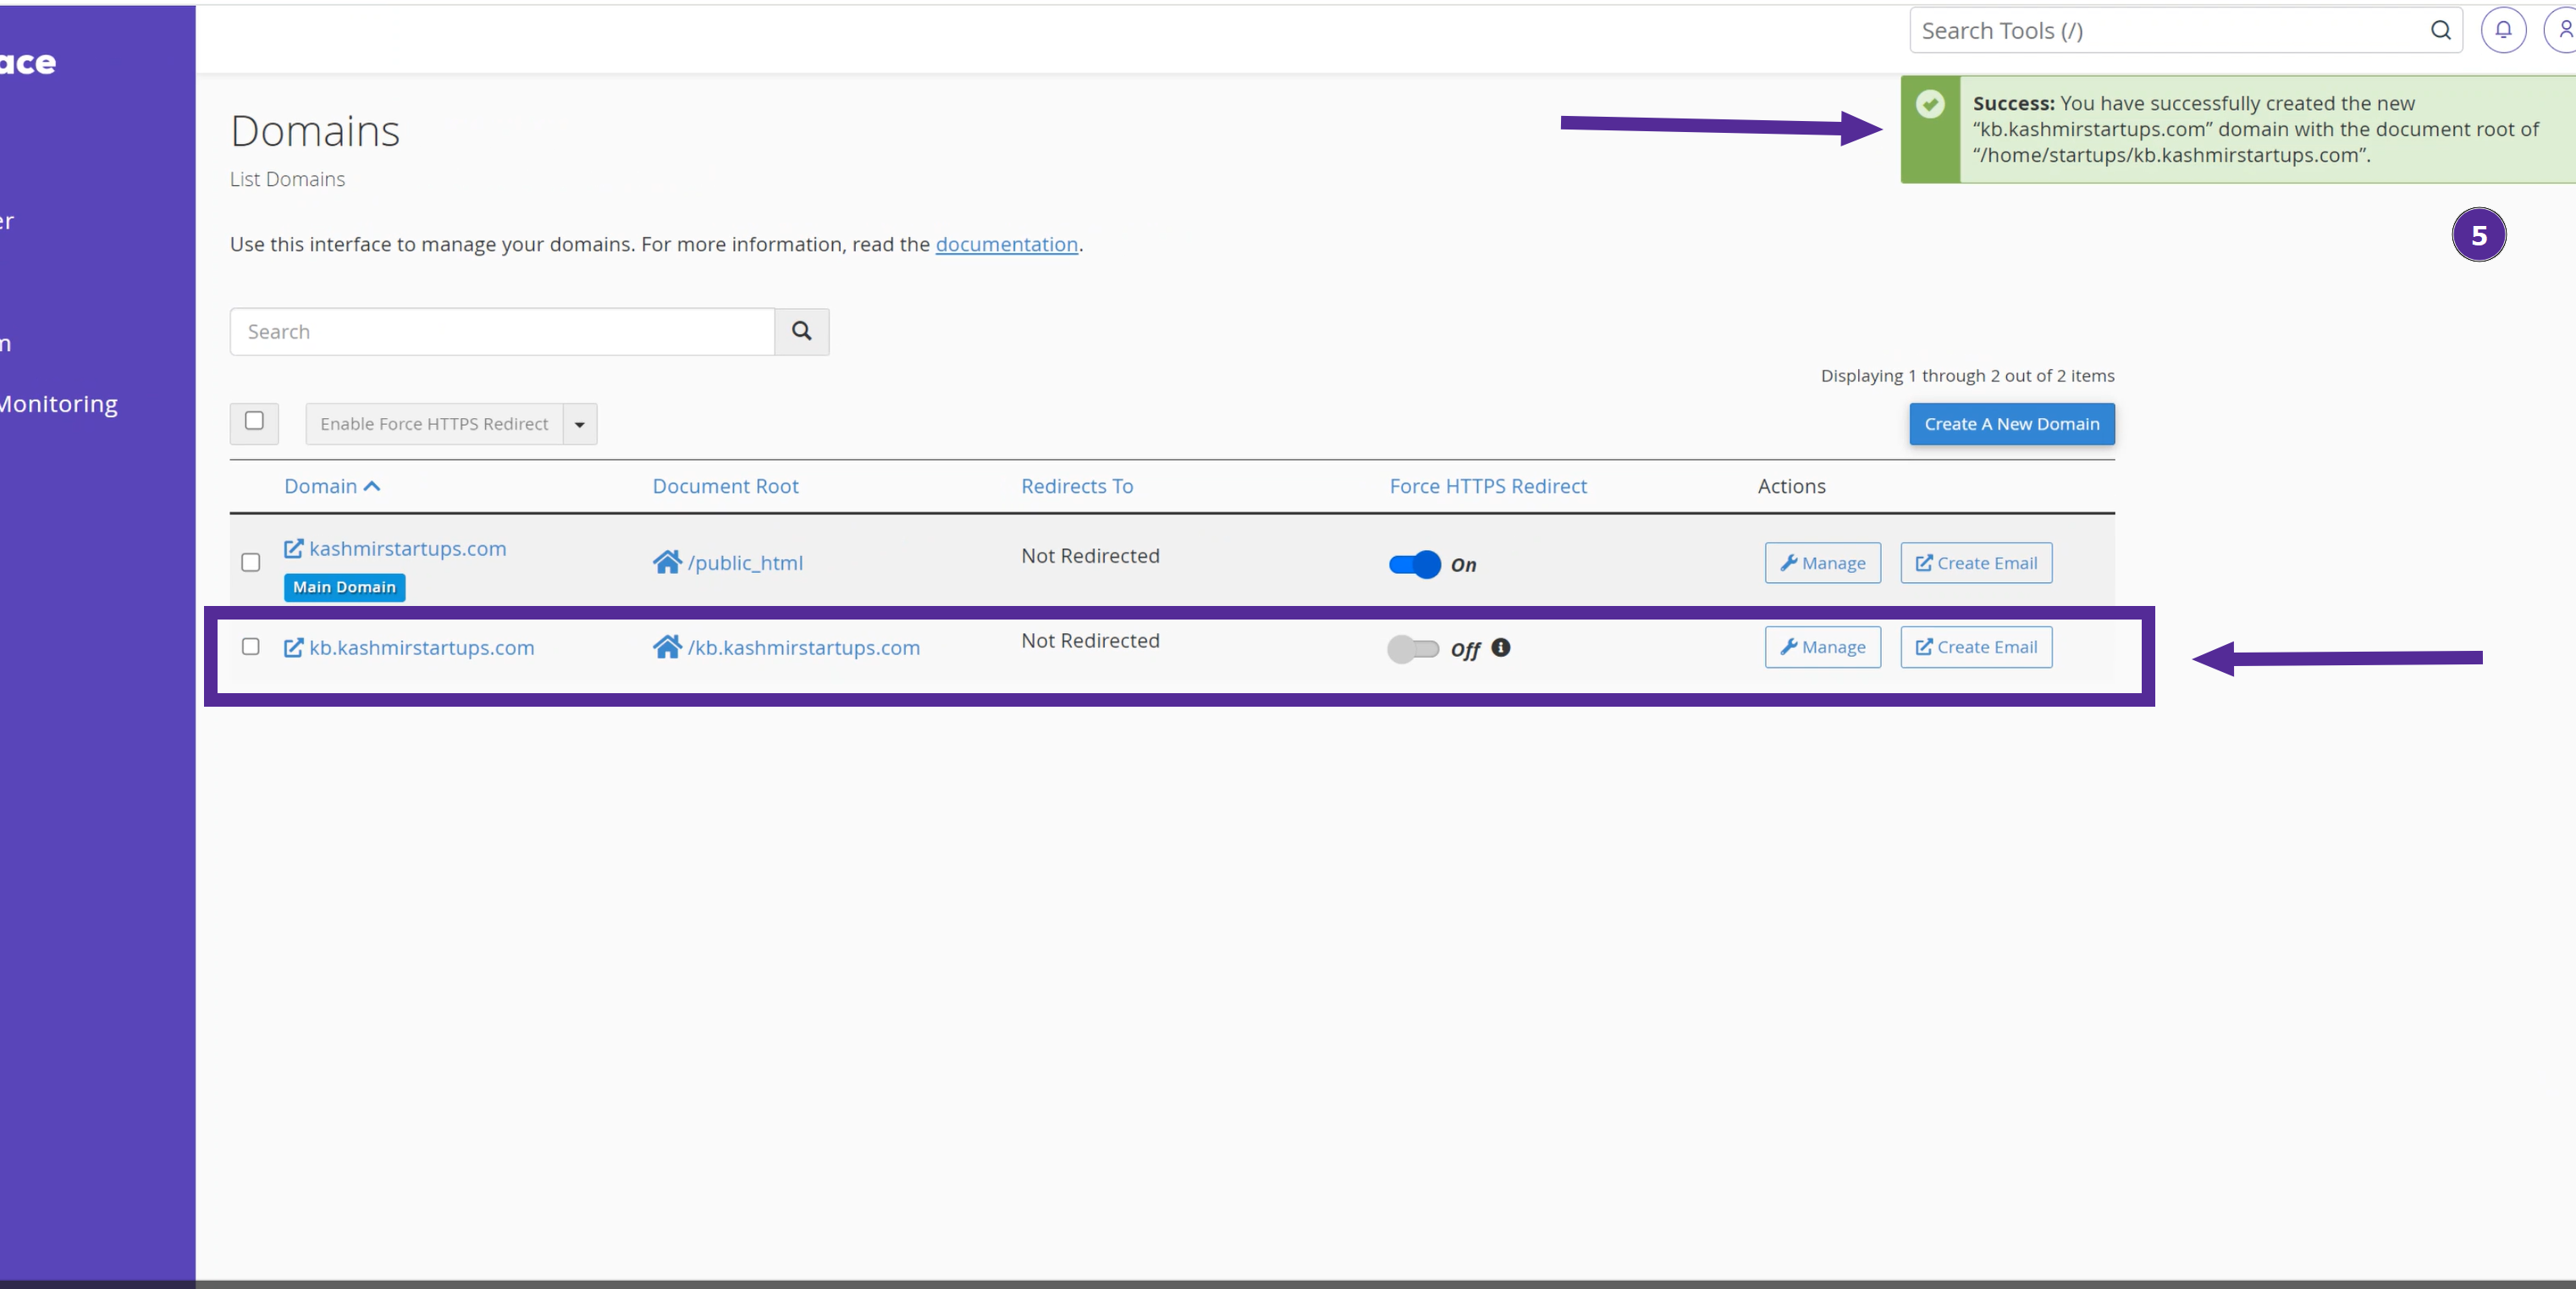
Step 5: Subdomain Creation Successful
You will see a success message indicating that your new subdomain has been created. Your new subdomain will be listed among your other domains.
It usually takes around 30 minutes for a new subdomain to be fully accessible on the web.
Watch Video:
Conclusion
Congratulations! You have successfully created your first subdomain using cPanel. Subdomains are a great way to organize and expand your website. If you encounter any issues, feel free to reach out to ElySpace support for assistance.


