introduction:
Changing the nameservers of your domain on ElySpace is a straightforward process. Follow these steps to update your domain's nameservers:
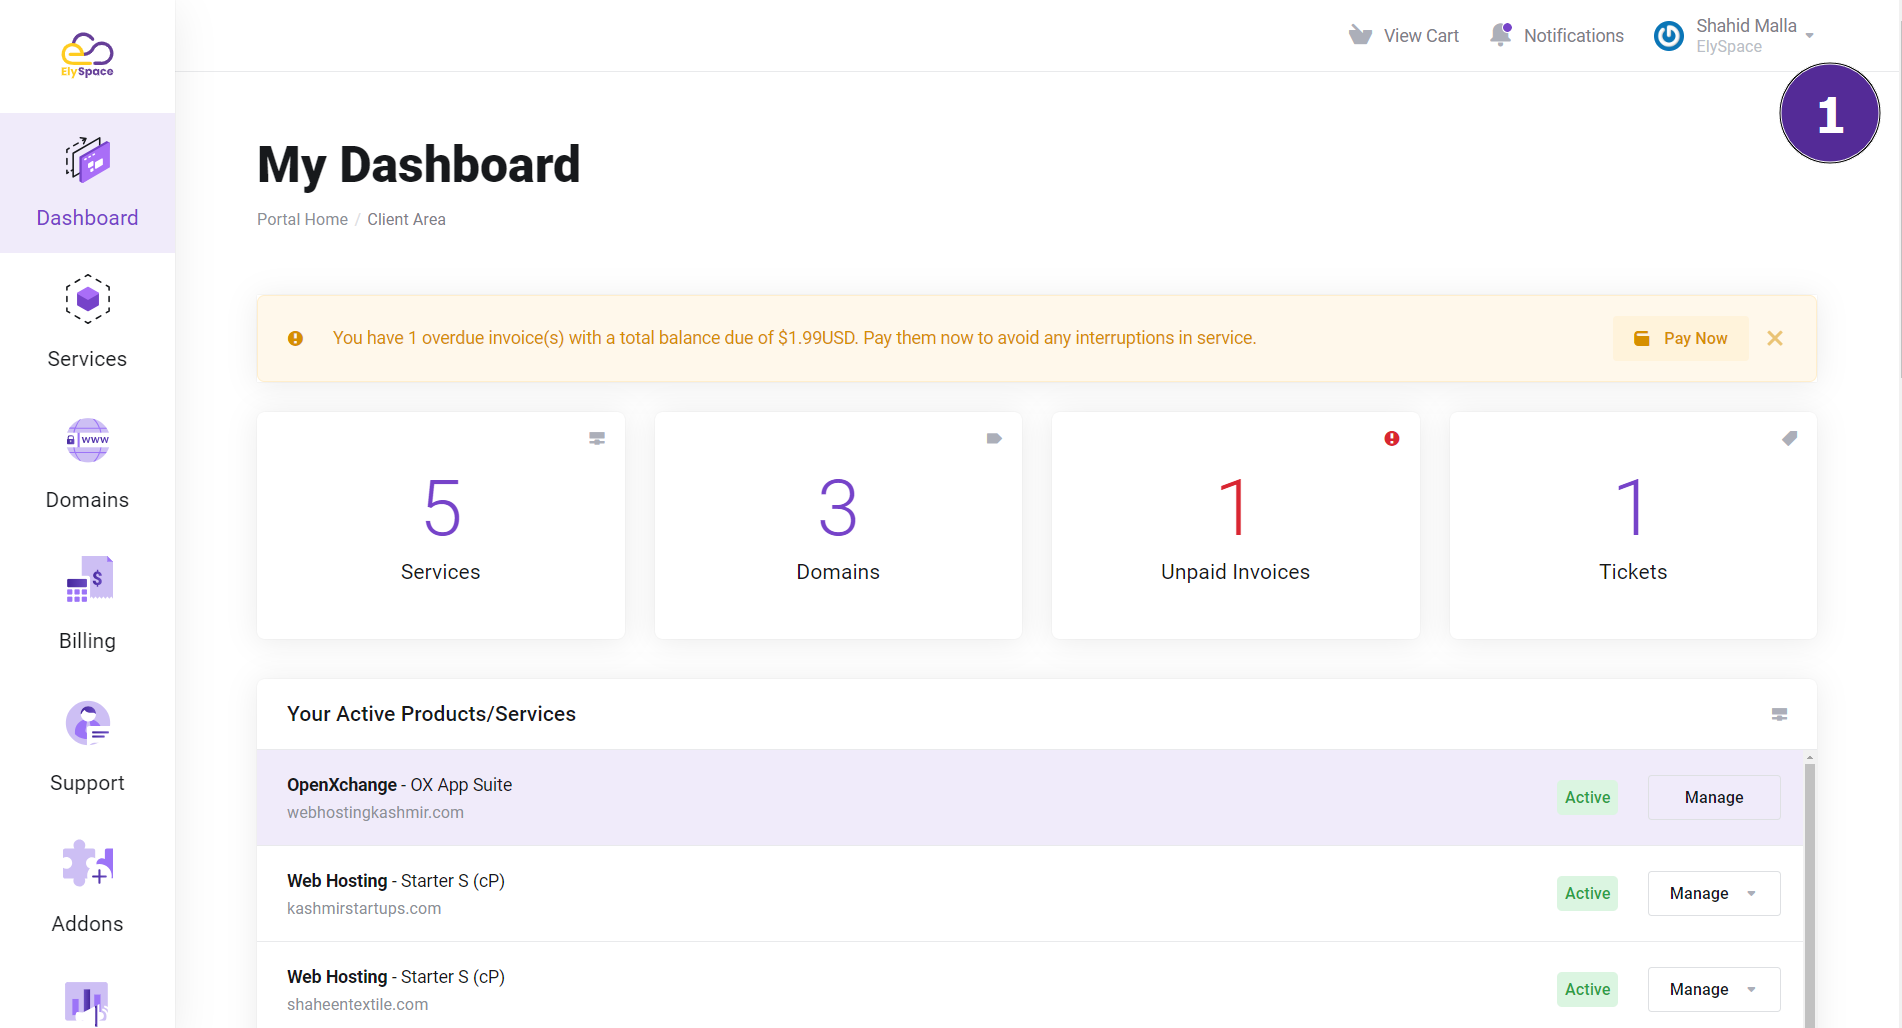
Step 1: Go to Your ElySpace Dashboard:
Log in to your ElySpace account and go to your dashboard. This is where you can manage your account and domains.
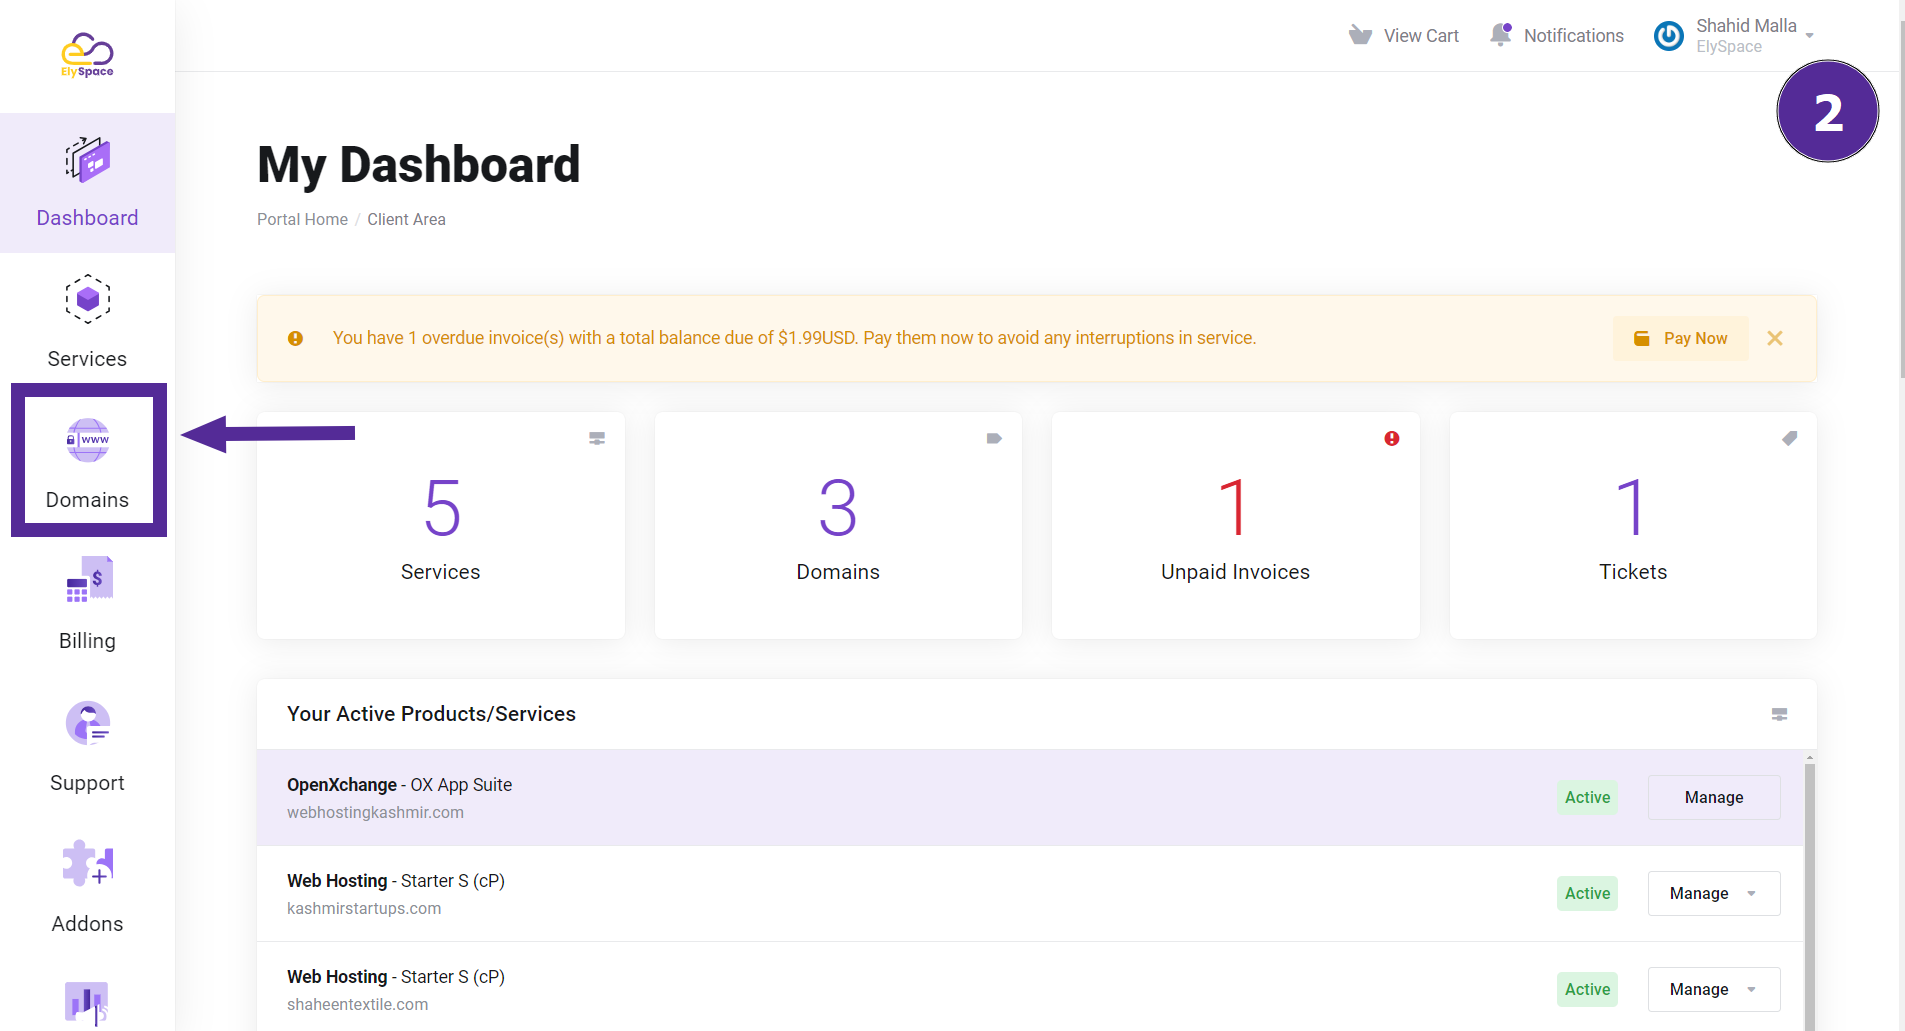
Step 2: Navigate to the Domains Section:
On the left side of the dashboard, click on the "Domains" option. This will take you to the domains management area.
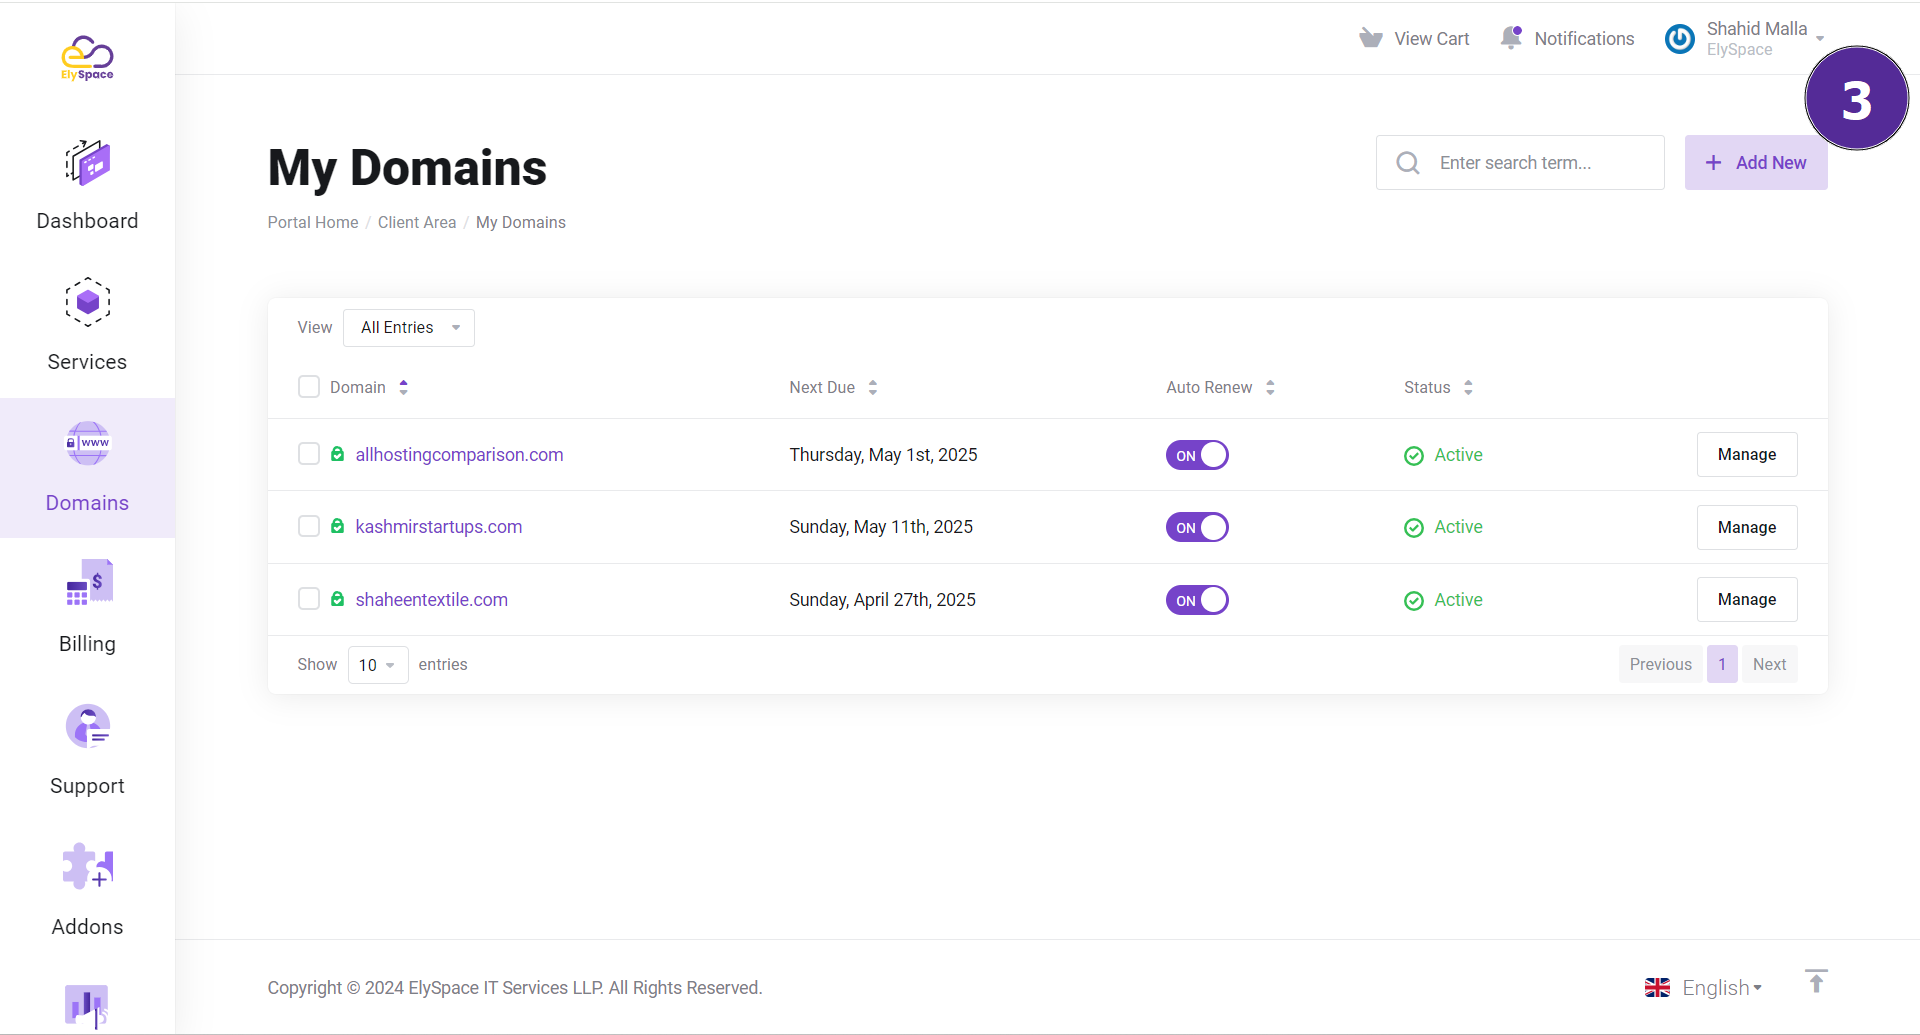
Step 3: Access Your Domain Management Page:
You will see the "My Domains" page. This page lists all your registered domains.
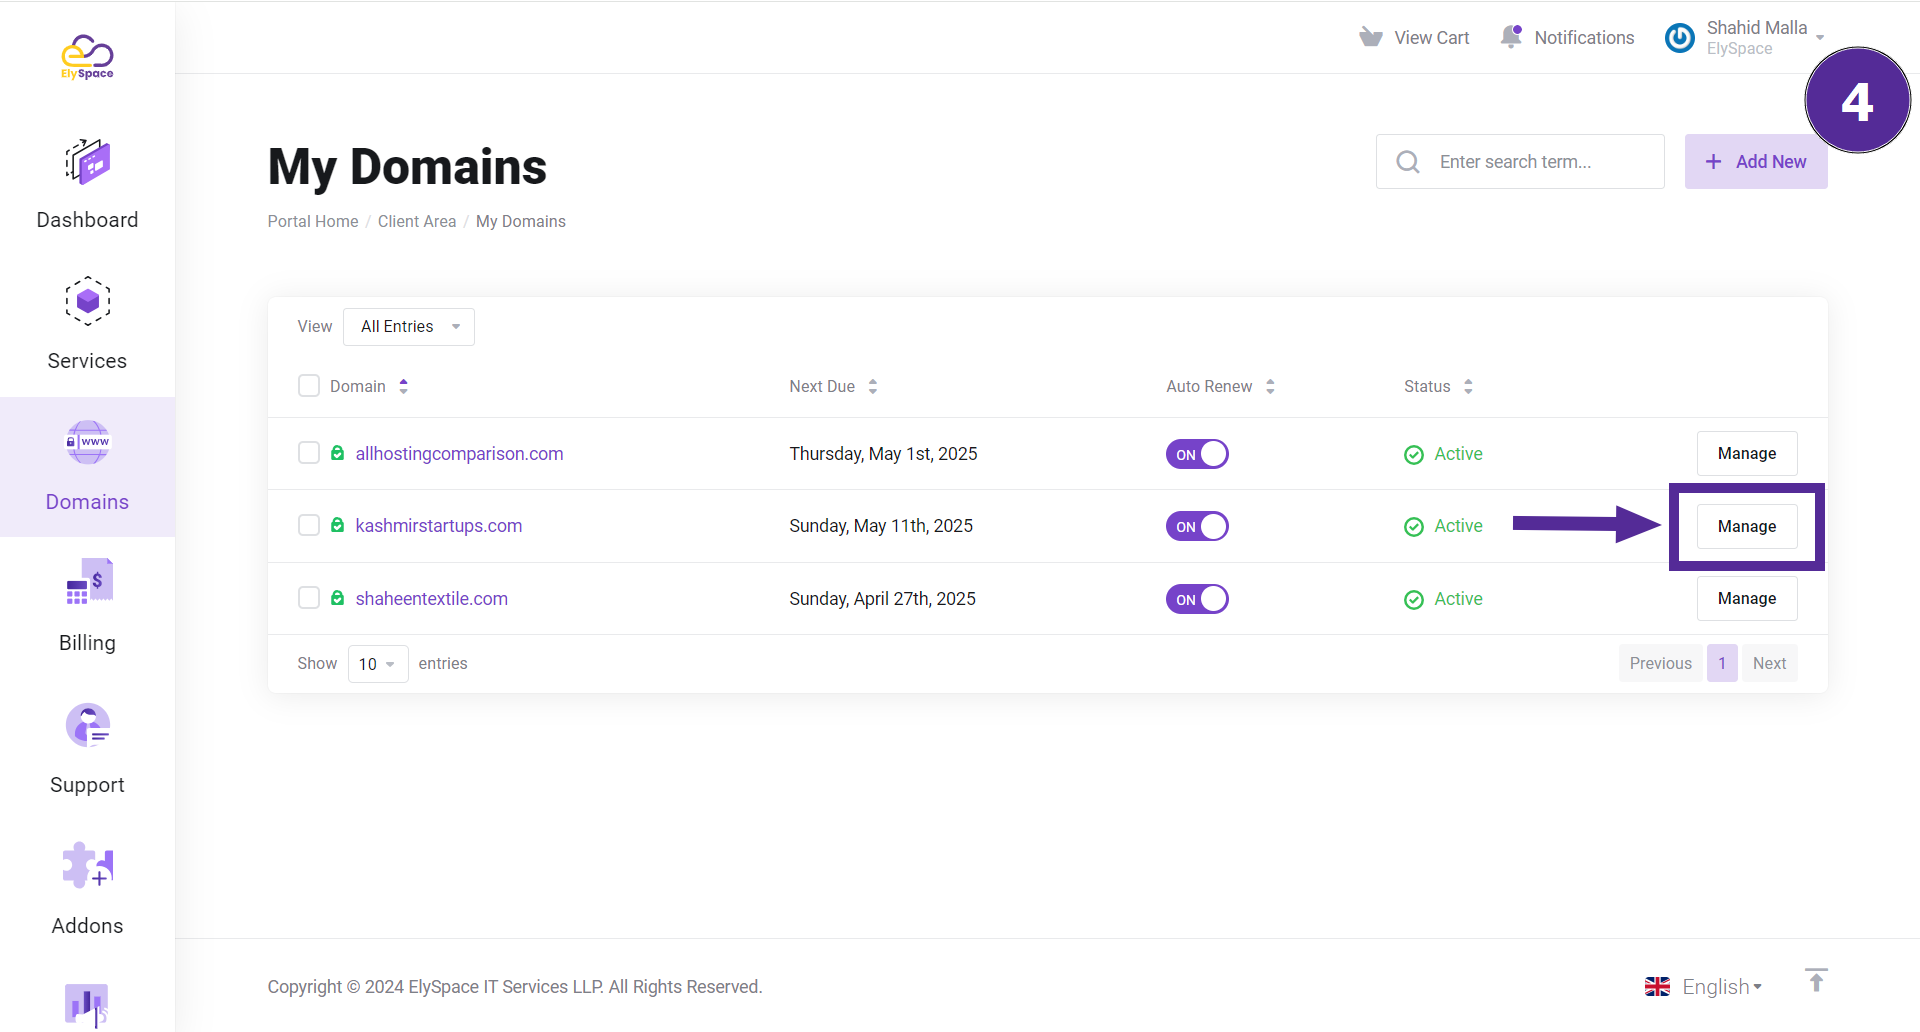
Step 4: Select the Domain to Manage:
Find the domain you want to update and click on the "Manage" option next to it. This will open the domain settings.
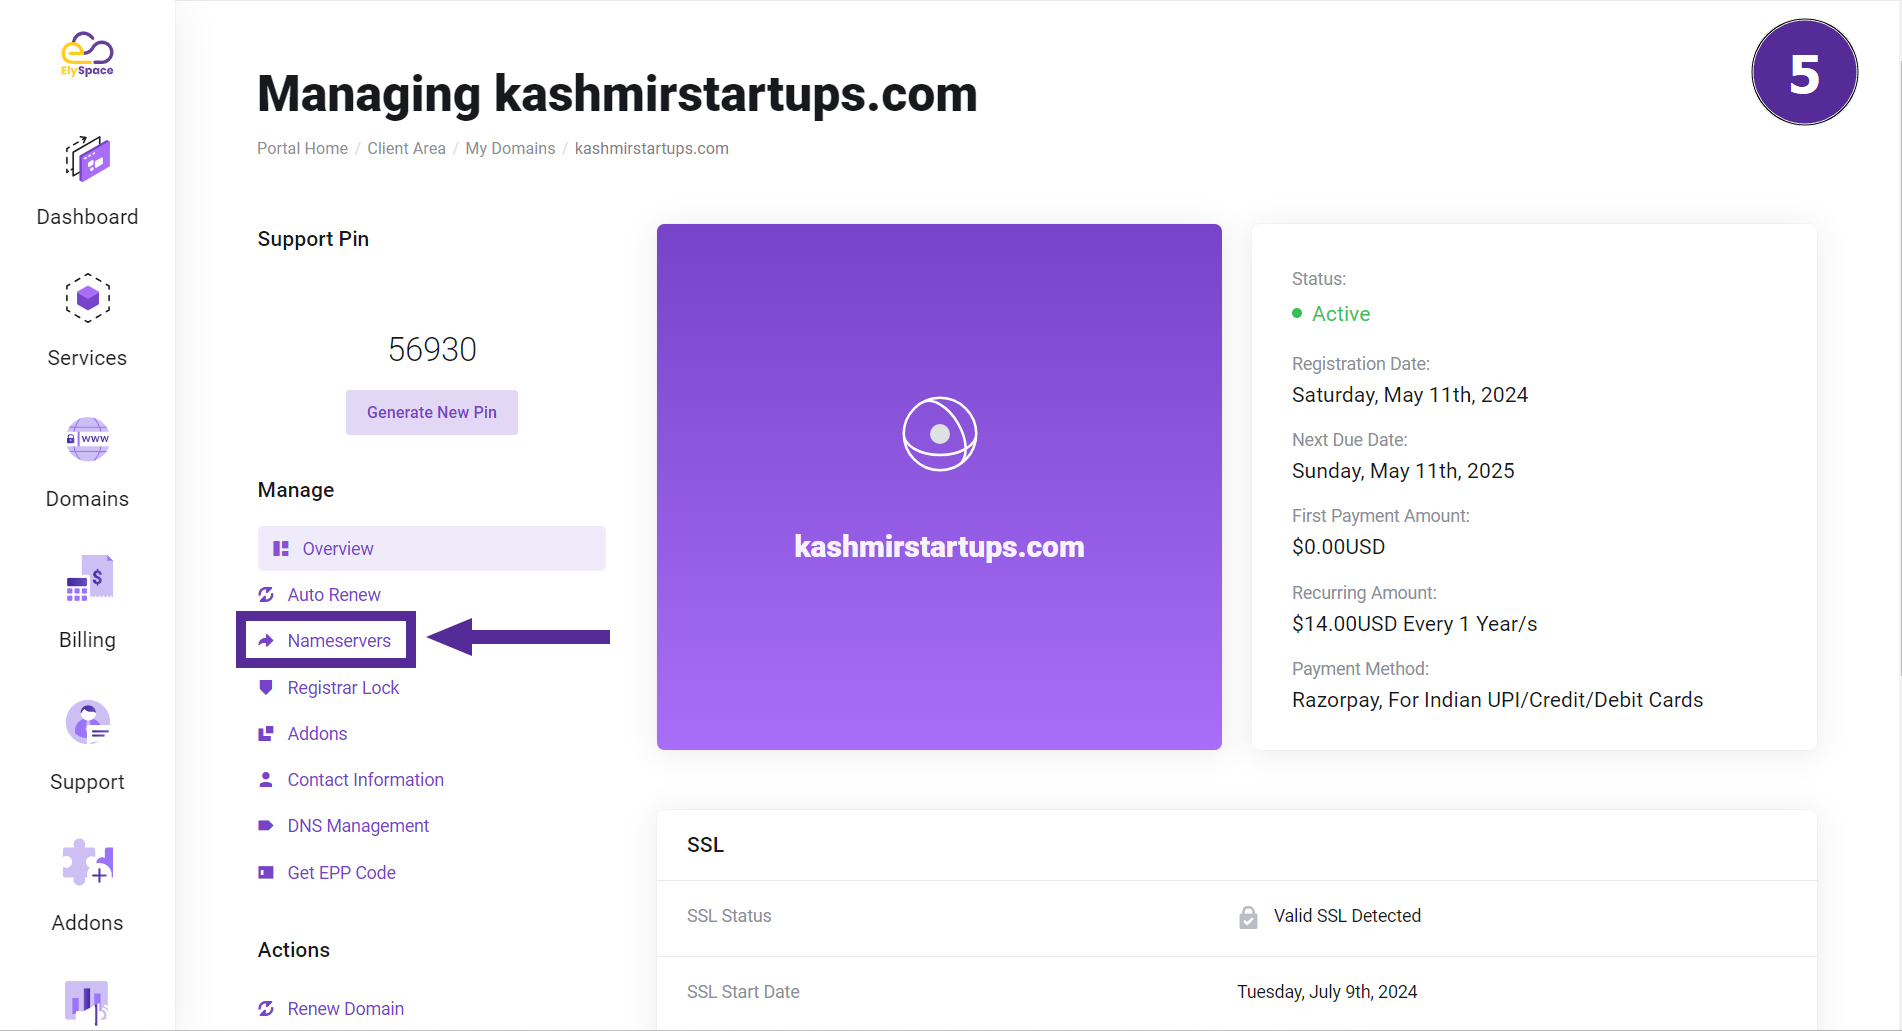
Step 5: Navigate to Nameserver Settings:
On the domain settings page, look for the "Nameserver" section and click on it. Here, you can point your domain to new nameservers.
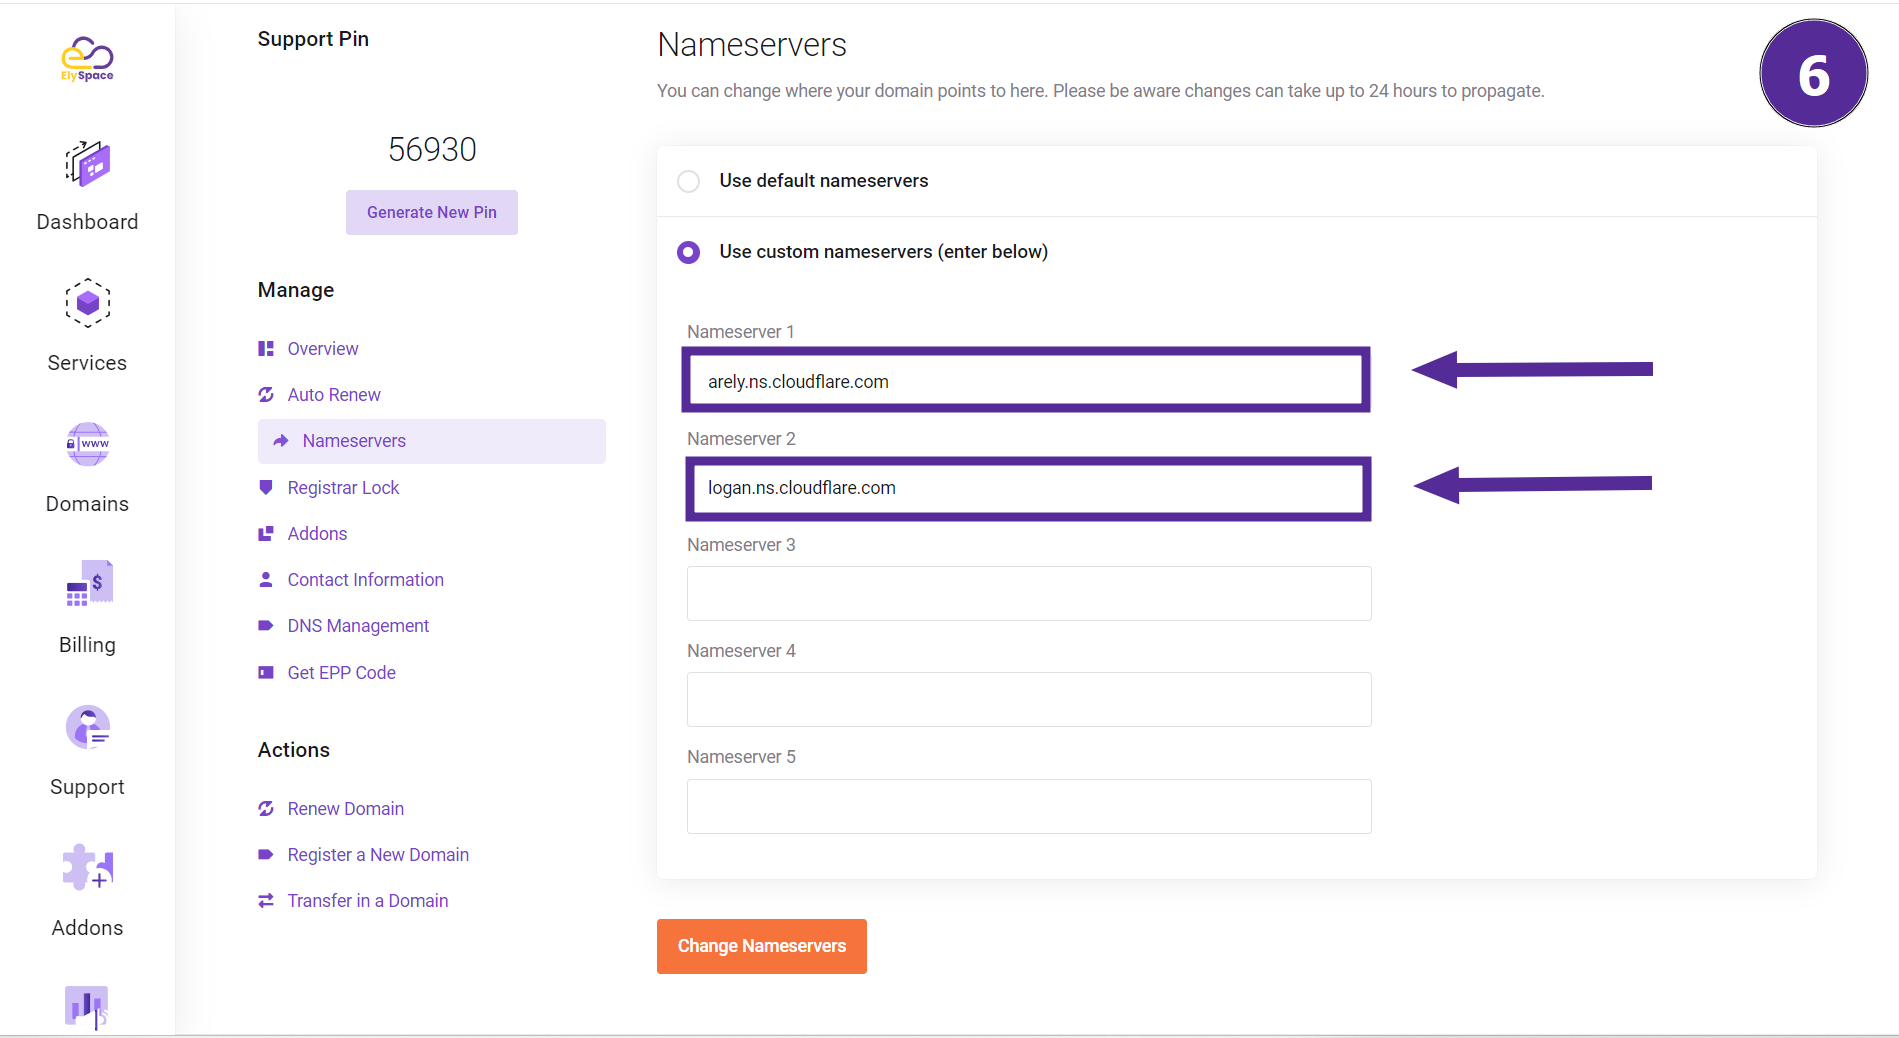
Step 6: Update Nameserver Information:
If you are using custom nameservers, enter the new nameserver details in the provided fields (e.g., Nameserver 1 and Nameserver 2).
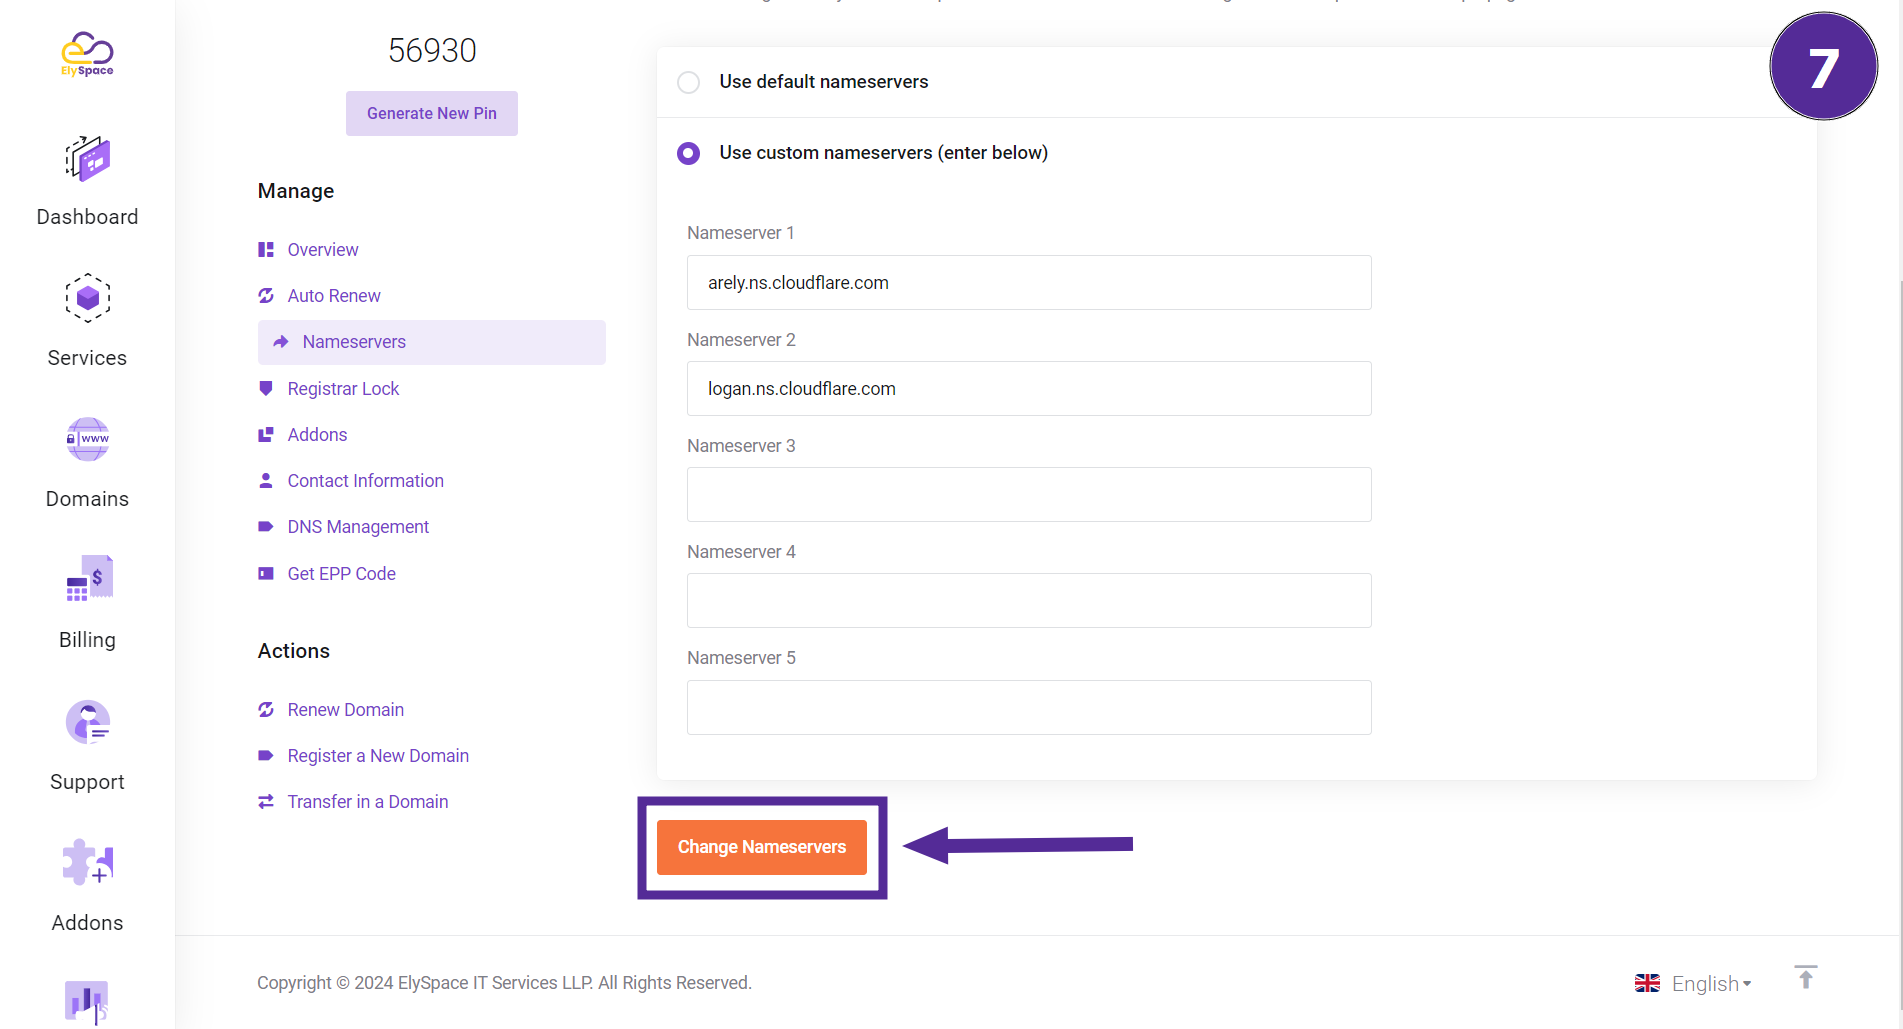
Step 7: Save Changes:
After entering the new nameserver details, click the "Change Nameserver" button to save your changes.
Watch Video:
conclusion:
Following these steps will successfully update the nameservers for your domain on ElySpace. If you have any questions or need further assistance, our dedicated support team is here to help.


