Introduction
Creating a MySQL database on cPanel with ElySpace is straightforward. Follow these detailed steps to get your database up and running:
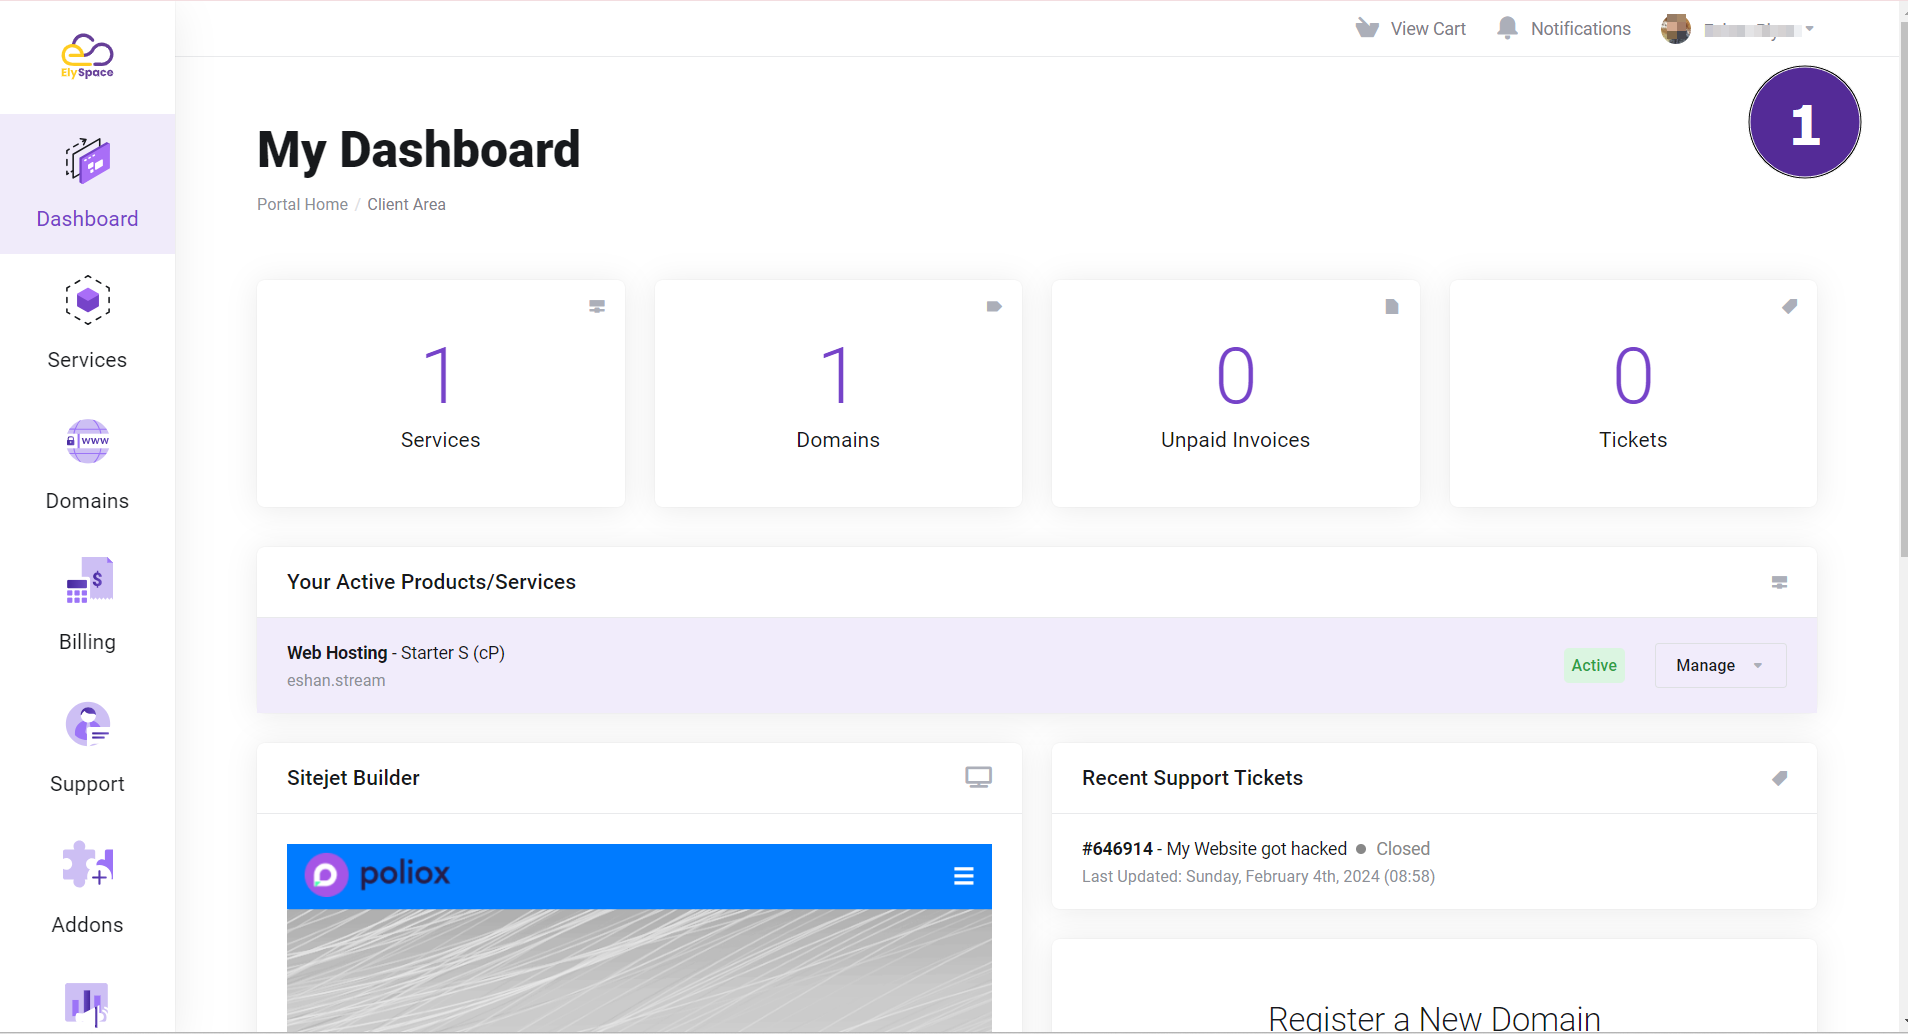
step 1: Go to your Dashboard on ElySpace:
Log in to your ElySpace account and navigate to 'My Dashboard'. This is where you can manage all your services and account settings.
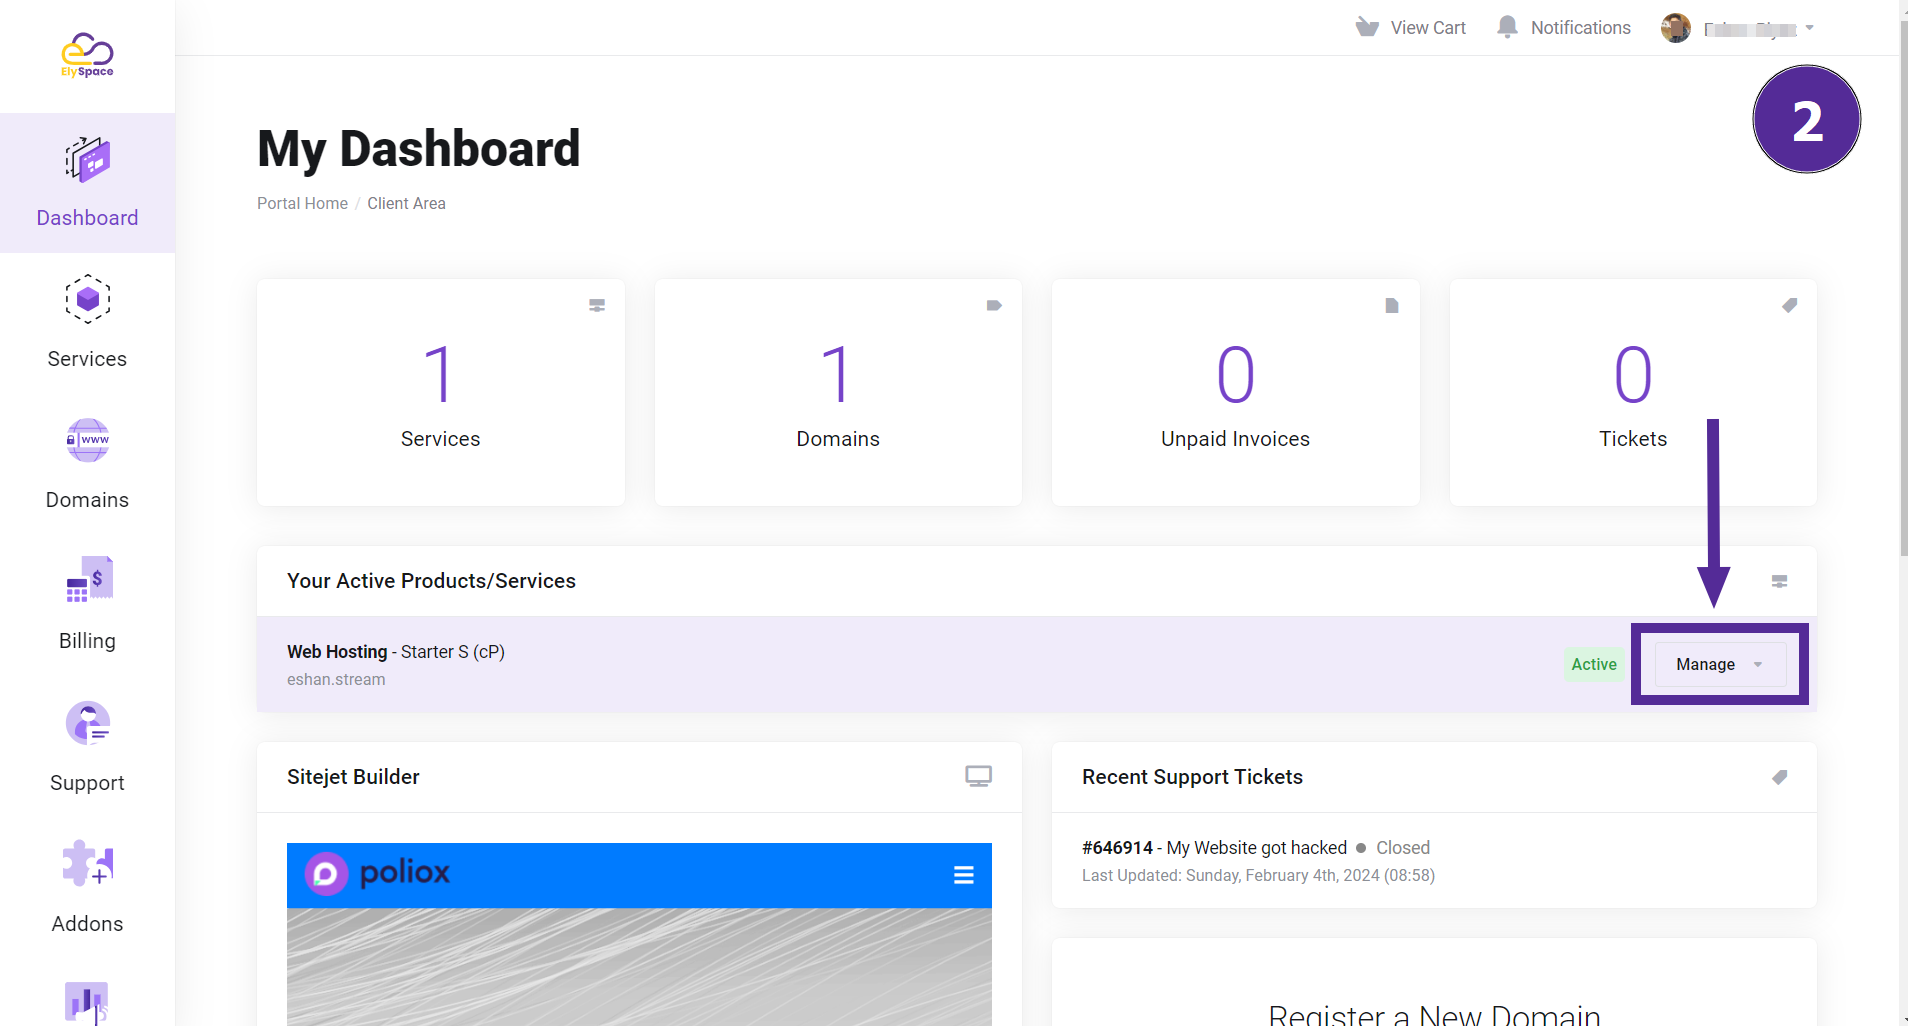
step 2: Click on 'Manage':
On the right side of your dashboard, you will see the option to 'Manage'. This allows you to access the detailed settings of your hosting services. Click on it.
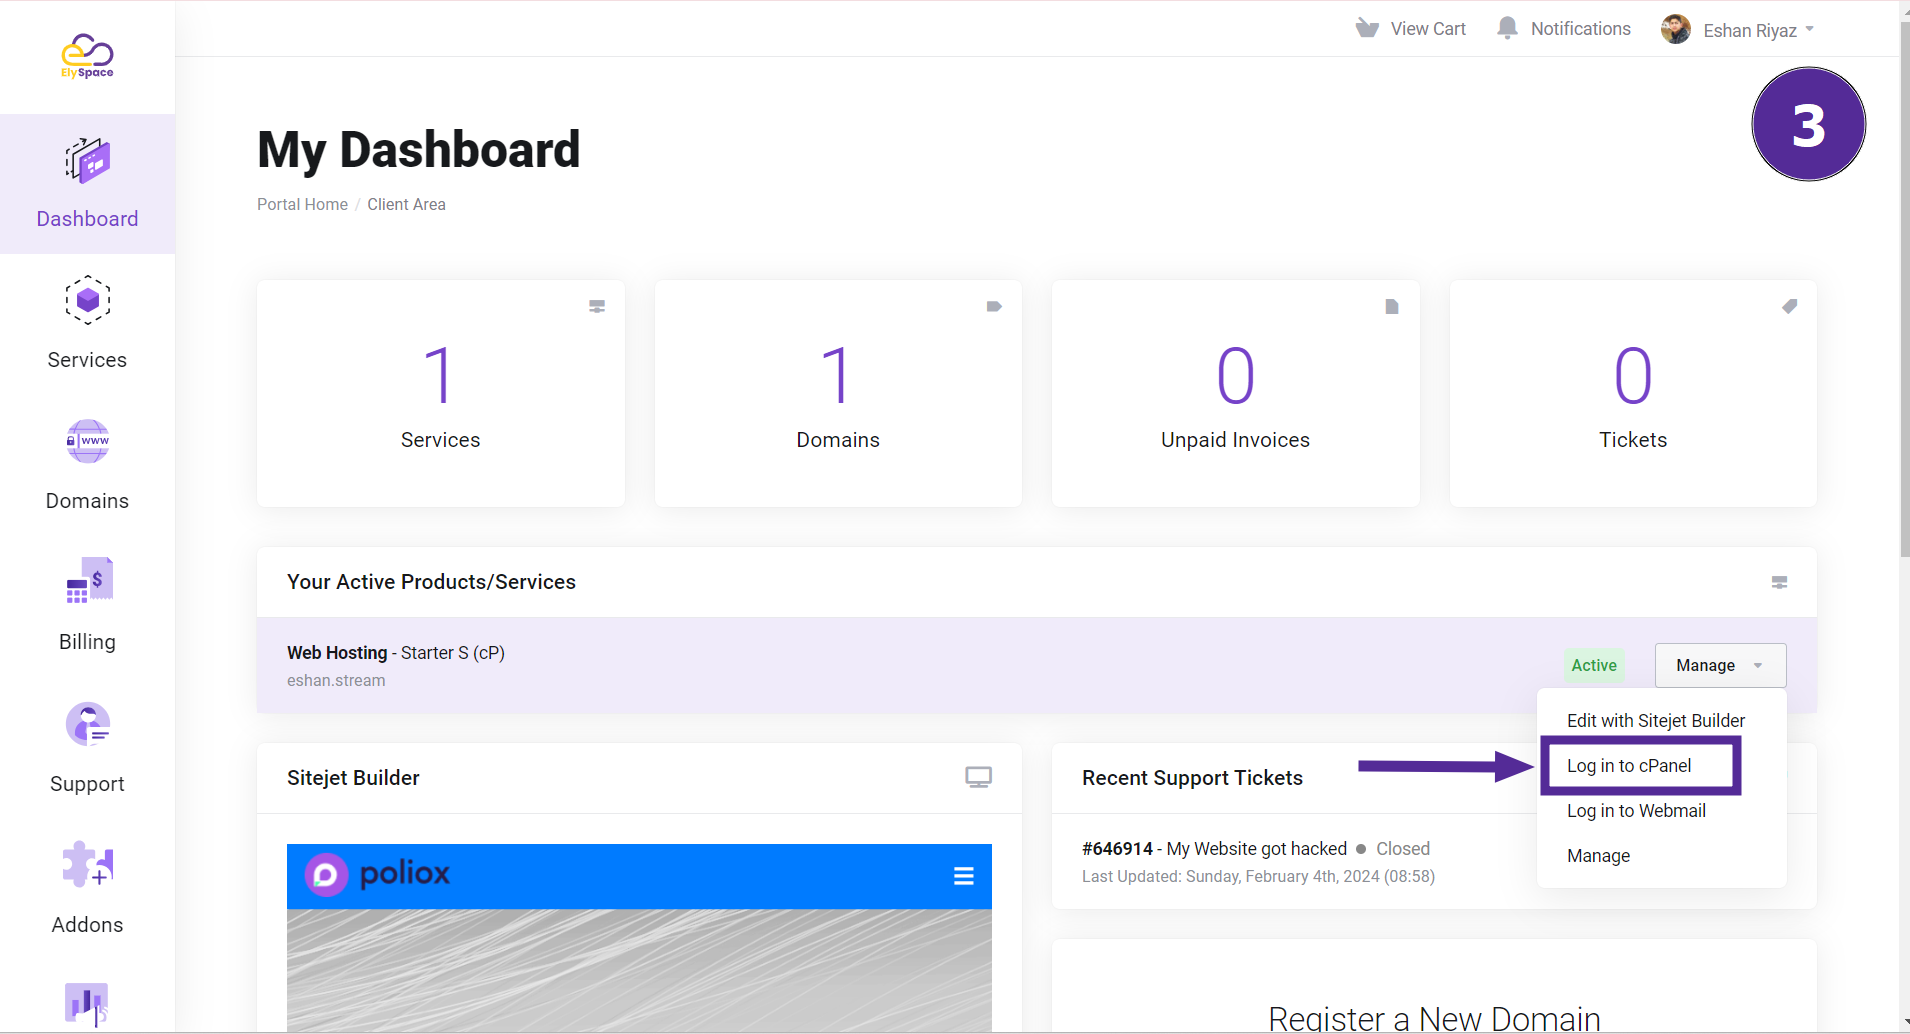
step 3: Log in to cPanel:
After clicking 'Manage'. you will see an option to 'Log in to cPanel'. Click on it to access your cPanel dashboard.
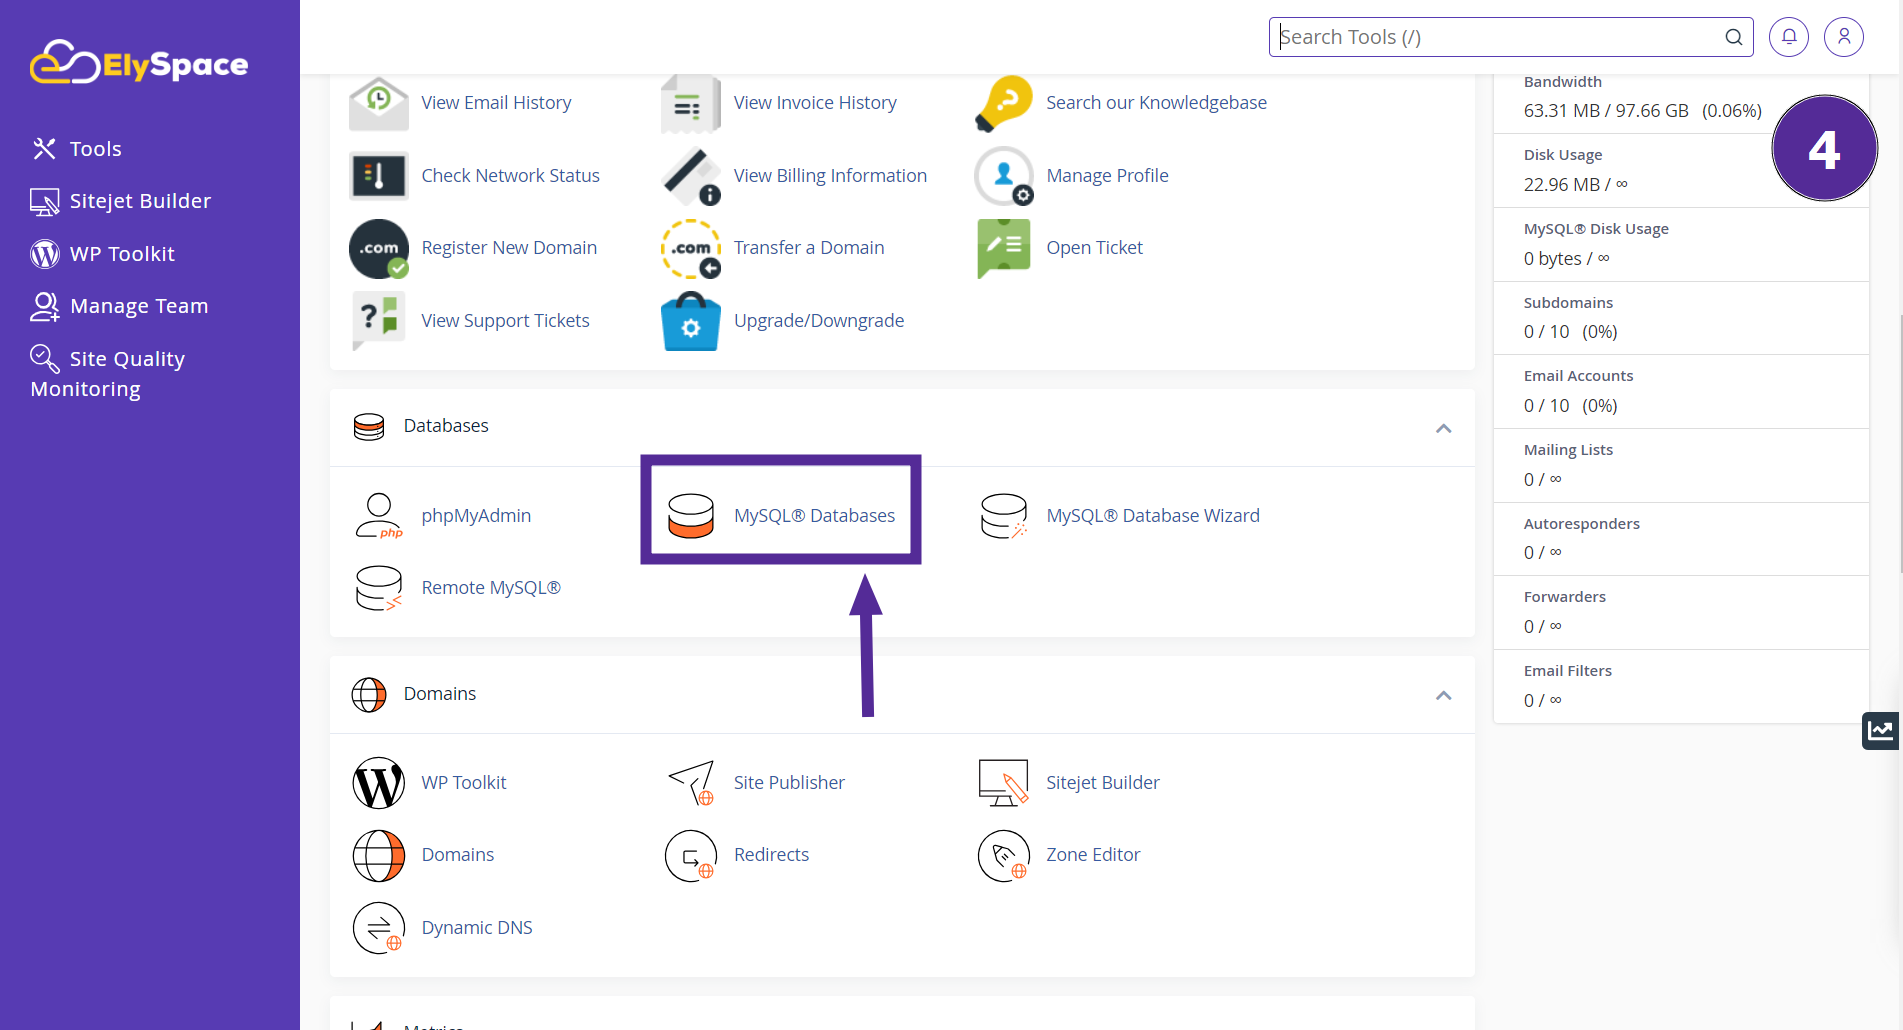
step 4: Access the MySQL Database Section:
Once you are logged into cPanel, scroll down until you see the 'Databases' section. Here, you will find various database management options. Click on 'MySQL Databases' to proceed.
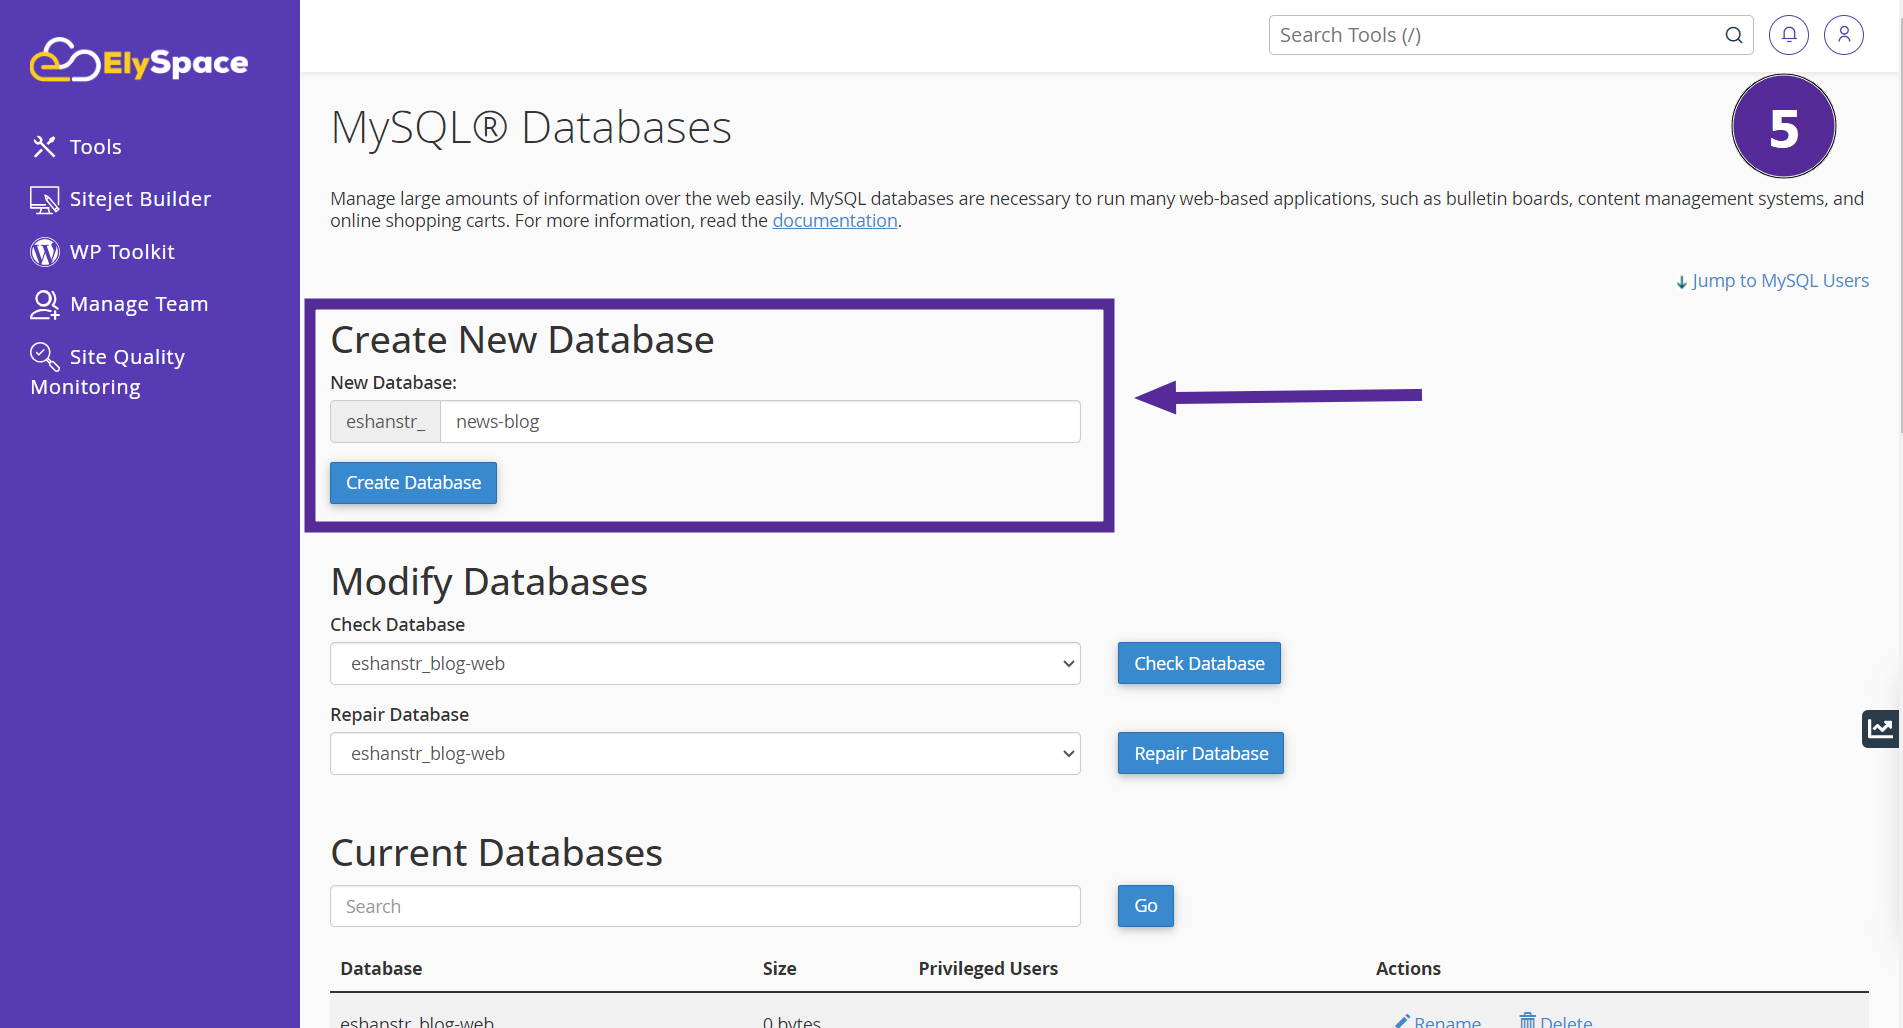
step 5: Create a New Database:
In the MySQL Databases section, you will see an option to 'Create a New Database'. Enter your desired database name in the provided field. Then, click 'Create Database'.
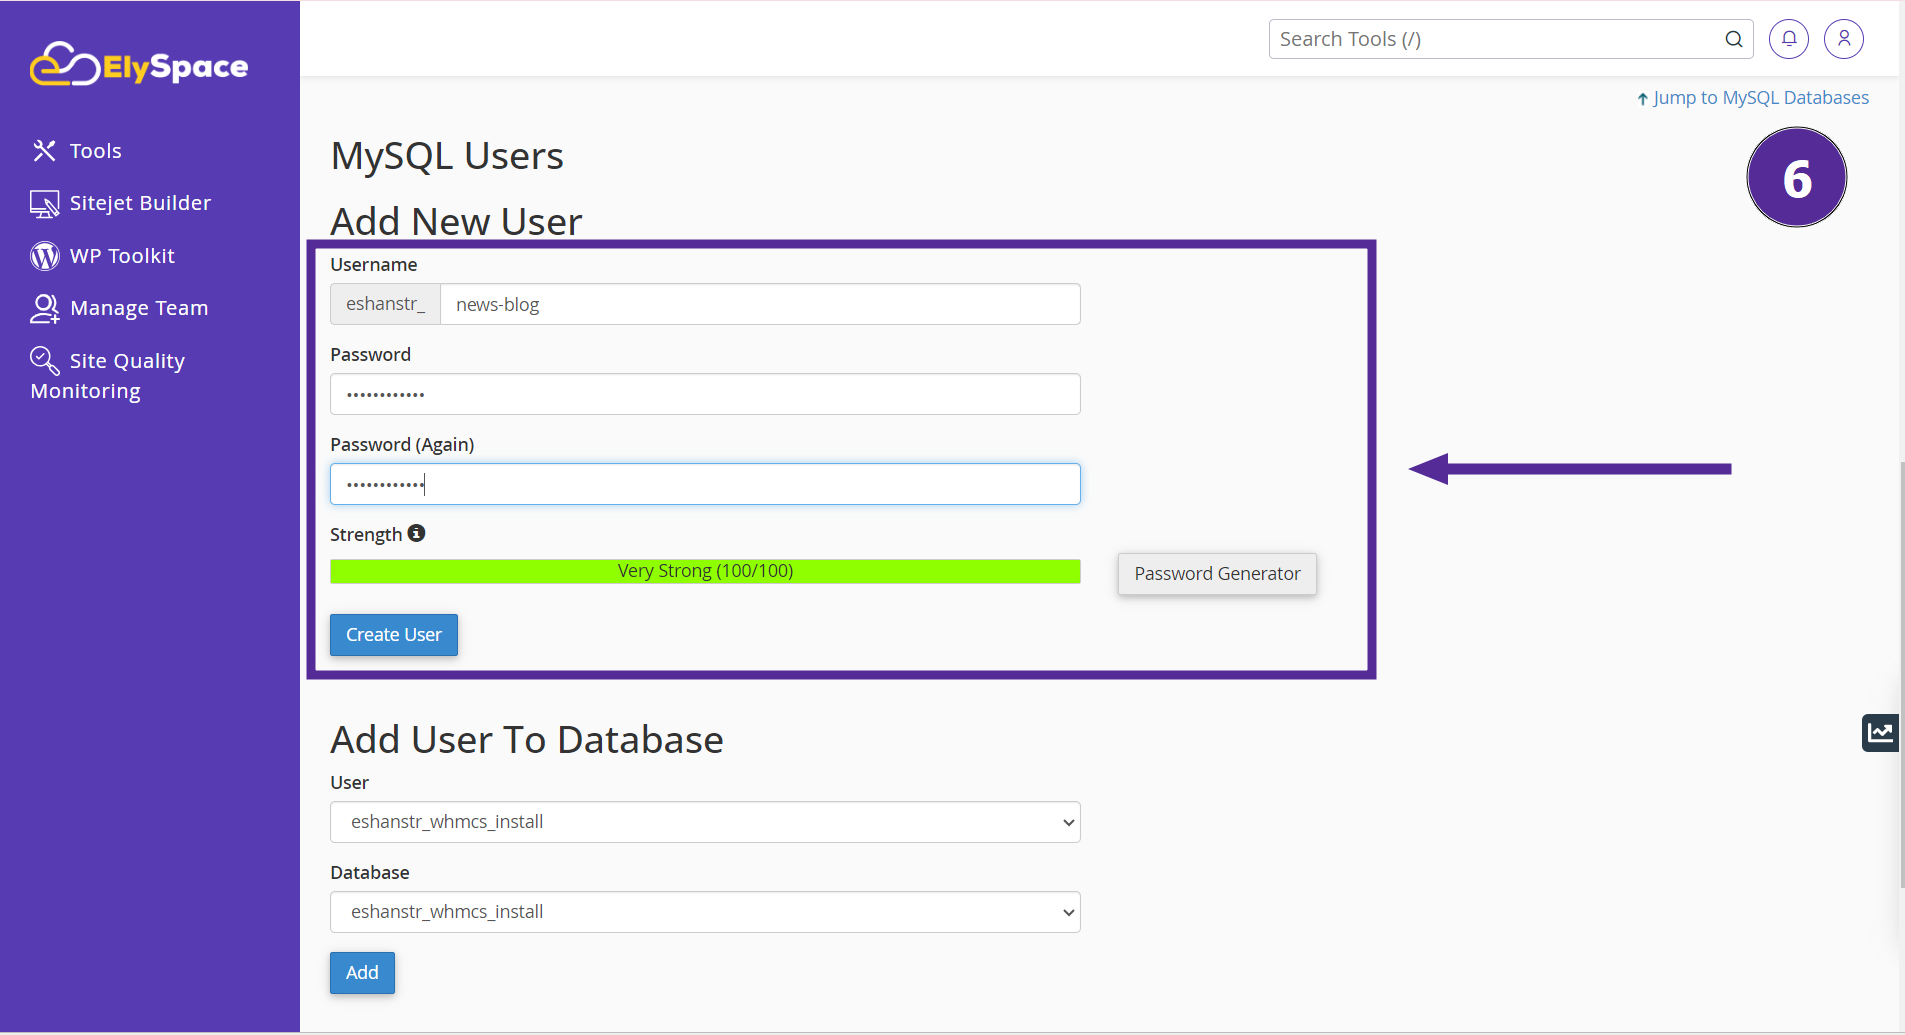
step 6: Add a New User:
After creating the database, you need to add a new user to manage it. Enter a username and password for the new user. You can also use the 'Password Generator' for a strong password. Click on 'Create User' once you have filled in the details.
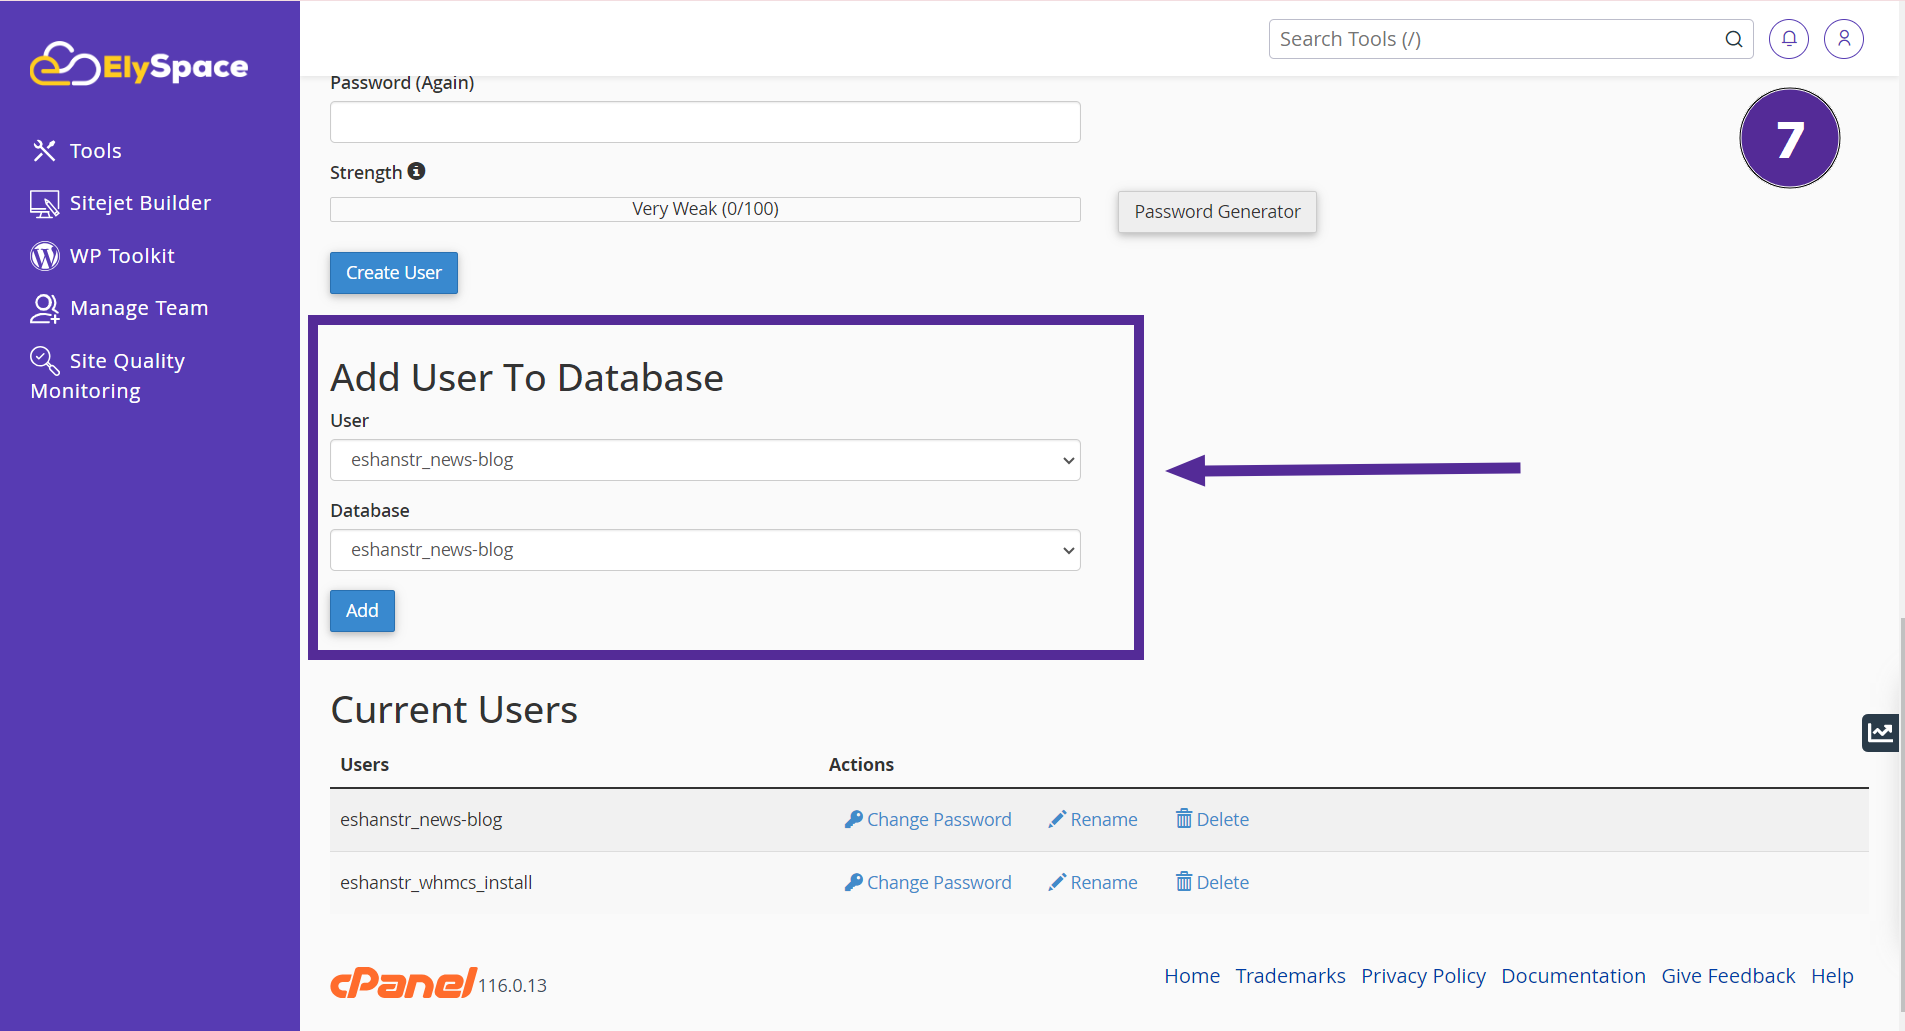
step 7: Add User to Database:
Finally, you need to assign the new user to your database. Select the user and the database from the dropdown menus and click on 'Add.'
Conclusion:
By following these steps, you can easily create a MySQL database on cPanel with ElySpace. This process is user-friendly and ensures that you can manage your databases efficiently. If you encounter any issues or need further assistance, please refer to our support documentation or contact our support team for help.


