Introduction
Managing files in cPanel is a crucial skill for anyone running a website or web application. cPanel's File Manager provides a user-friendly interface that allows you to easily handle a variety of file-related tasks without needing advanced technical knowledge. Whether you need to upload, create, edit, delete, or move files, the File Manager in cPanel makes it straightforward.
In this guide, we’ll walk you through the essential actions you can perform in the cPanel File Manager to help you keep your website files organized and secure. Let's get started!
Step 1: Go to 'My Dashboard' on Elyspace by Logging into Your Account
What to Do: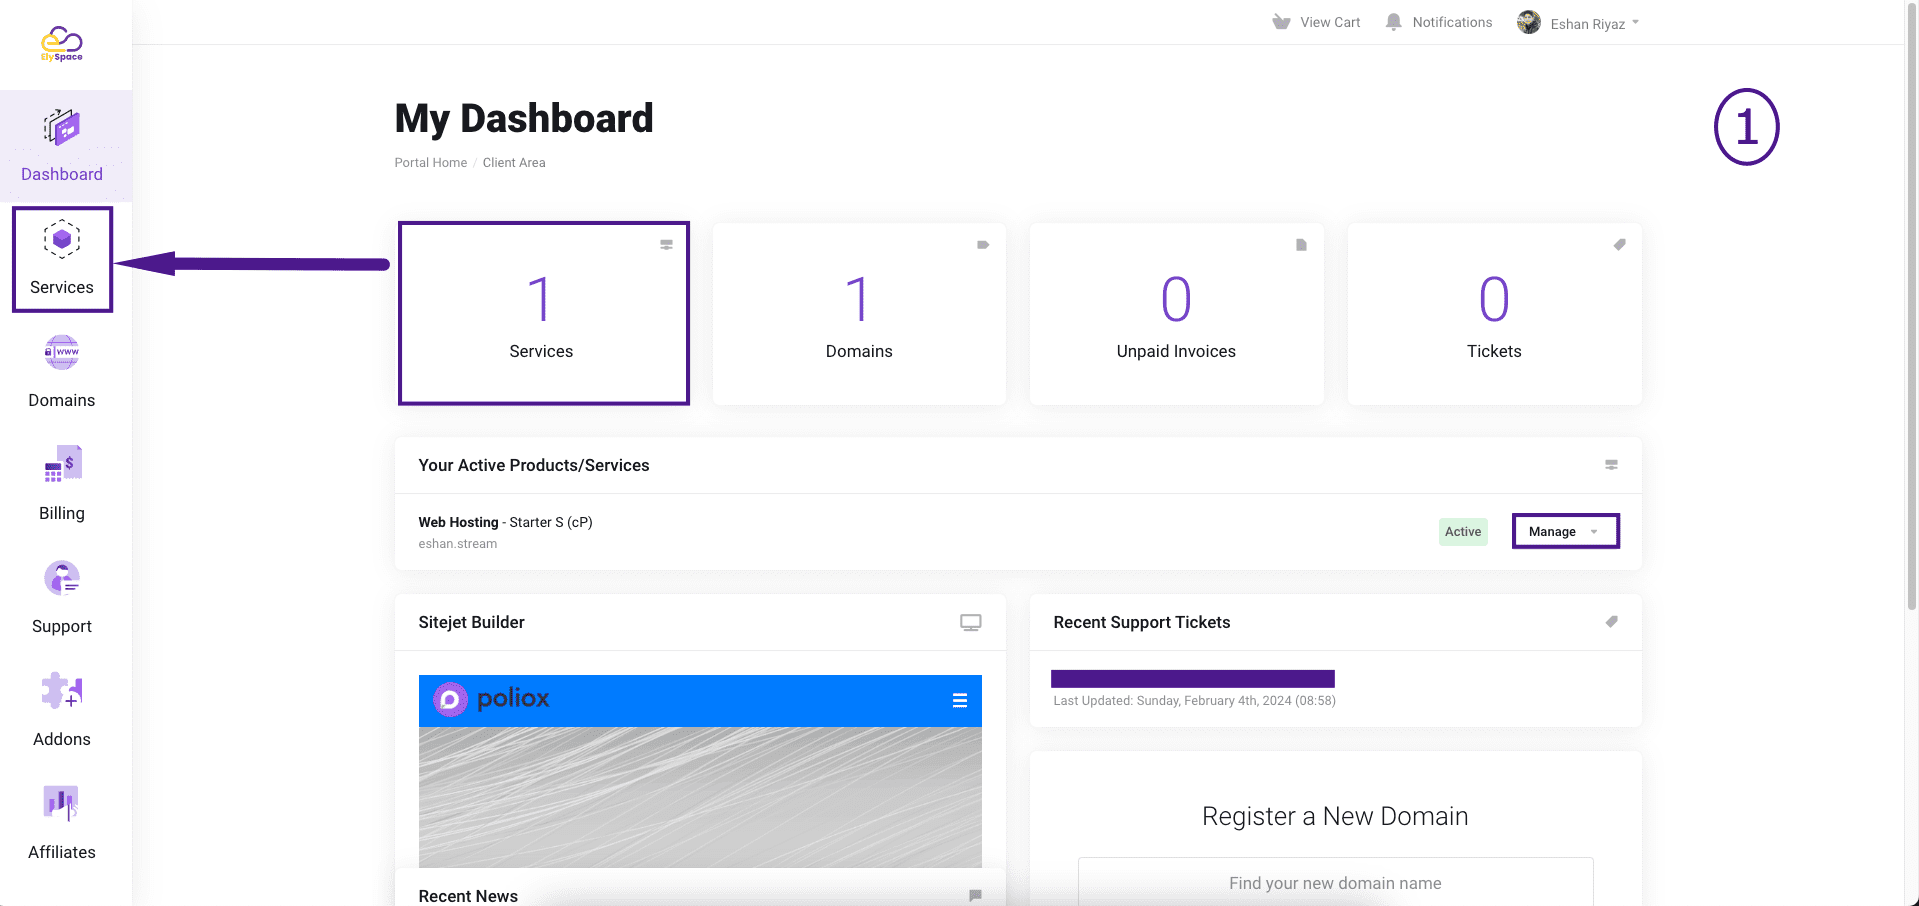
- Log in to your account using your username and password.
Step 2: Click on 'Manage' for the Service or Product Whose File Manager You Want to Manage
What to Do: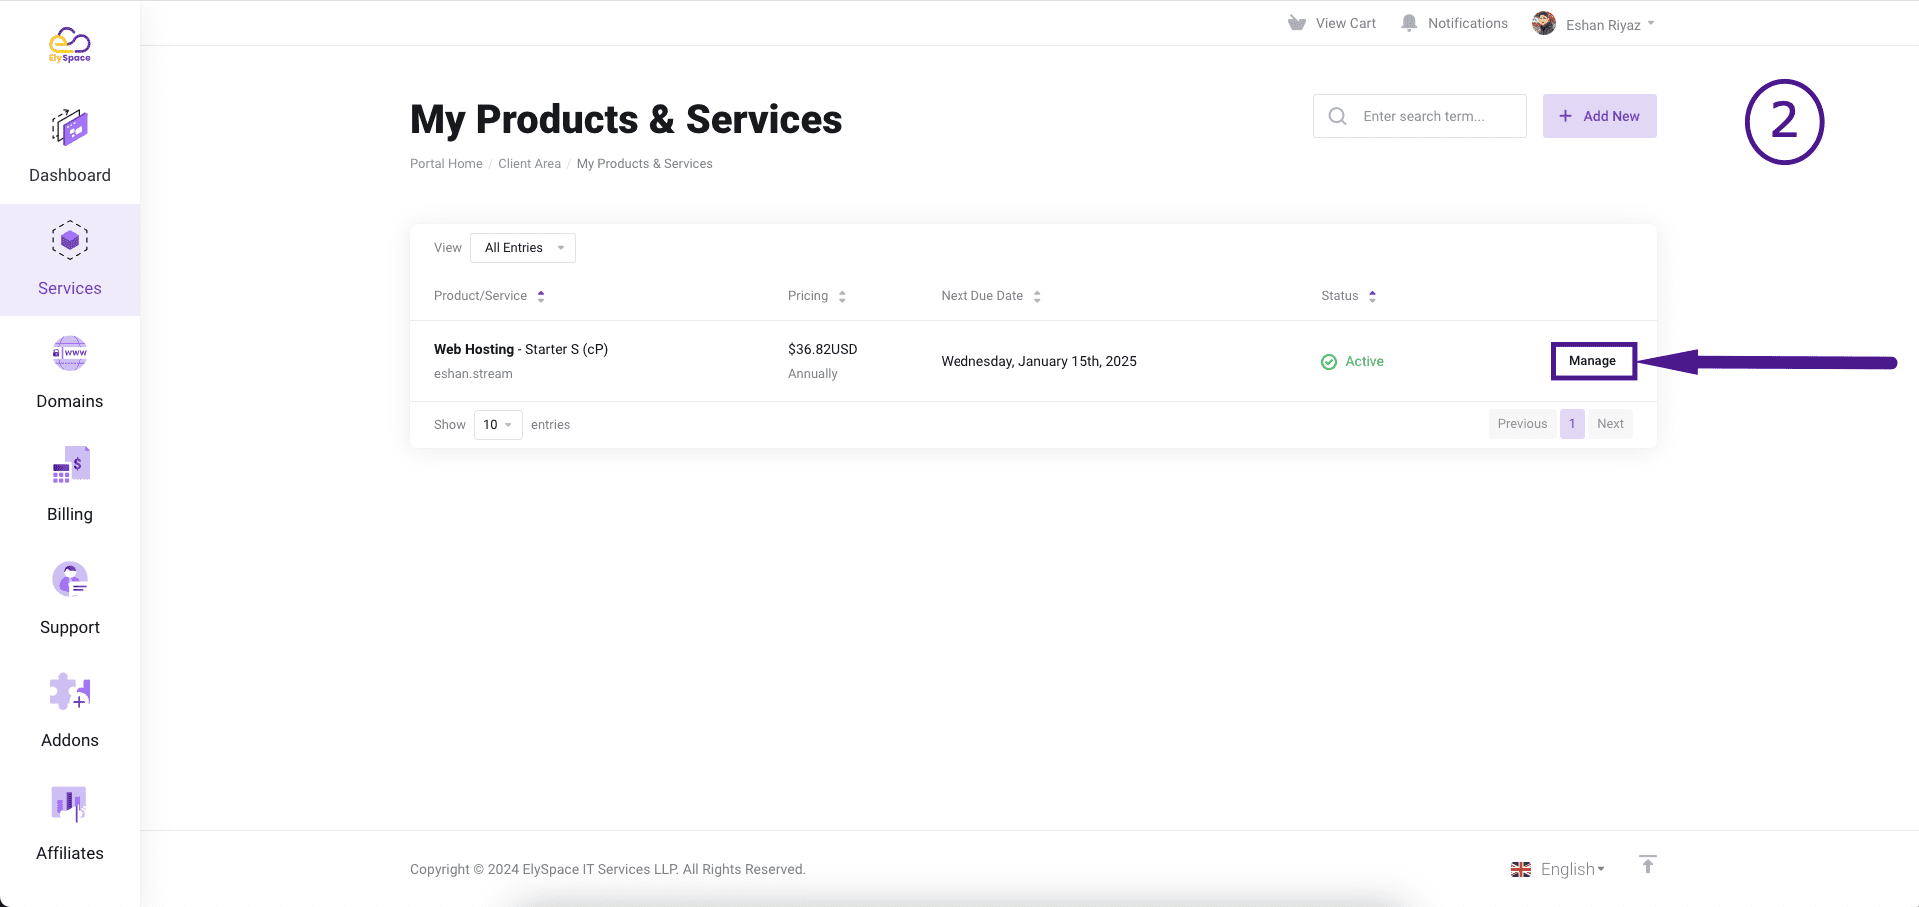
1. On the dashboard, find the list of your services or products.
2. Locate the service or product for which you want to manage the File Manager.
3. Click on the ‘Manage’ button next to that service or product.
Step 3: Click on 'Log in to cPanel' in the Product Details Section
What to Do: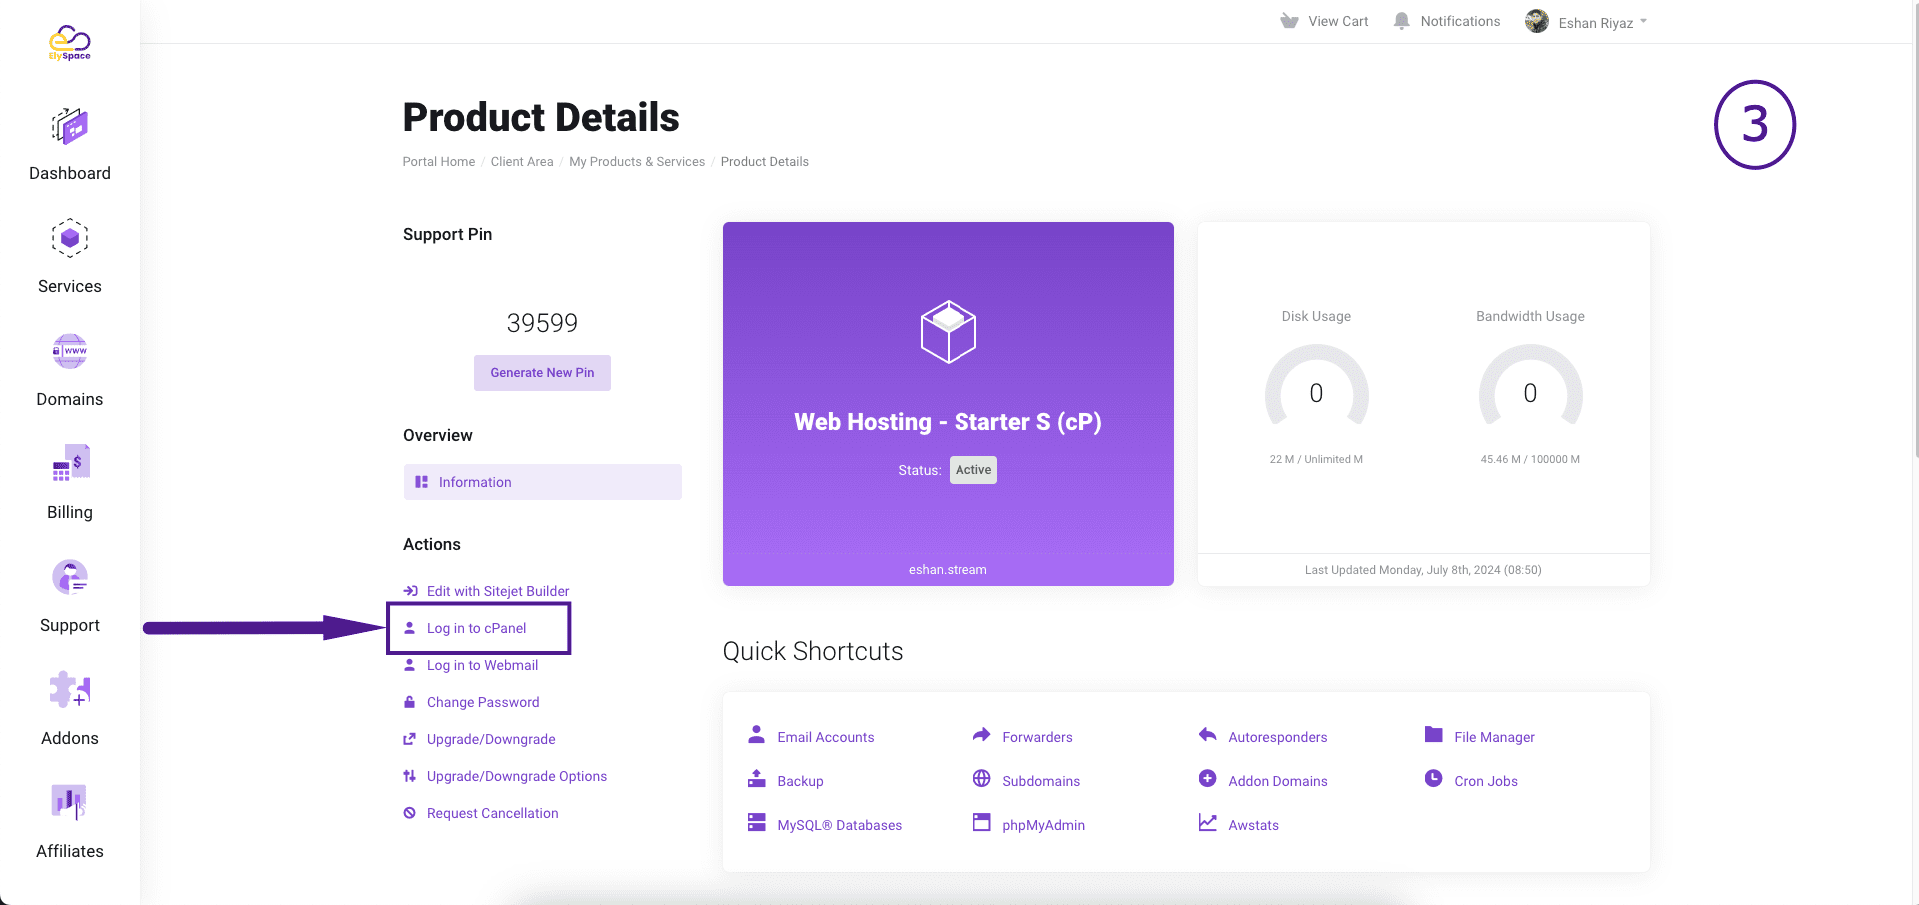
1. In the Product Details section, find the option to ‘Log in to cPanel.’
2. Click on this button to access the cPanel interface.
Step 4: Click on 'File Manager' in the Files Section
What to Do:
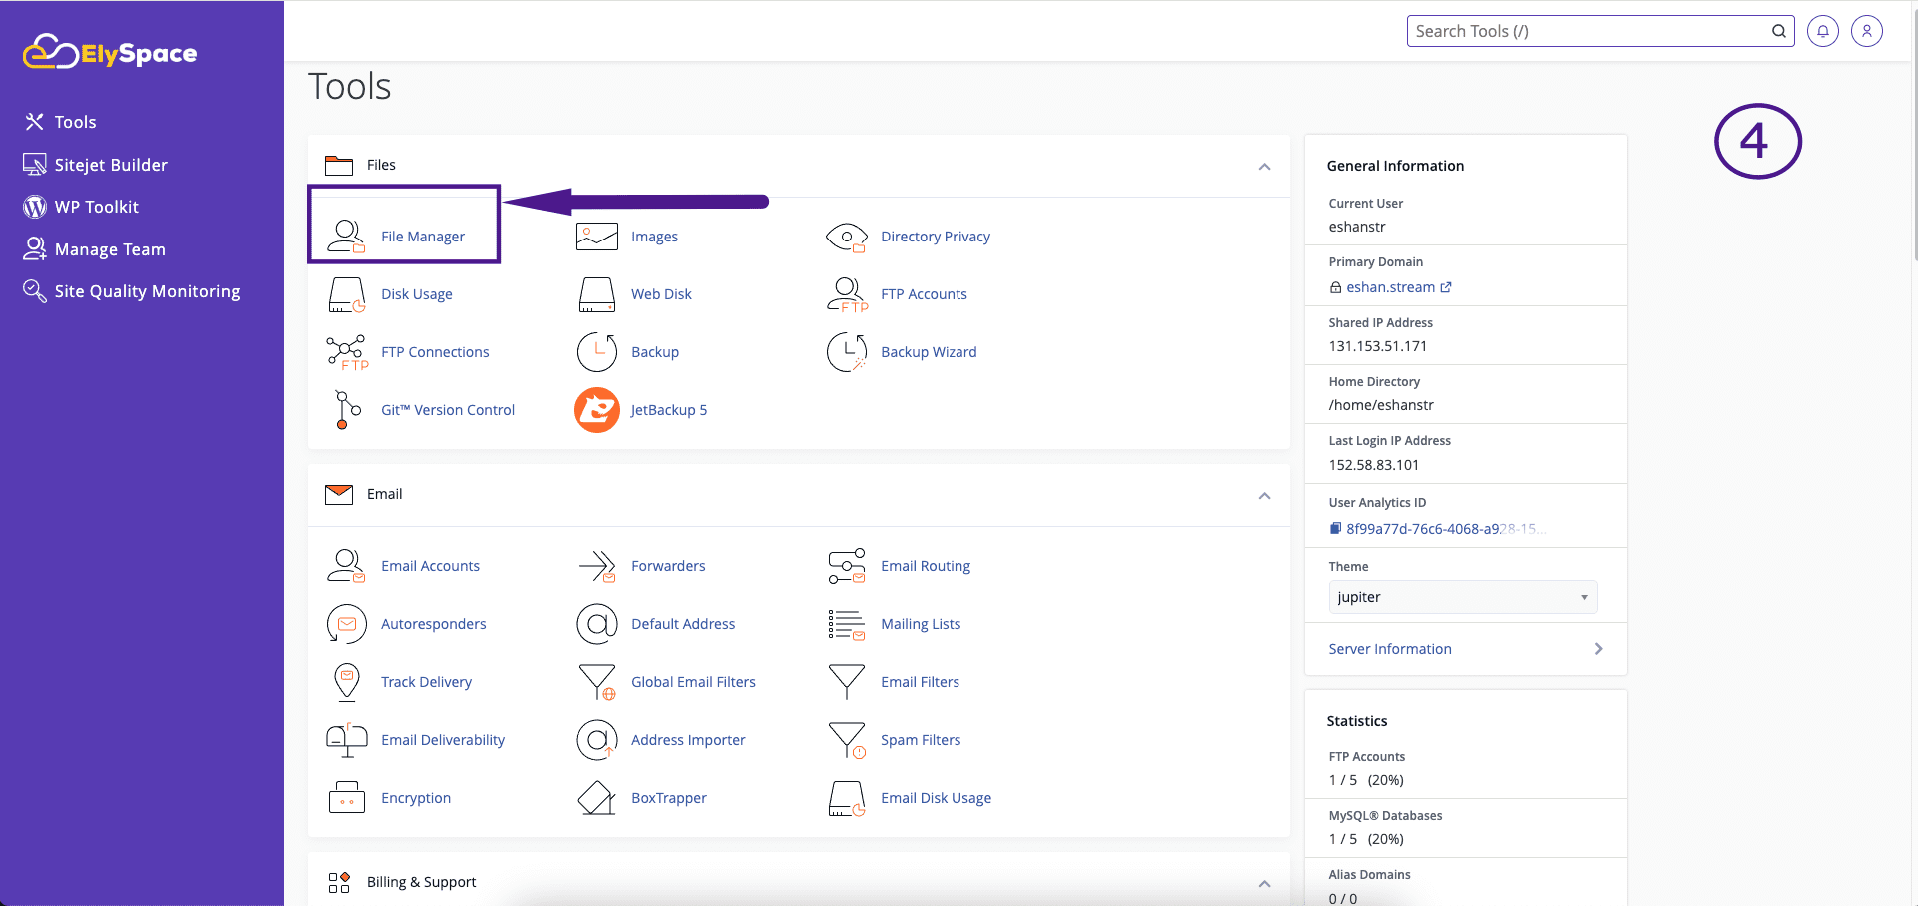
1. In the cPanel dashboard, look for the “Files” section.
2. Click on the ‘File Manager’ icon to open the File Manager interface.
Step 5: Uploading a File
What to Do:
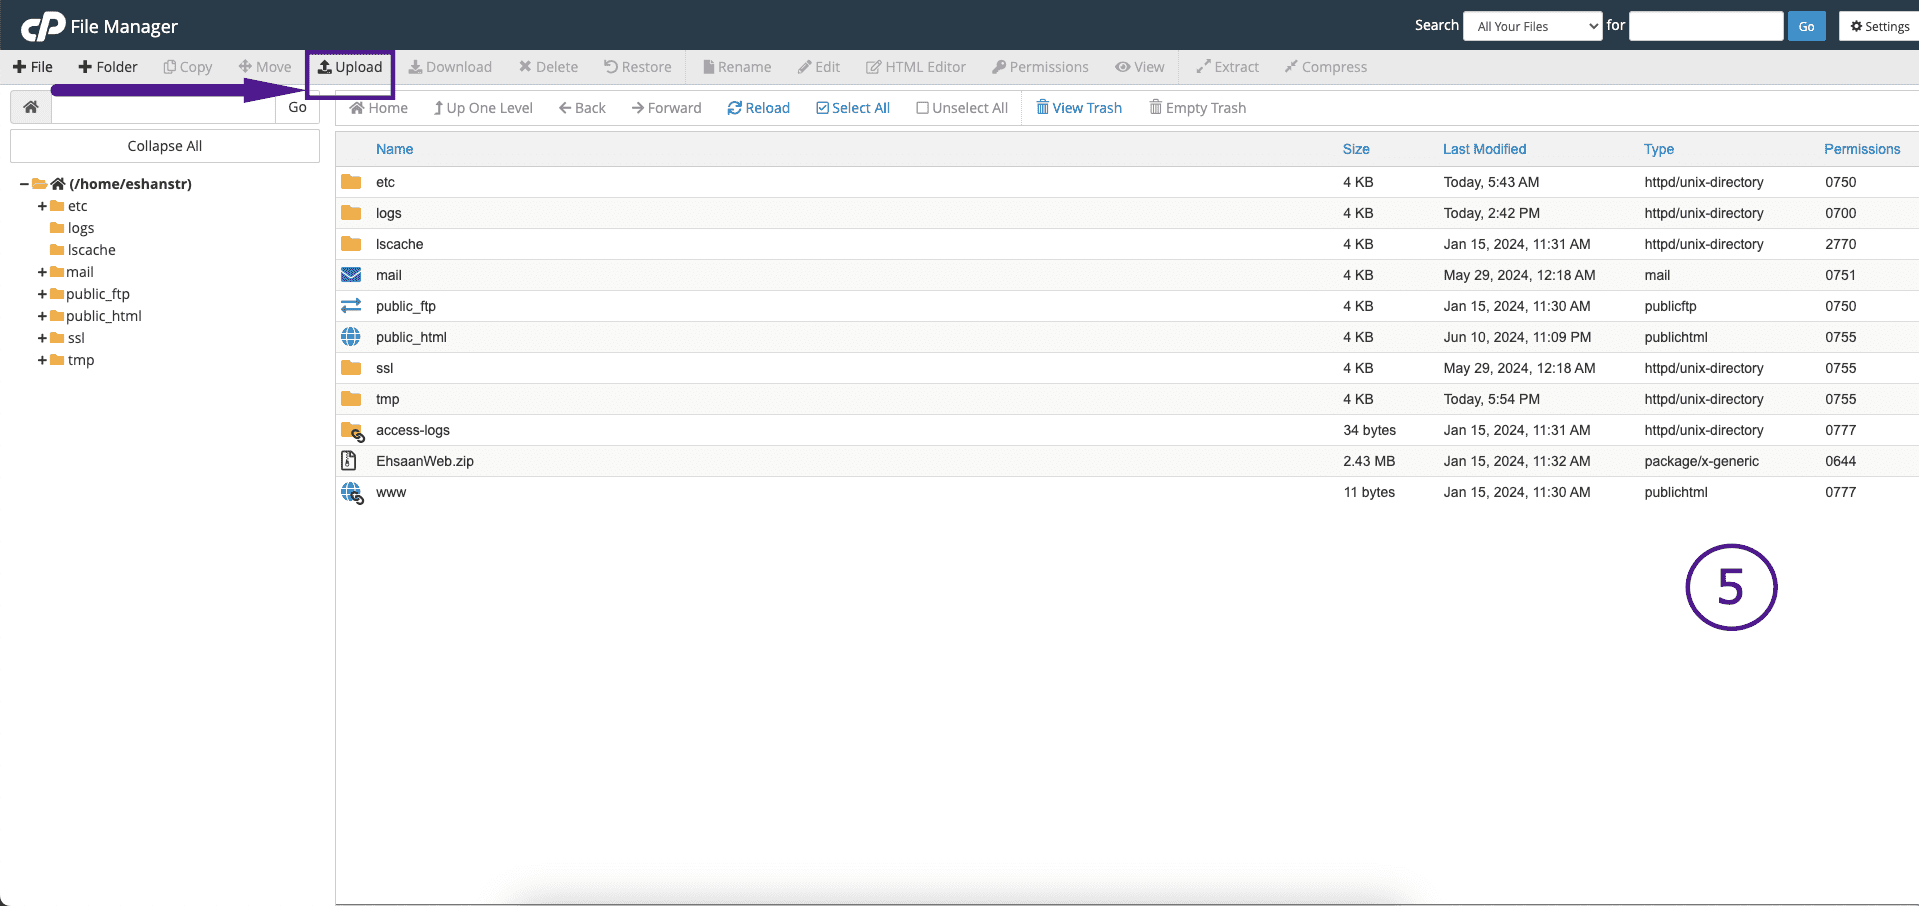
1. In the File Manager interface, click the ‘Upload’ button at the top.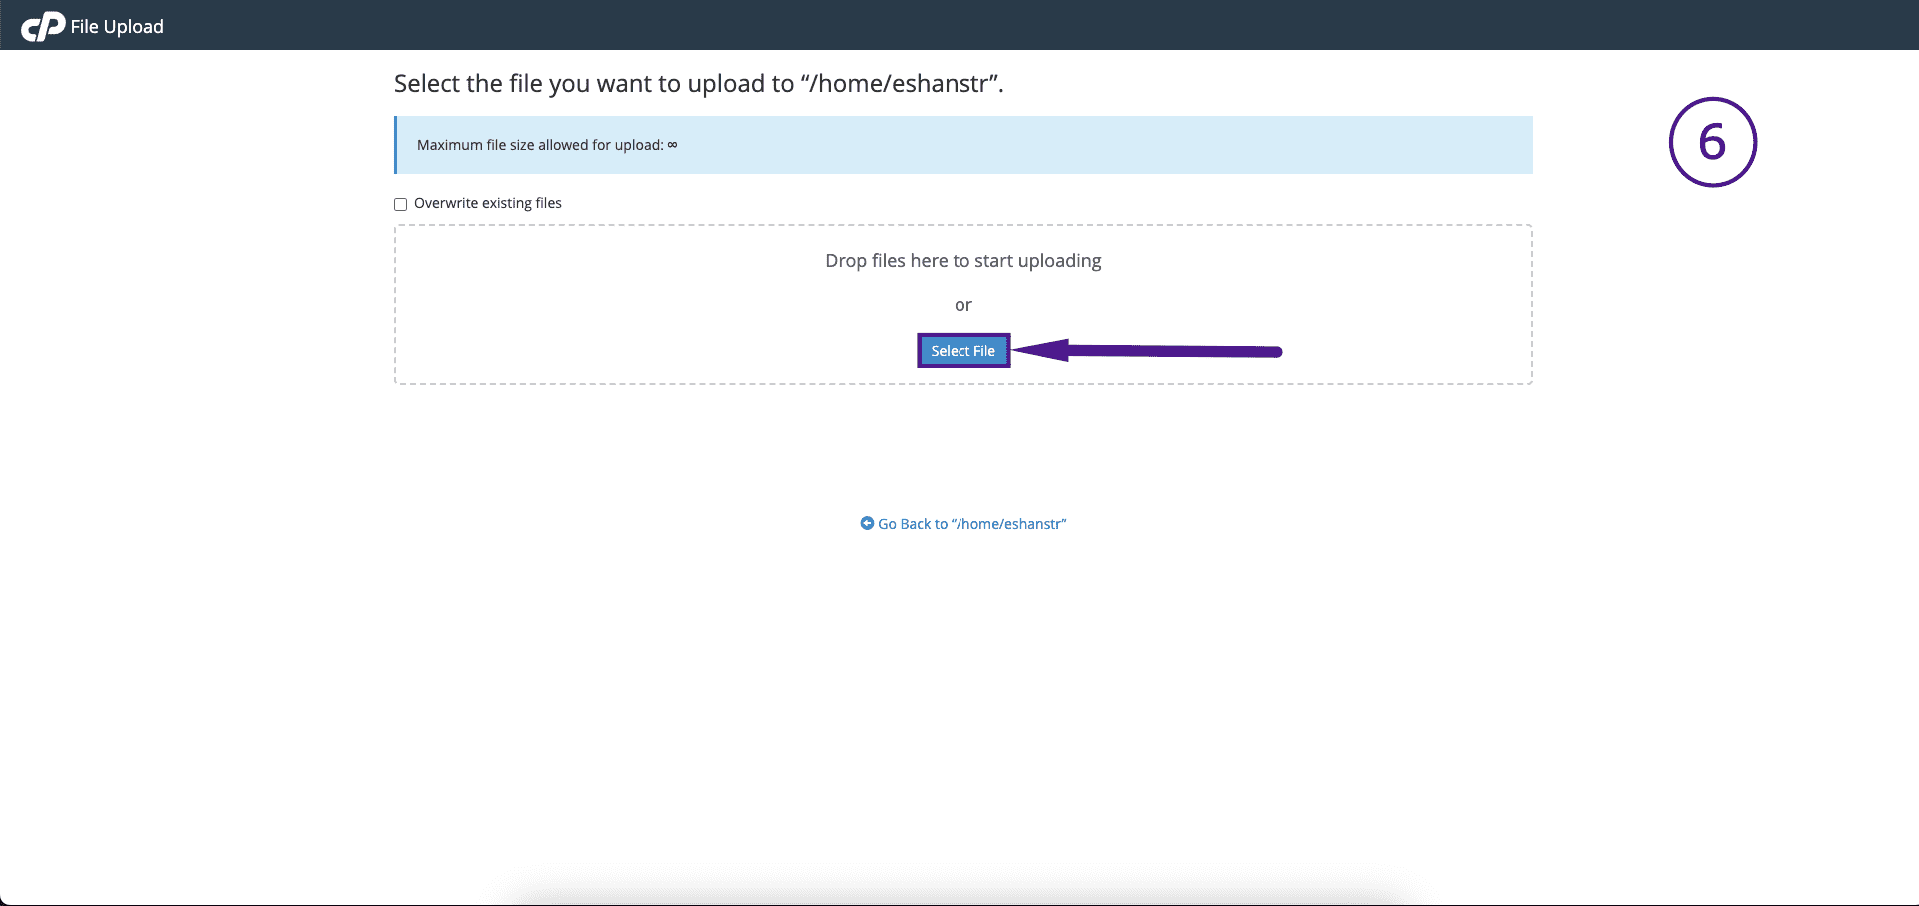
2. Drag and drop the file into the upload area or click on ‘Select File’ to browse and choose the file from your computer.
Step 6: Creating a New File
What to Do: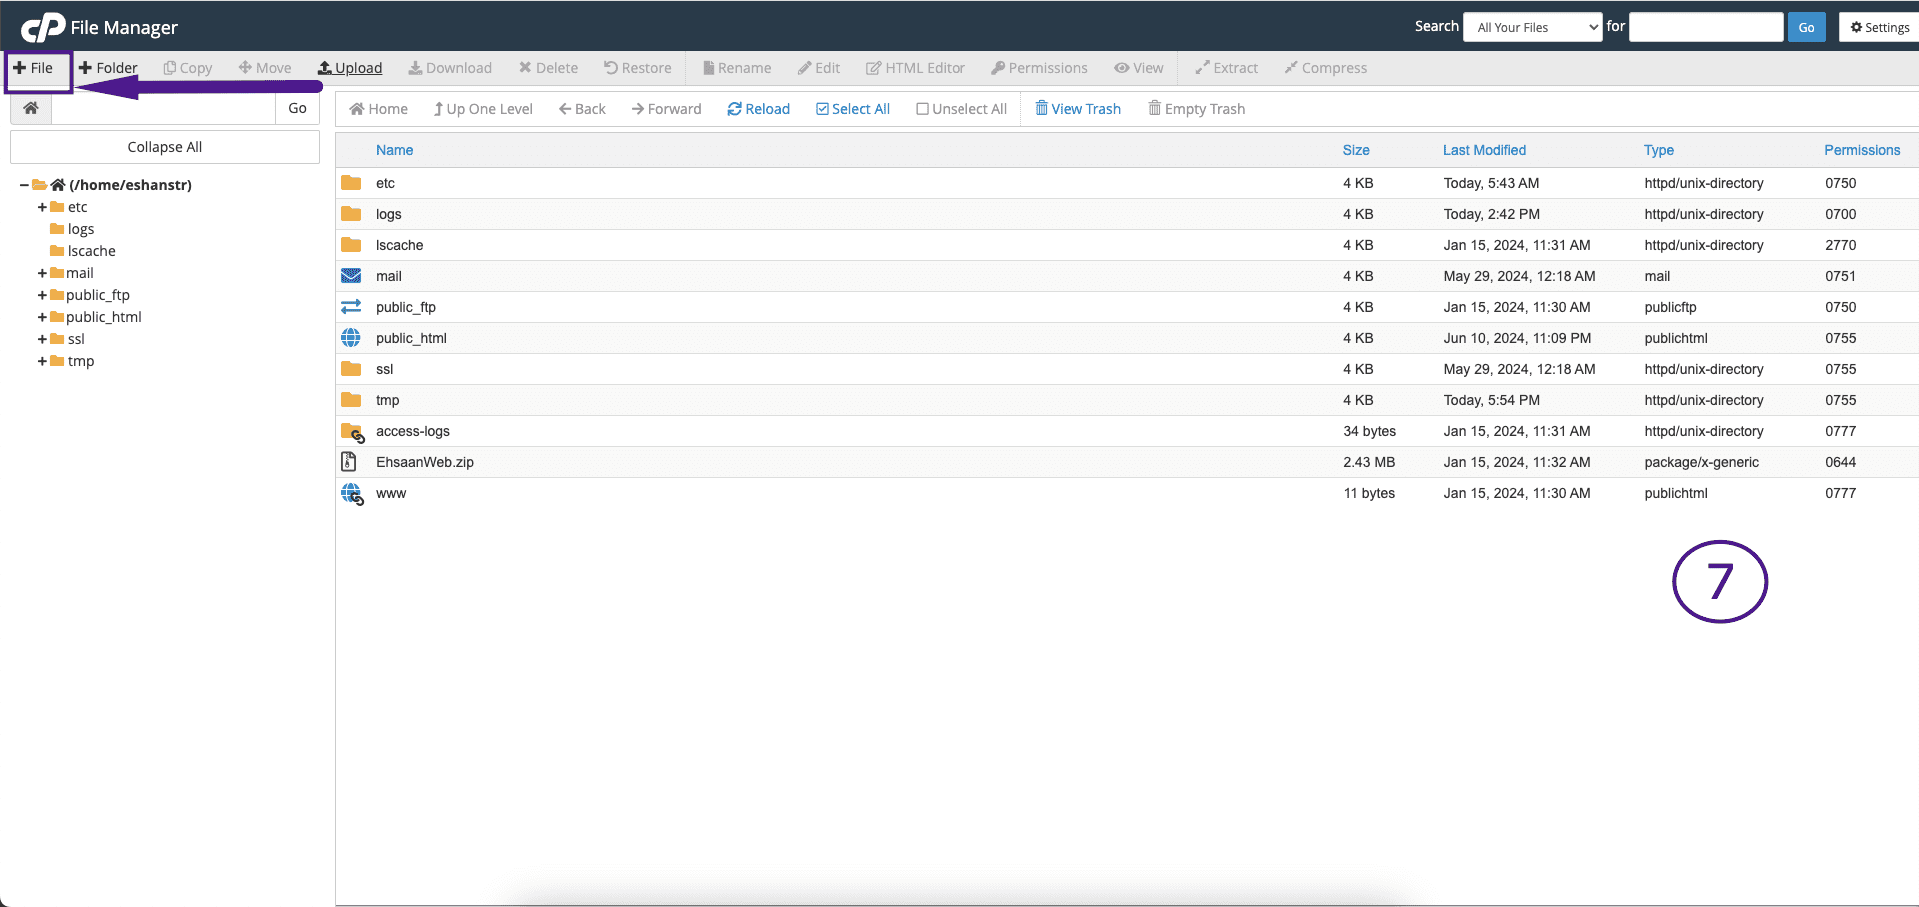
1. Click the ‘+ File’ button at the top of the File Manager interface.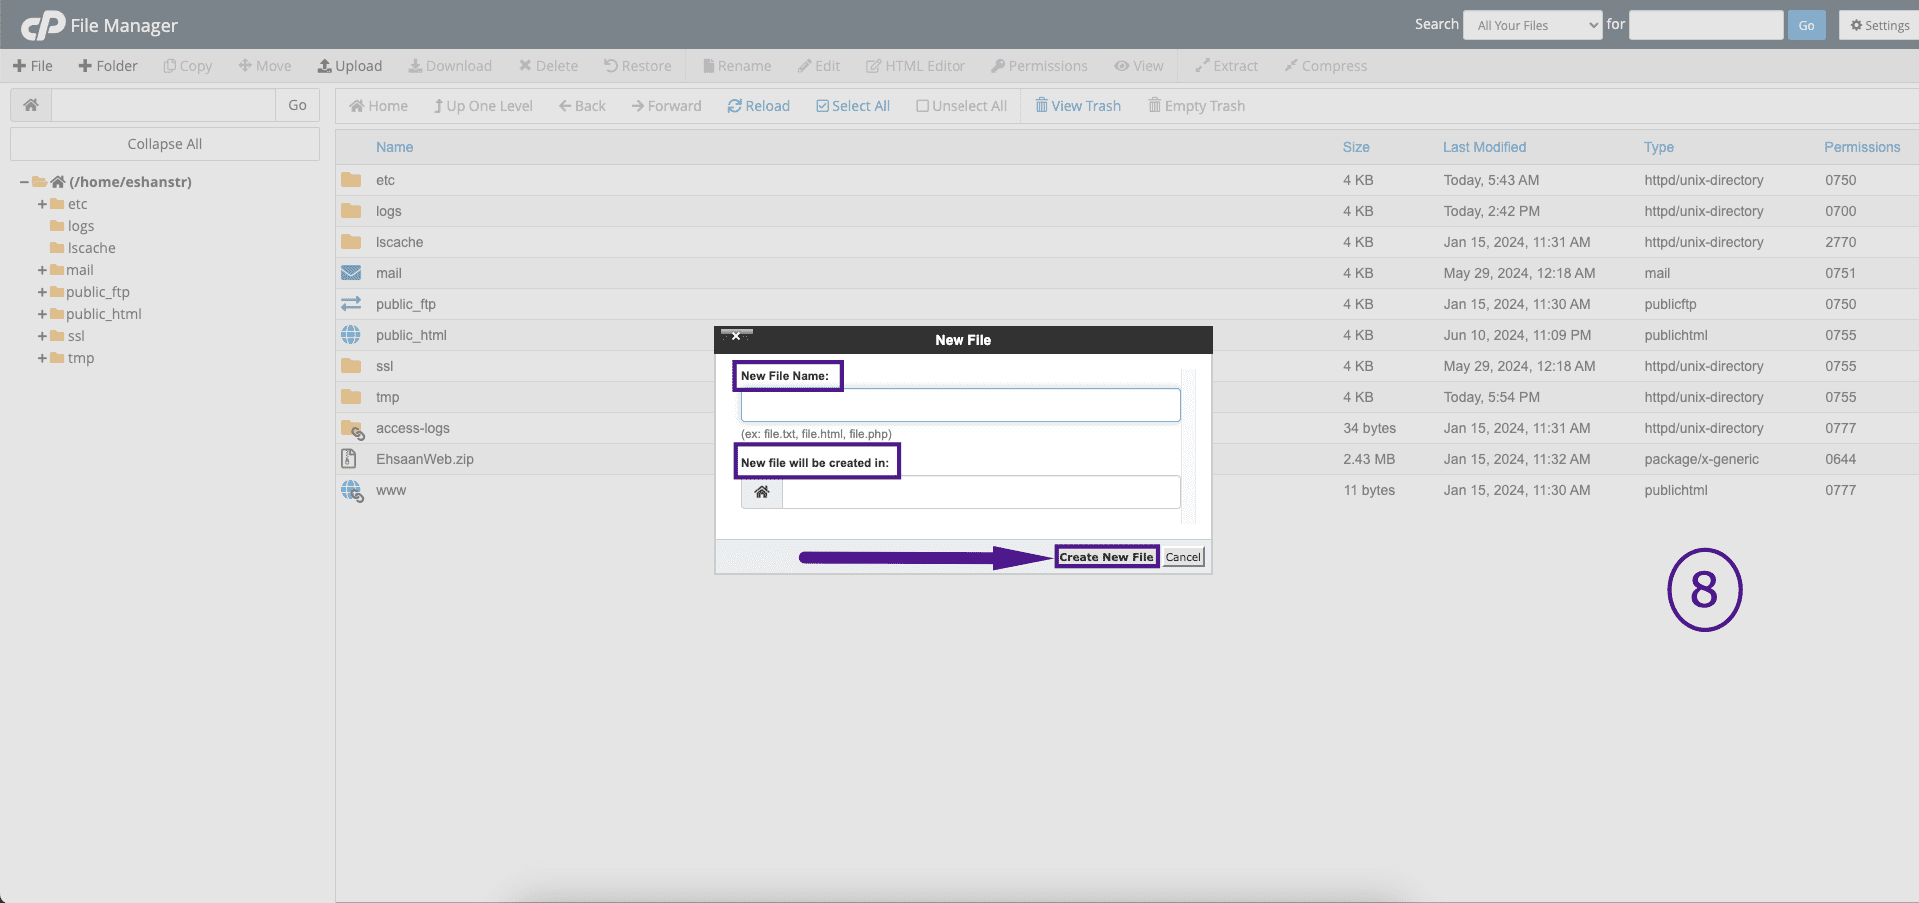
2. Enter the file name and specify the path where you want to create the file.
3. Click ‘Create New File’ to complete the process.
Step 7: Other File Actions
The File Manager offers several useful options for managing your files. Here are some of the things you can do: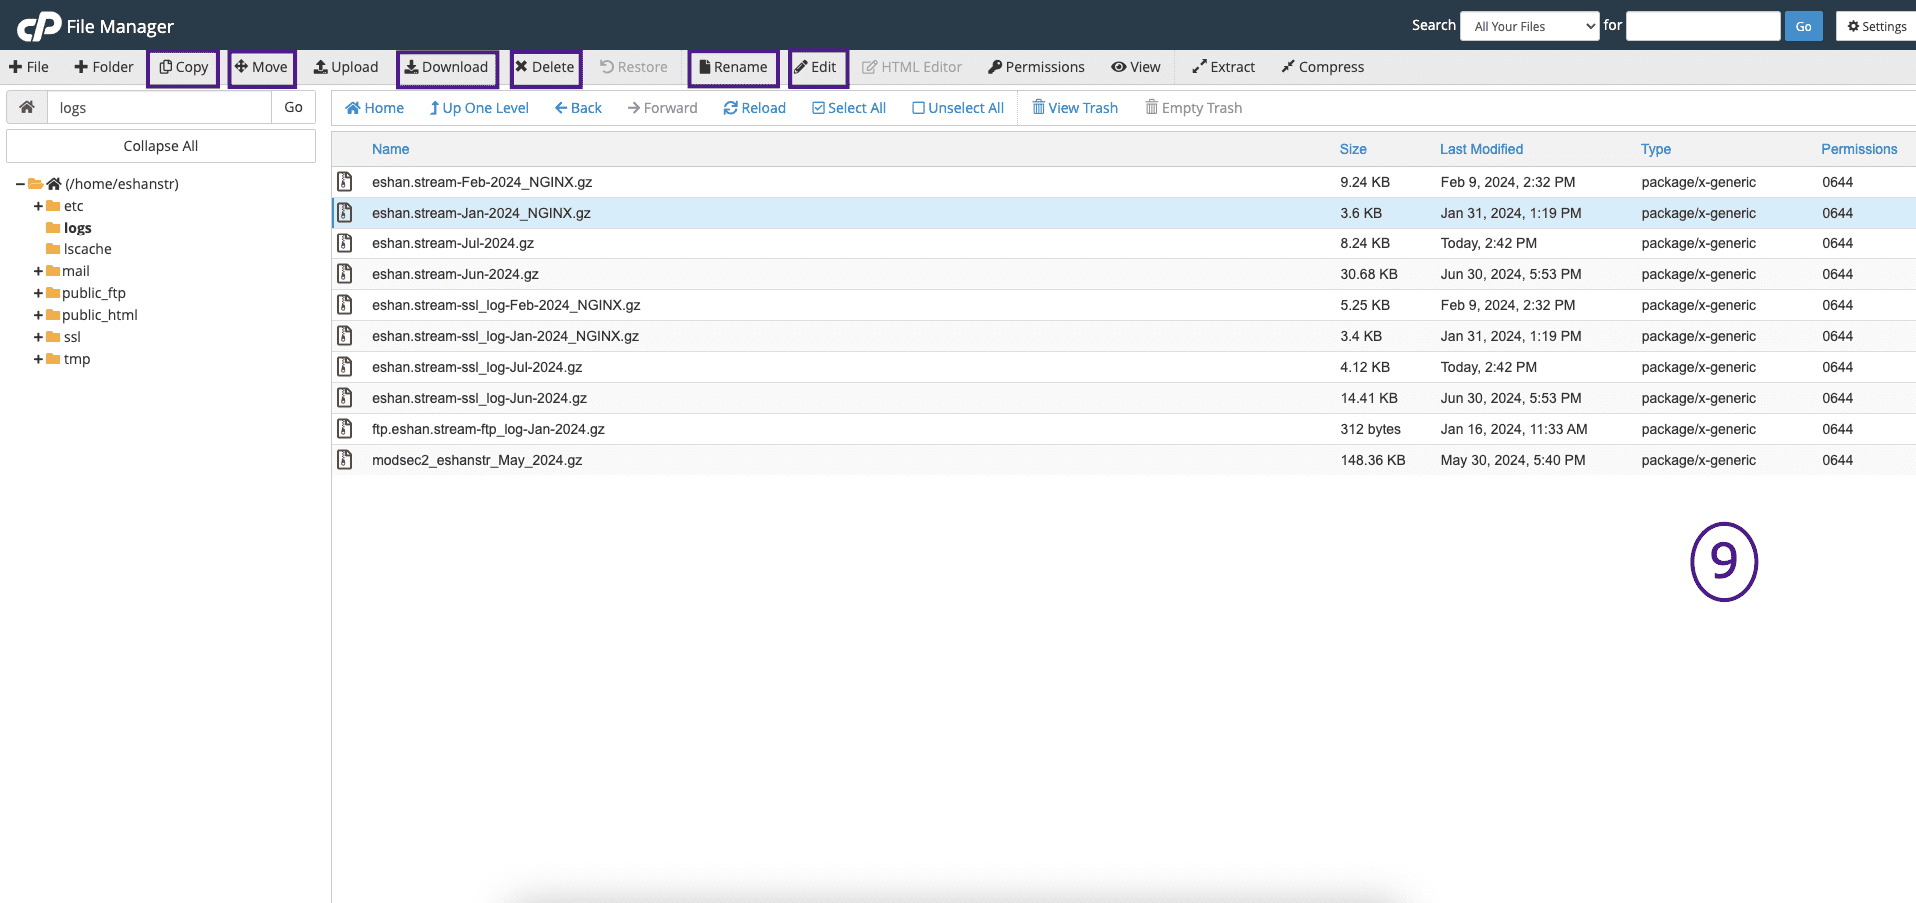
- Copy: Select the file and click on ‘Copy’ to make a duplicate in another directory.
- Move: Select the file and click on ‘Move’ to transfer it to a different directory.
- Download: Select the file and click on ‘Download’ to save it to your computer.
- Delete: Select the file and click on ‘Delete’ to remove it from the server.
- Rename: Select the file and click on ‘Rename’ to change its name.
- Edit: Select the file and click on ‘Edit’ to modify its content.
- Restore: Use the ‘Restore’ option to revert to a previous version of the file if it is available.
- Select: Use ‘Select’ to choose multiple files for bulk actions.
- Navigation: Use the forward and back buttons to move through directories.
Conclusion
Congratulations! You’ve learned how to manage files in cPanel and explored some essential file management tasks using the File Manager. These skills will help you manage your website files effectively and ensure that your data is organized and secure.
If you have any questions or need further assistance, feel free to reach out to support team at ElySpace. Happy managing!


