Introduction
Welcome to ElySpace! In this guide, we will walk you through the steps to create and delete a database using your cPanel account. Follow the detailed instructions below to manage your databases efficiently.
Creating a Database
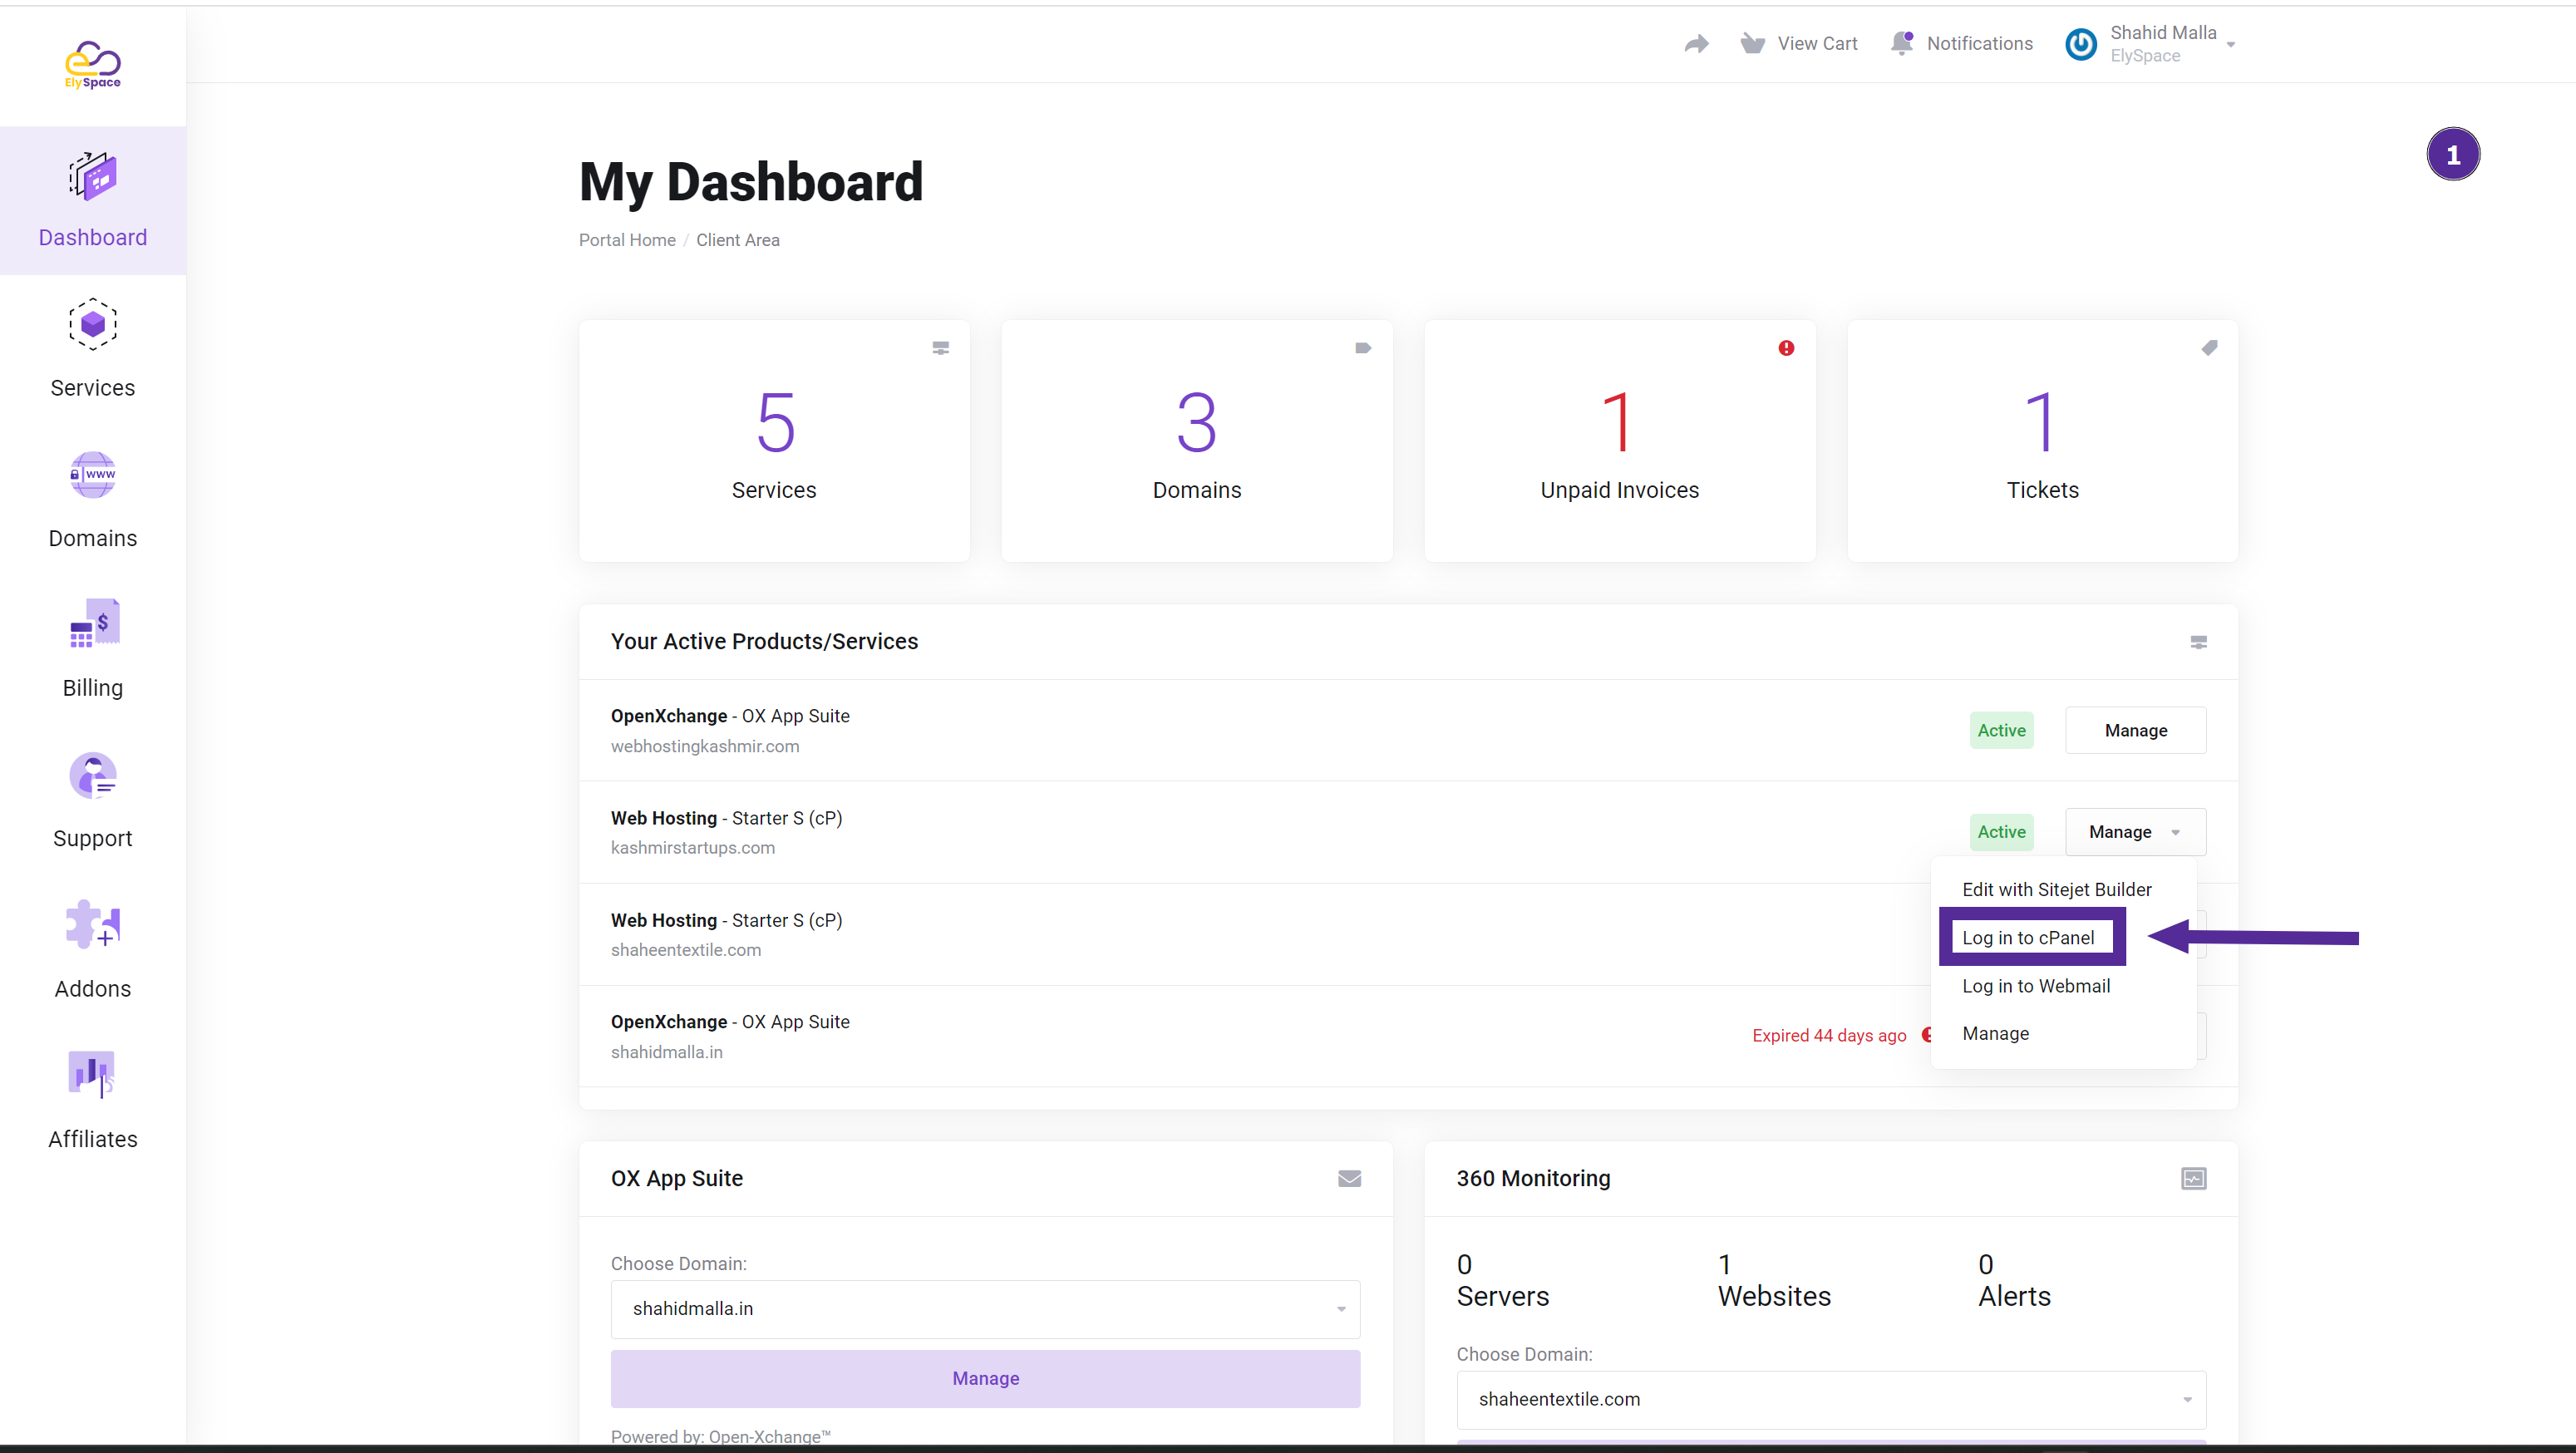
Step 1: Log in to Your cPanel Account
Go to the ElySpace portal and log in to your cPanel account using your credentials.
Once logged in, you will be directed to the cPanel dashboard where you can manage various aspects of your hosting account.
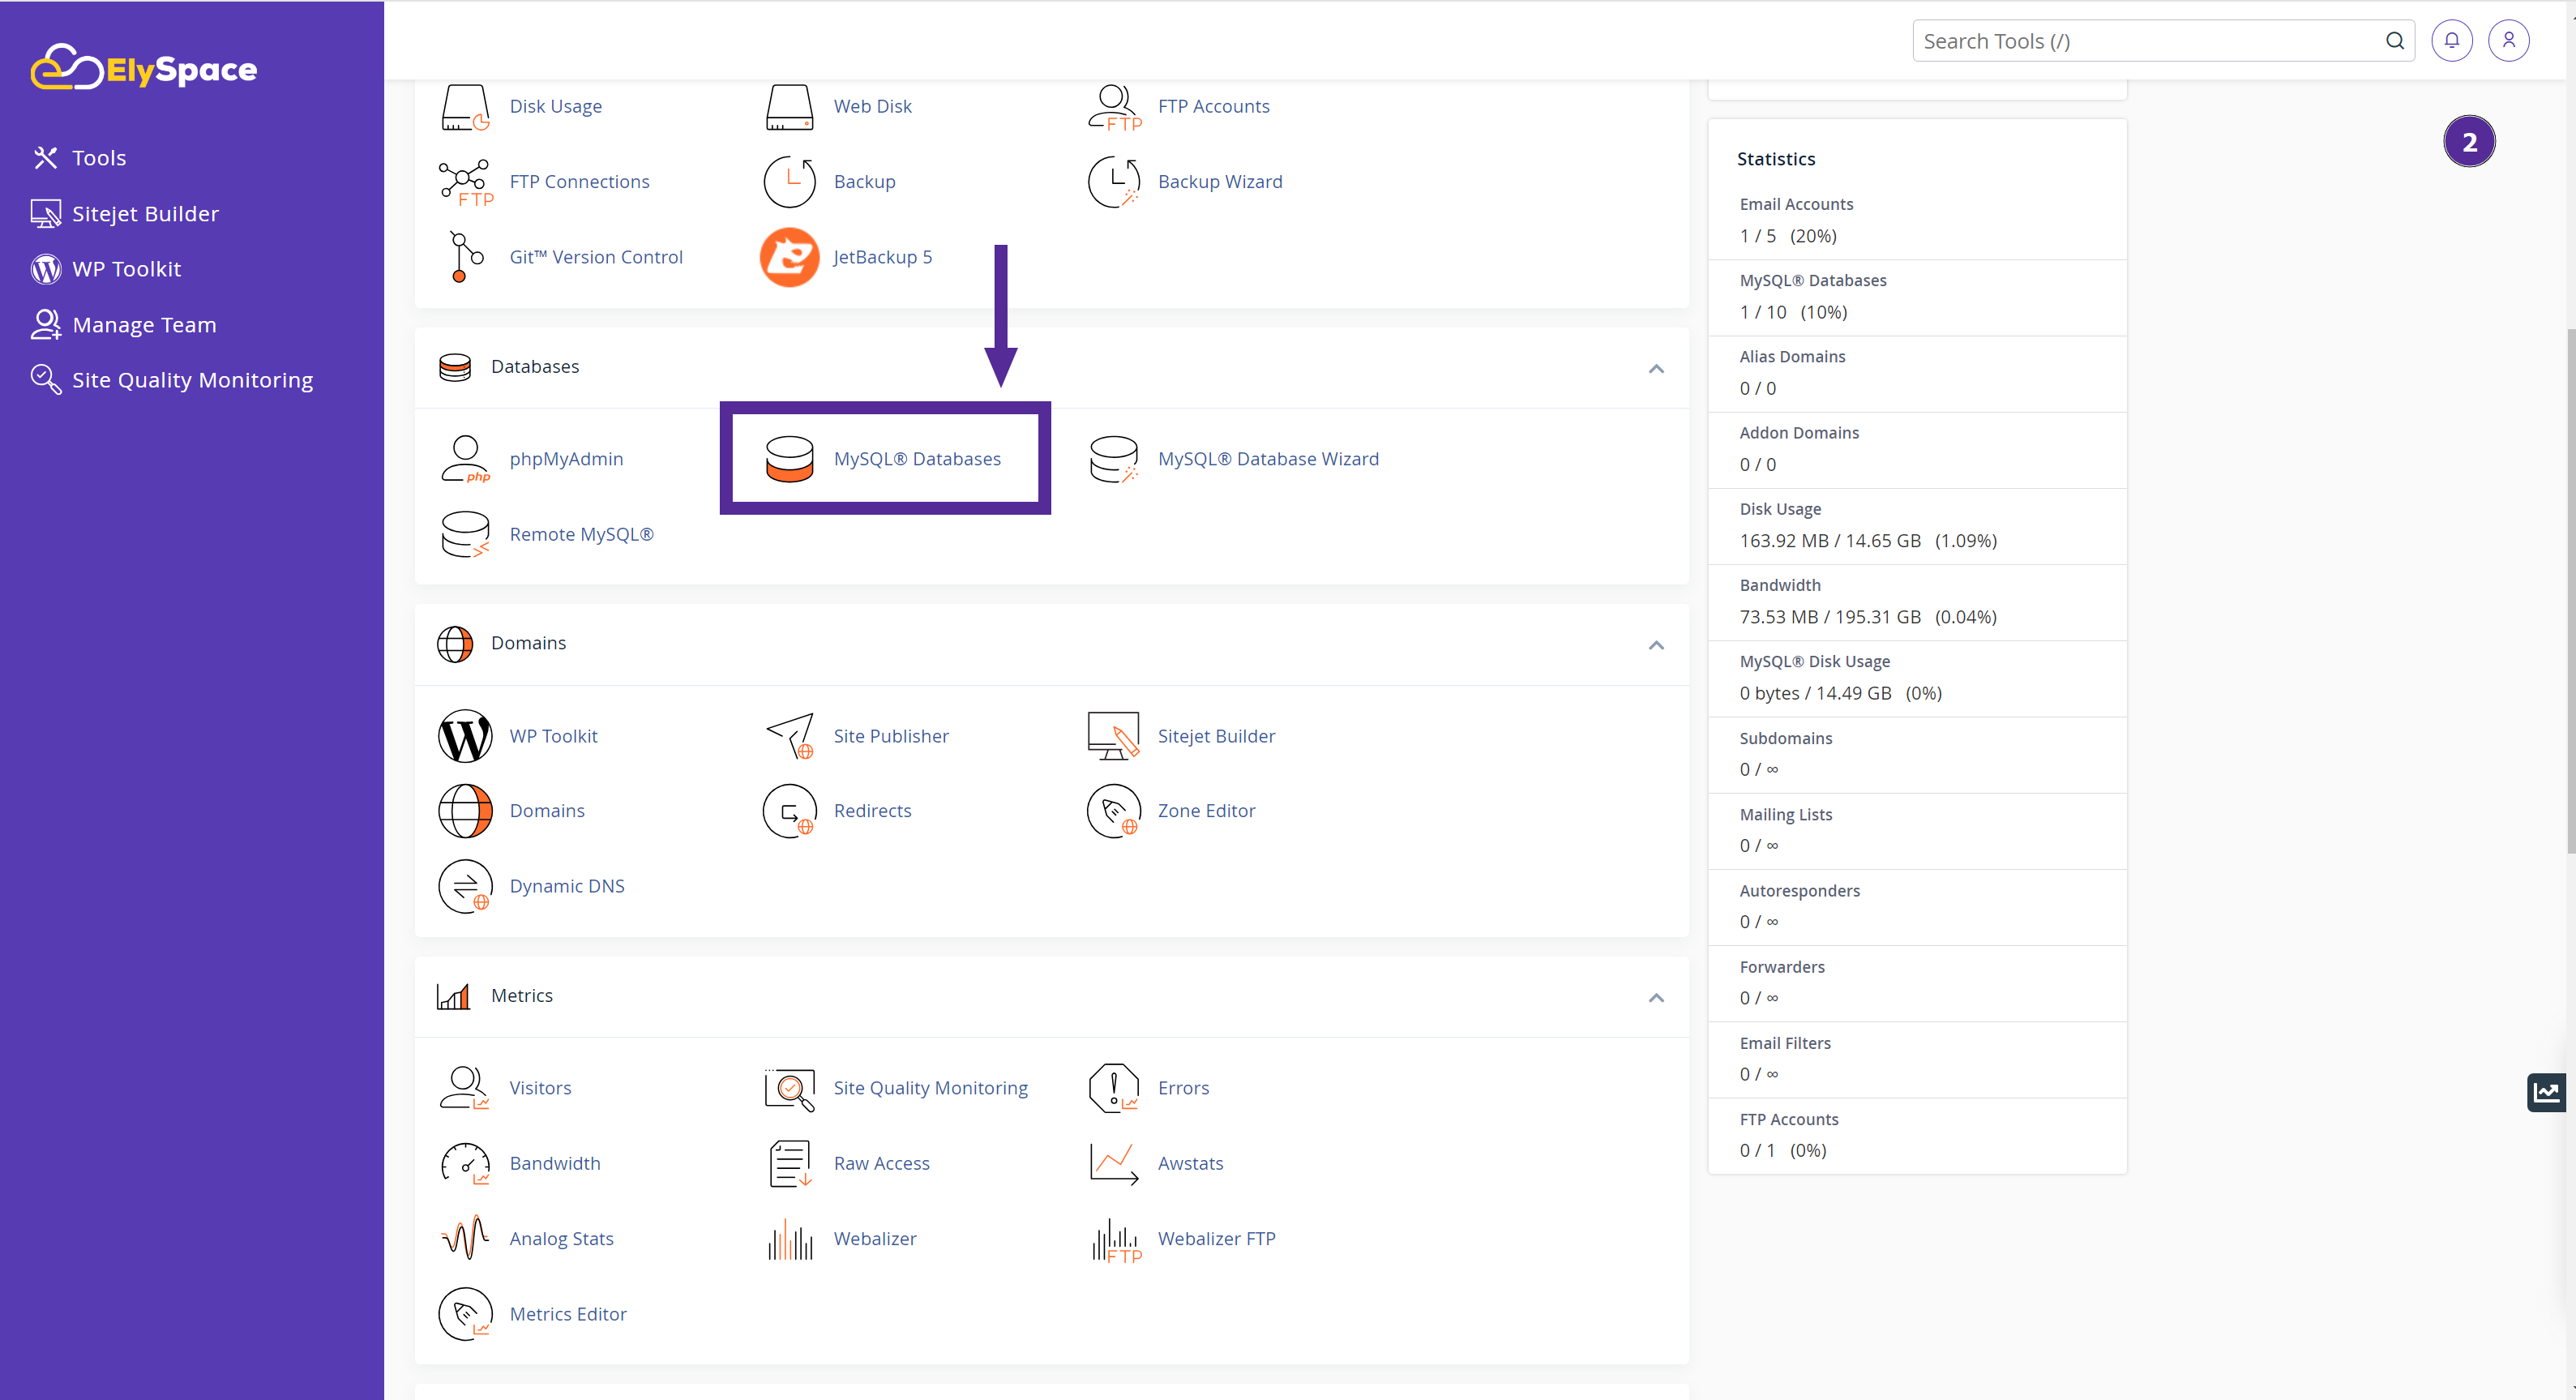
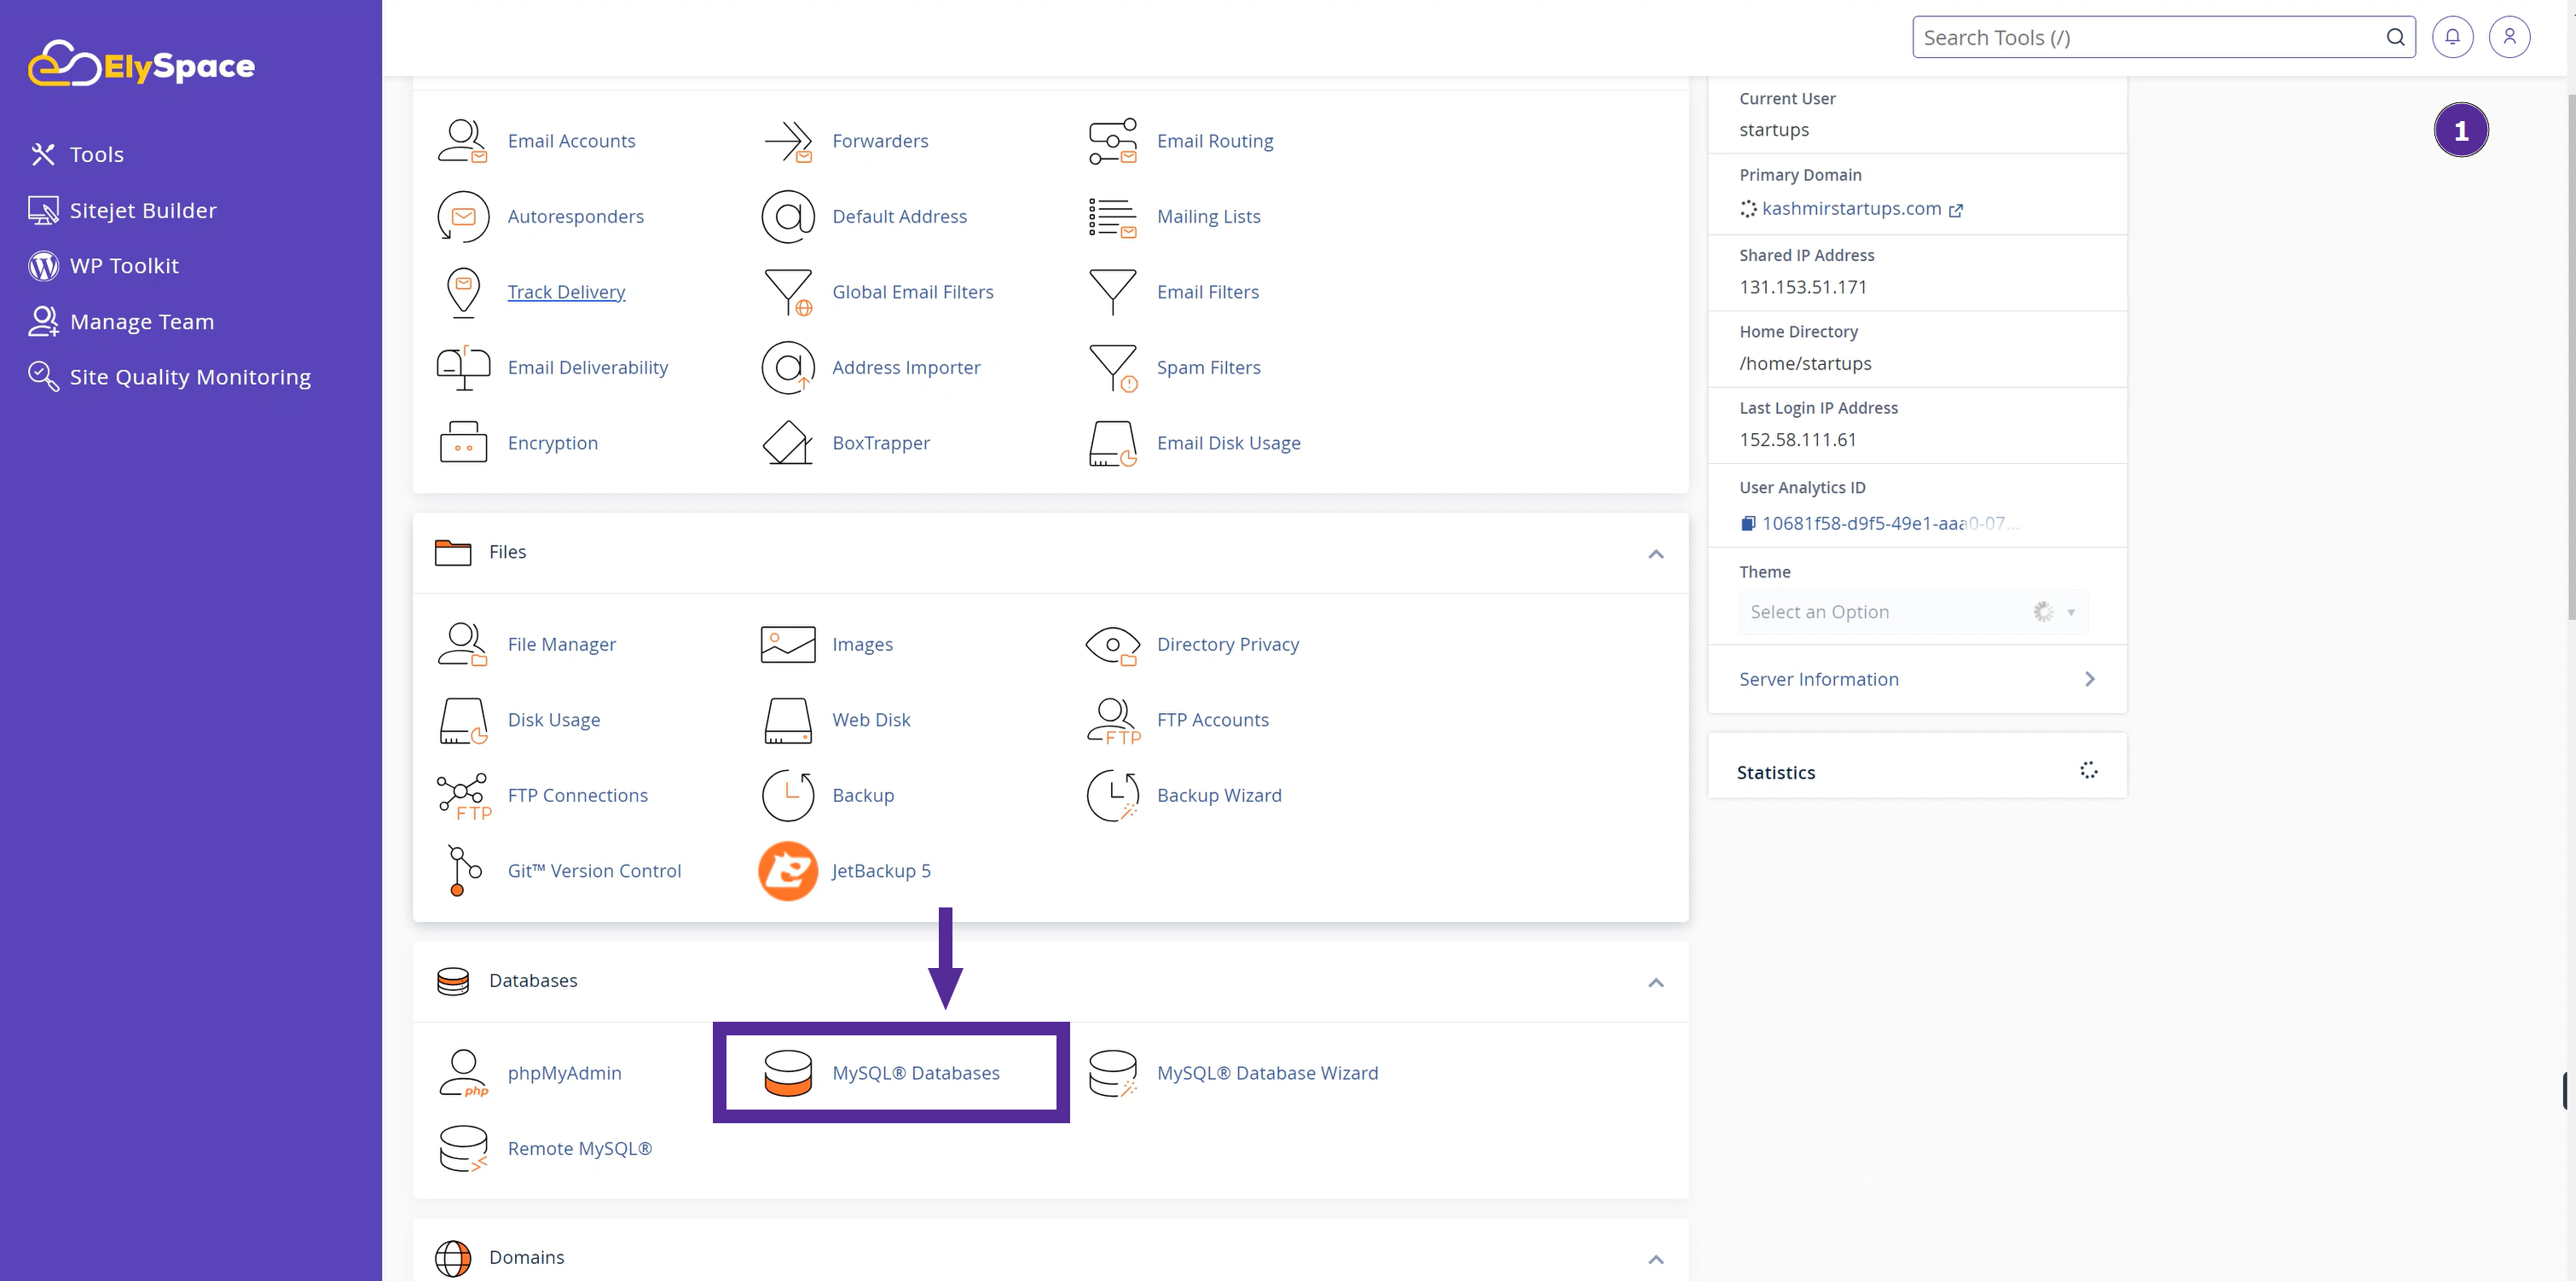
Step 2: Navigate to the Databases Section
In the cPanel dashboard, scroll down to the "Databases" section.
Click on the "MySQL Databases" icon.
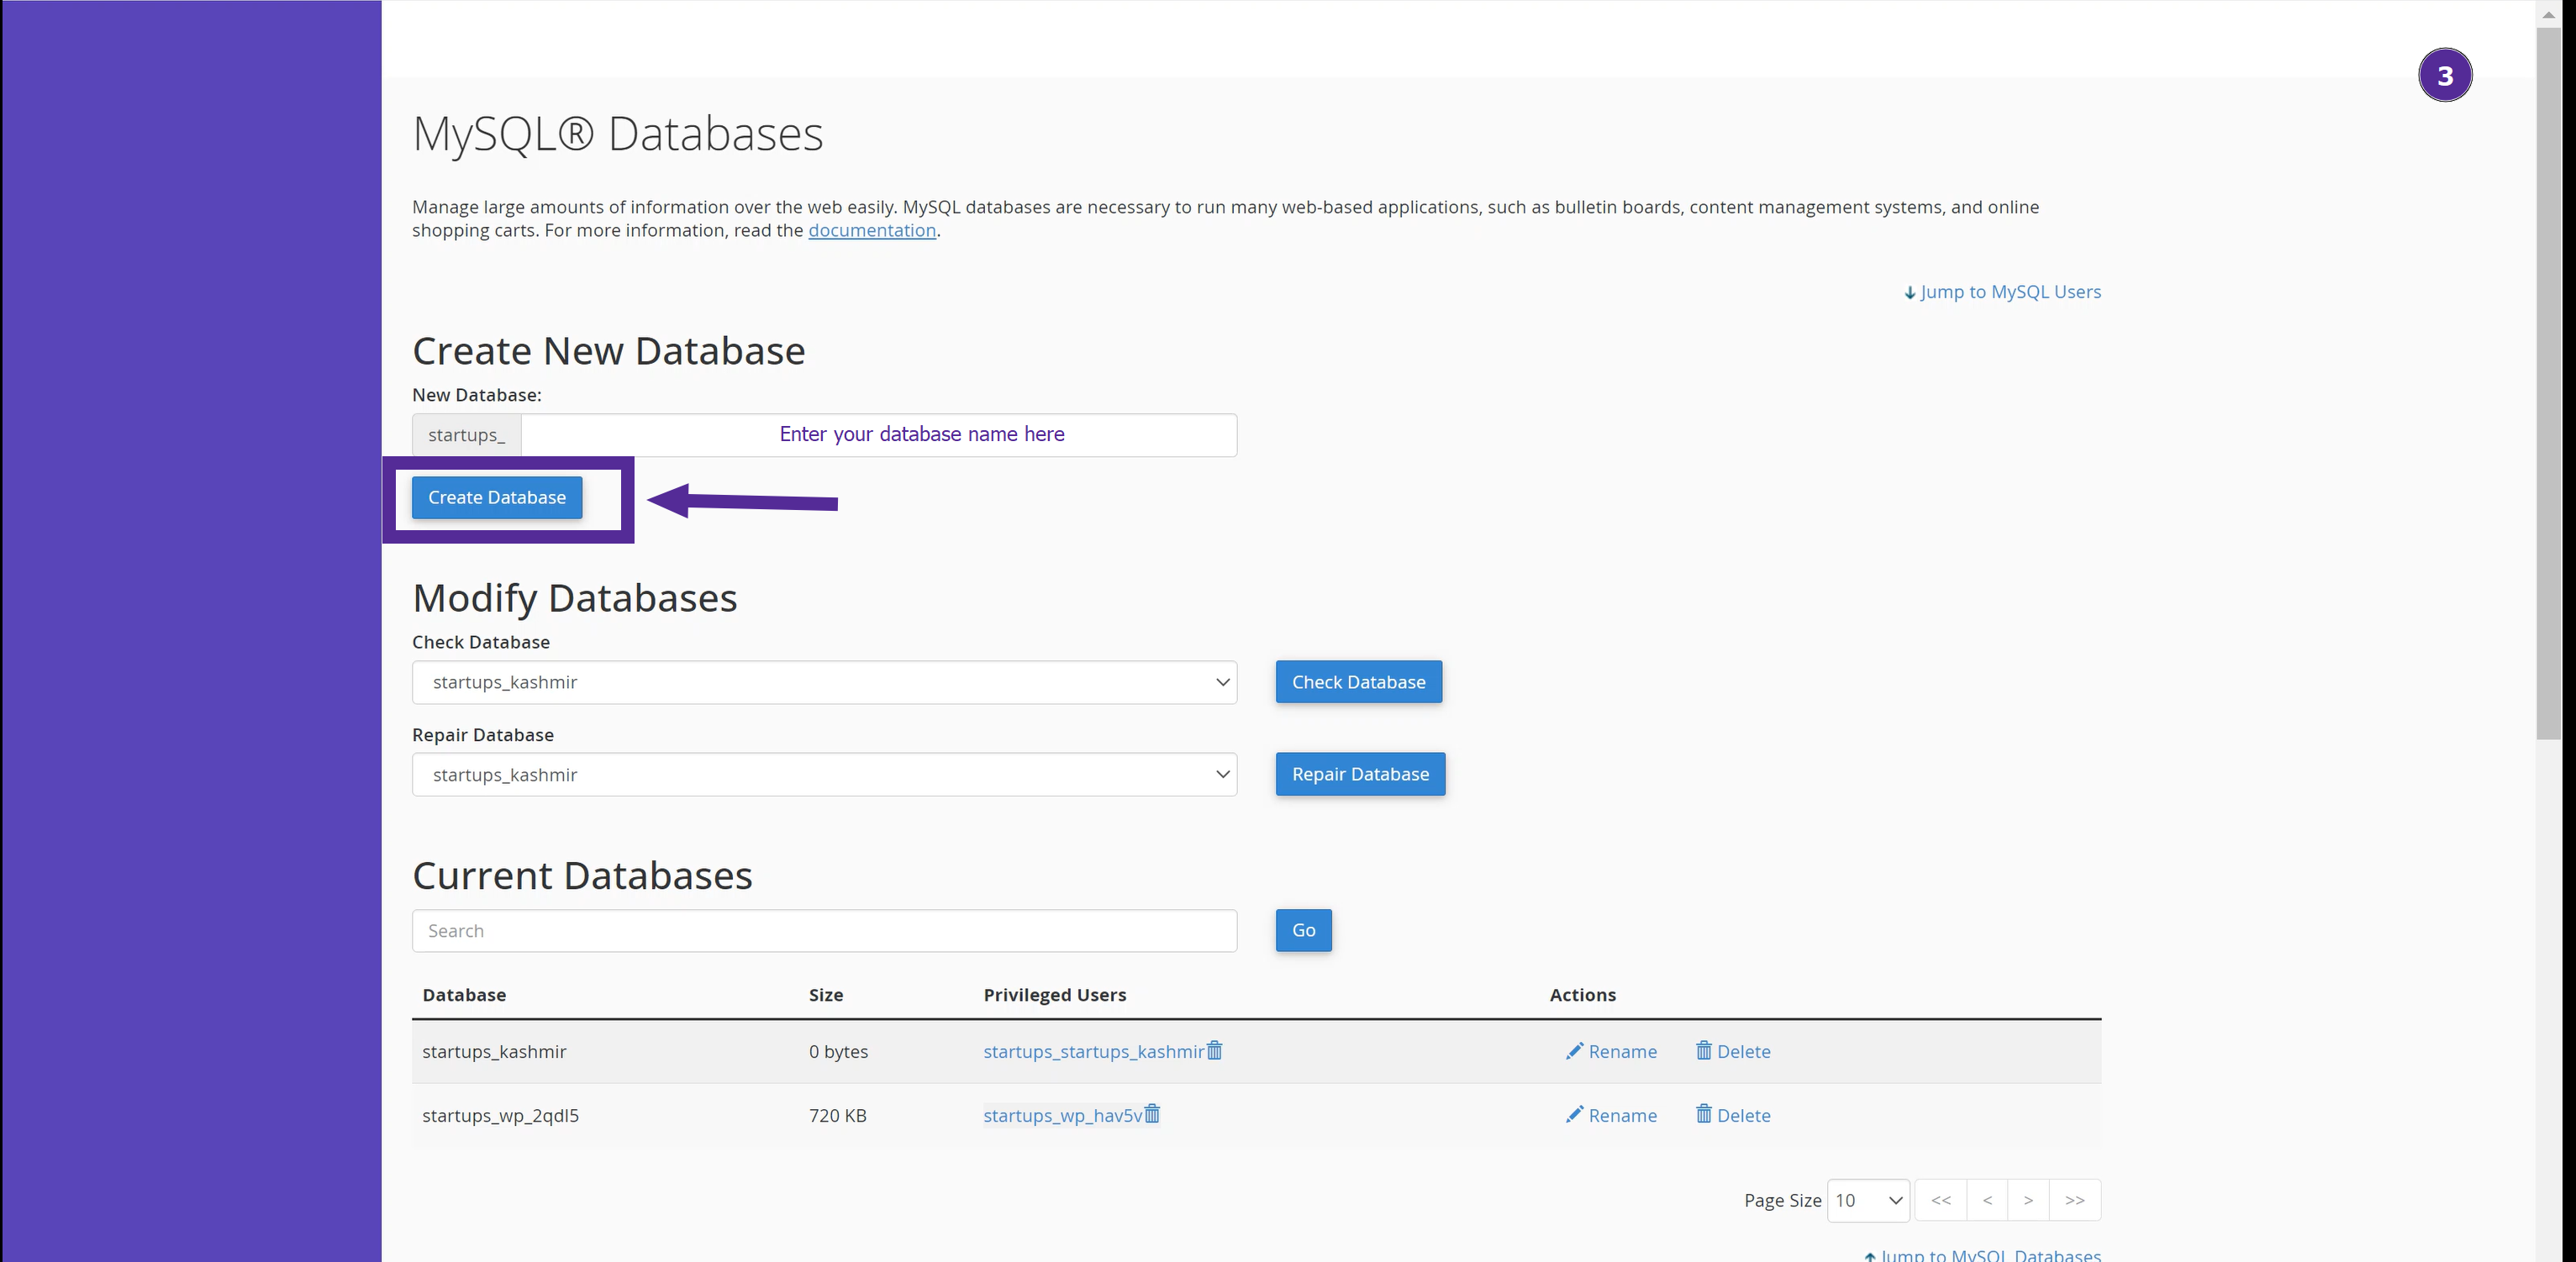
Step 3: Create a New Database
In the "Create New Database" field, enter the name you want for your database.
Click on the "Create Database" button.
A confirmation message will appear indicating that your database has been successfully created.
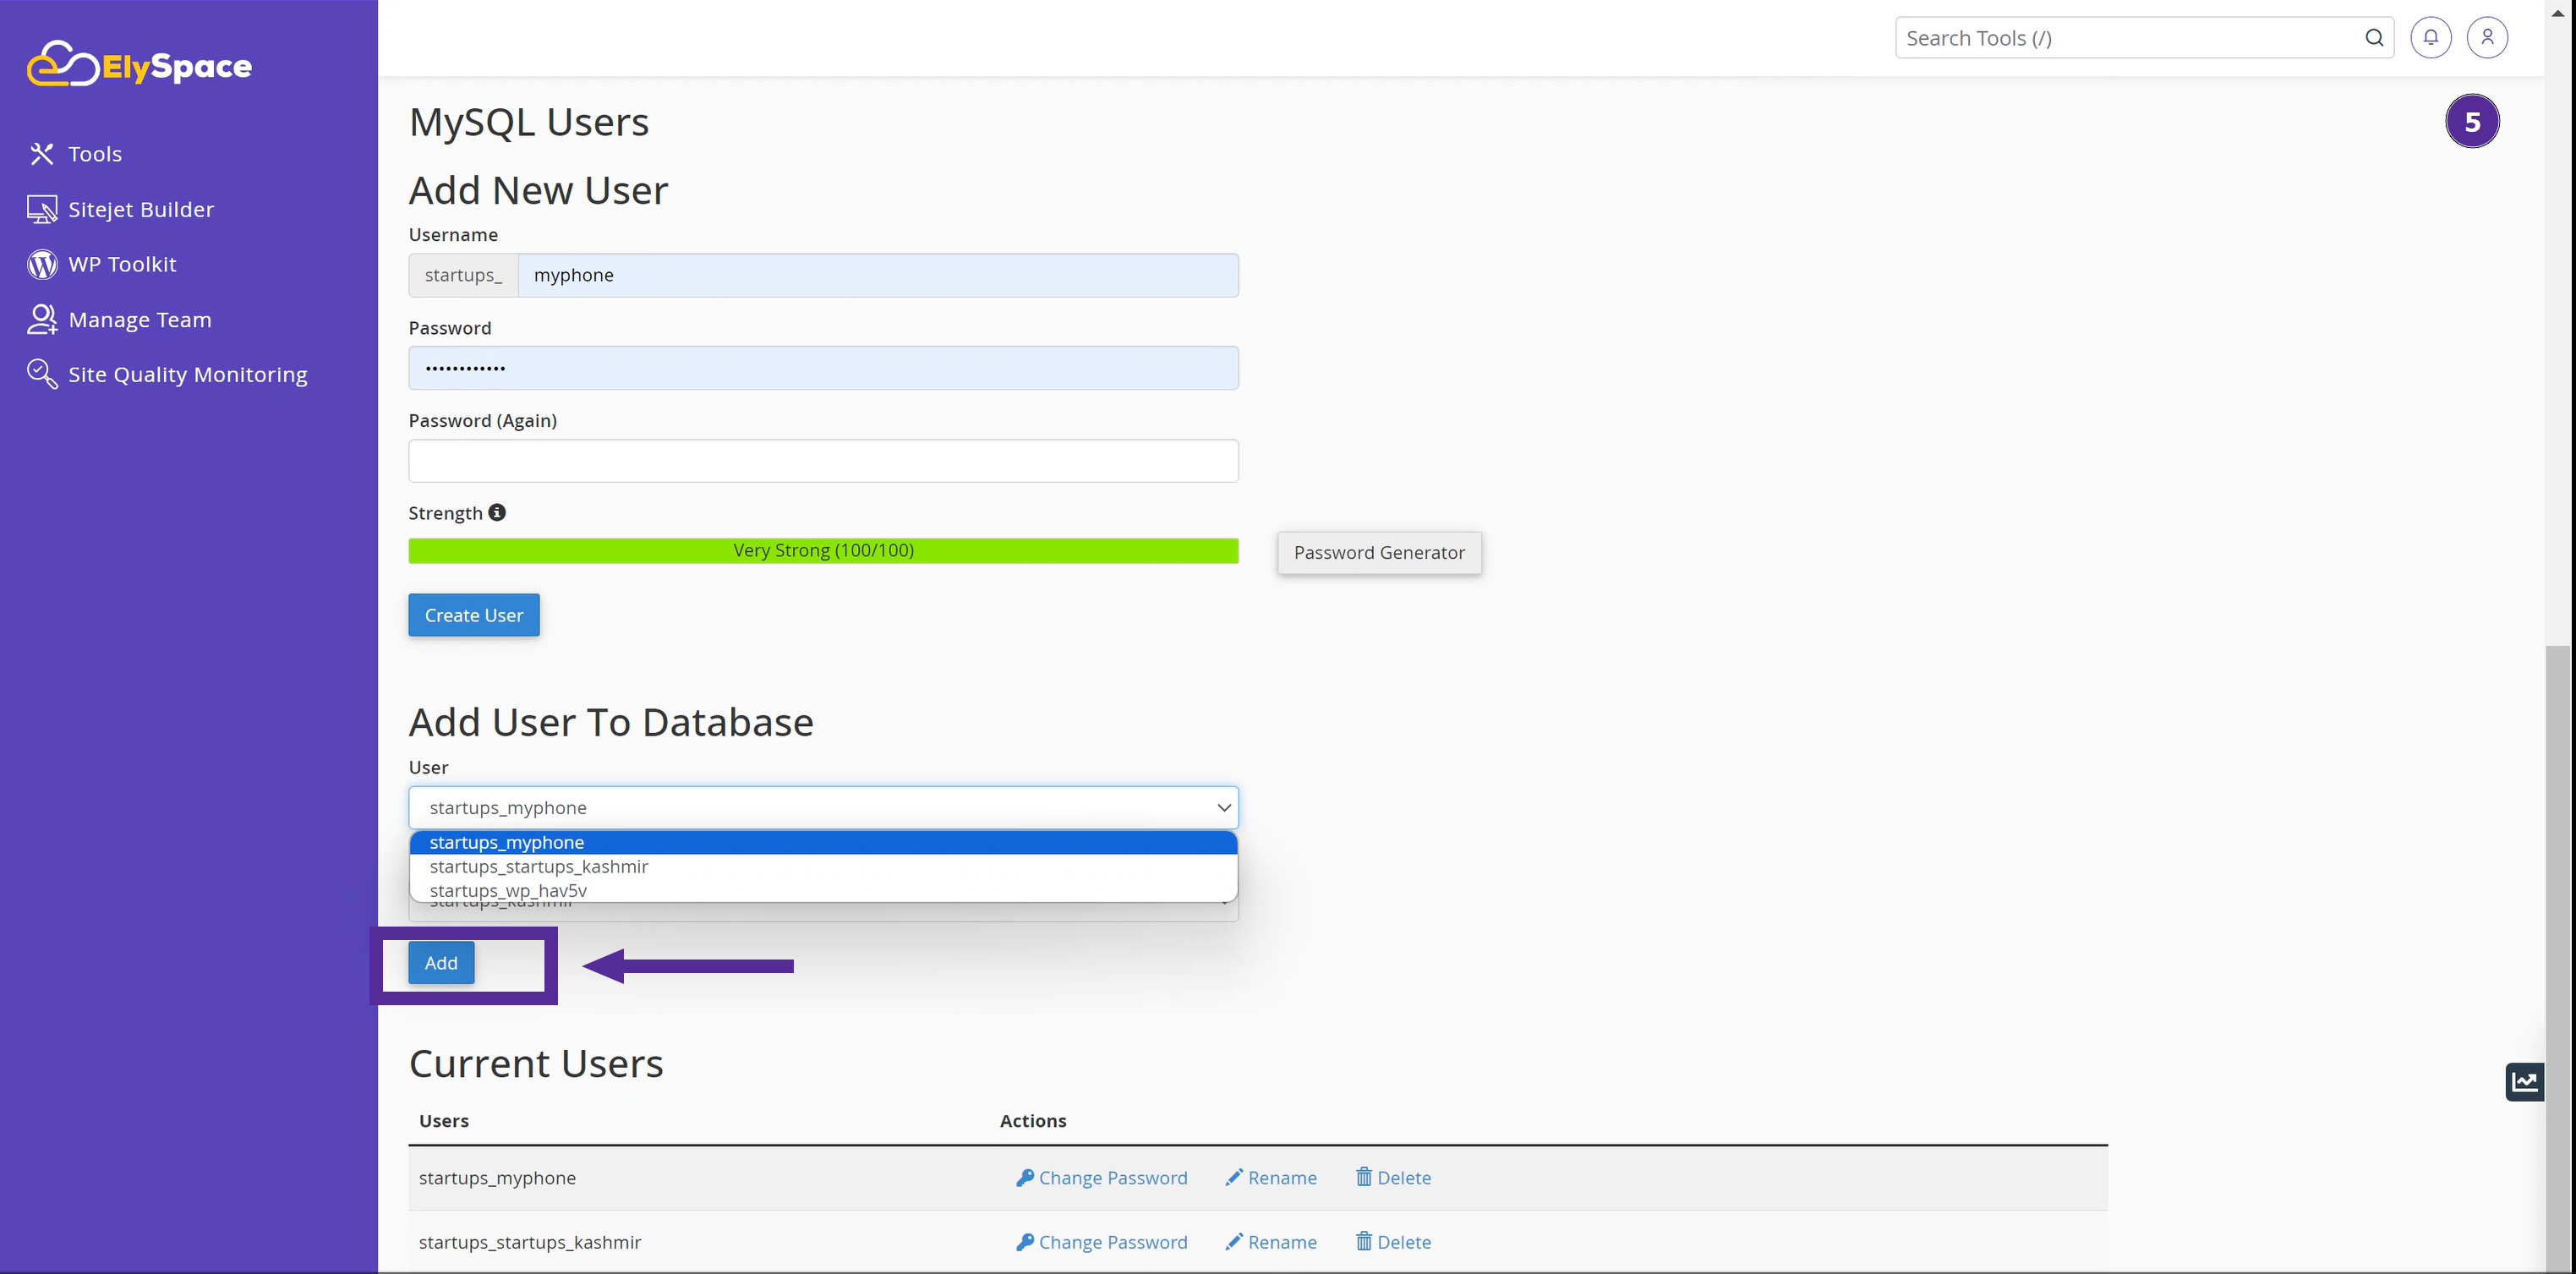
Step 4: Add a User to Your Database
In the "Add New User" section, enter a username and password for the new database user.
Click on the "Create User" button.
You can use the password generator to create a strong password.
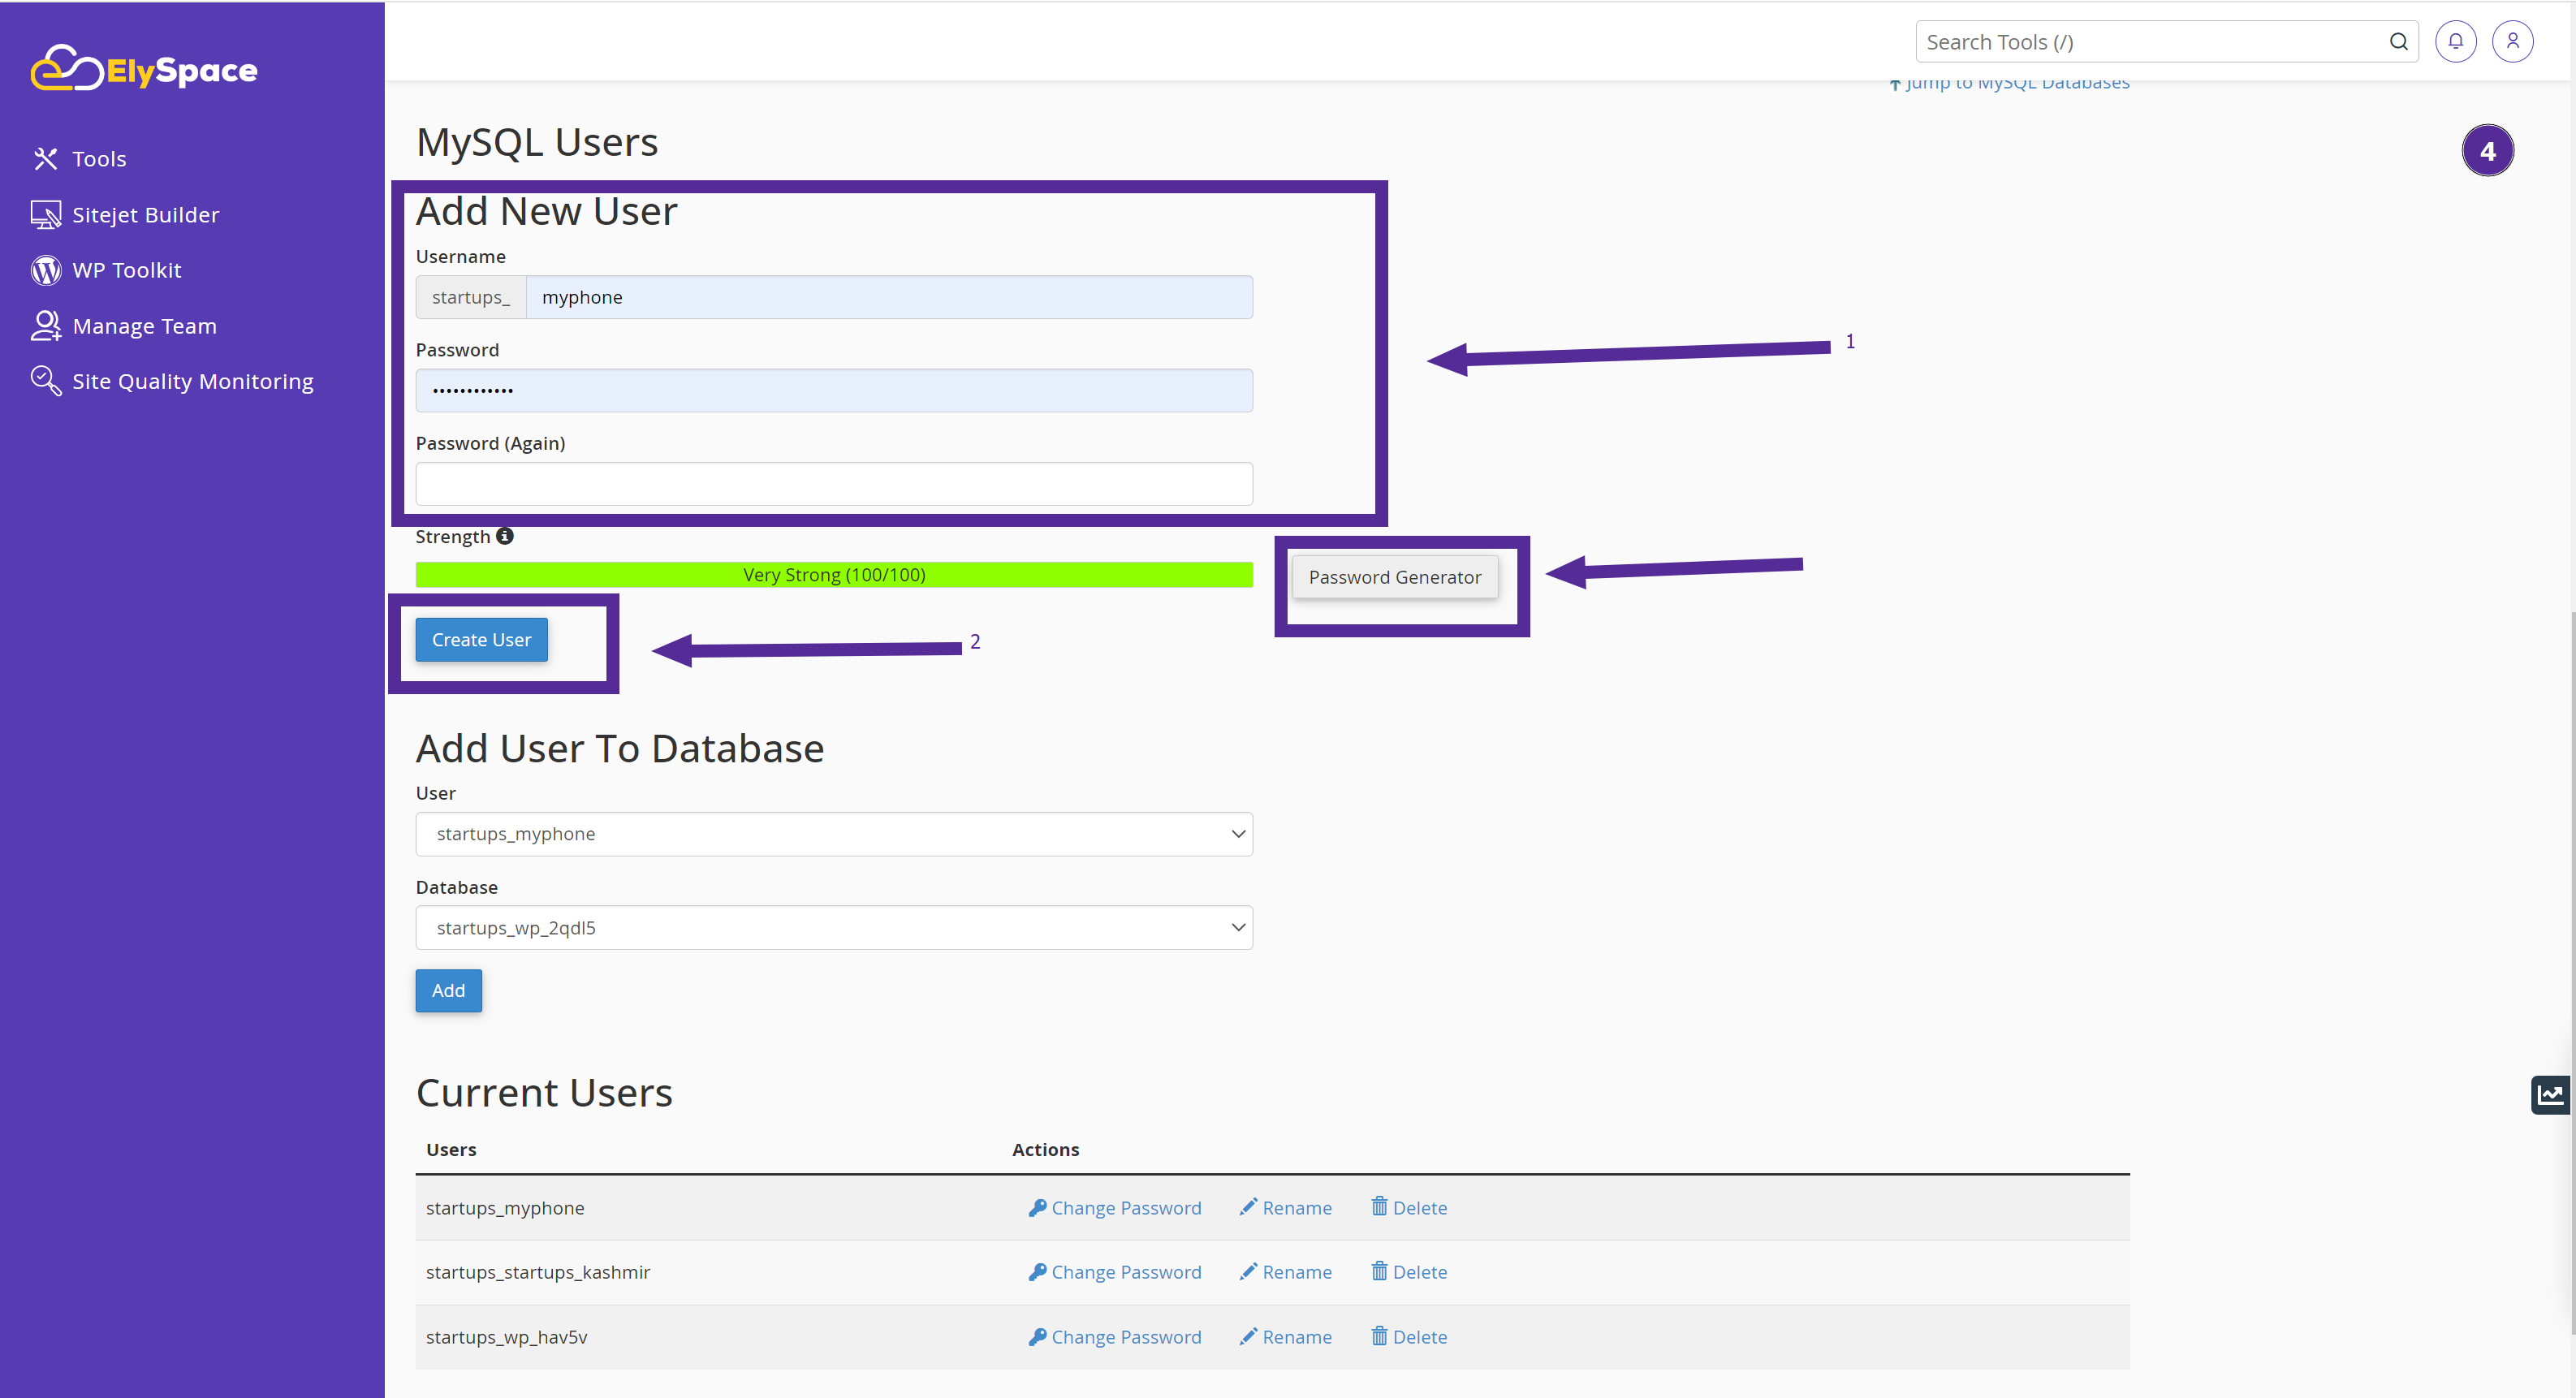
Step 5: Assign the User to the Database
Scroll down to the "Add User to Database" section in your cPanel.
From the dropdown menus, select the user you just created.
Next, choose the database to which you want to assign this user. This is the database you want the user to have access to and manage.
Click on the "Add" button to assign the user to the selected database.
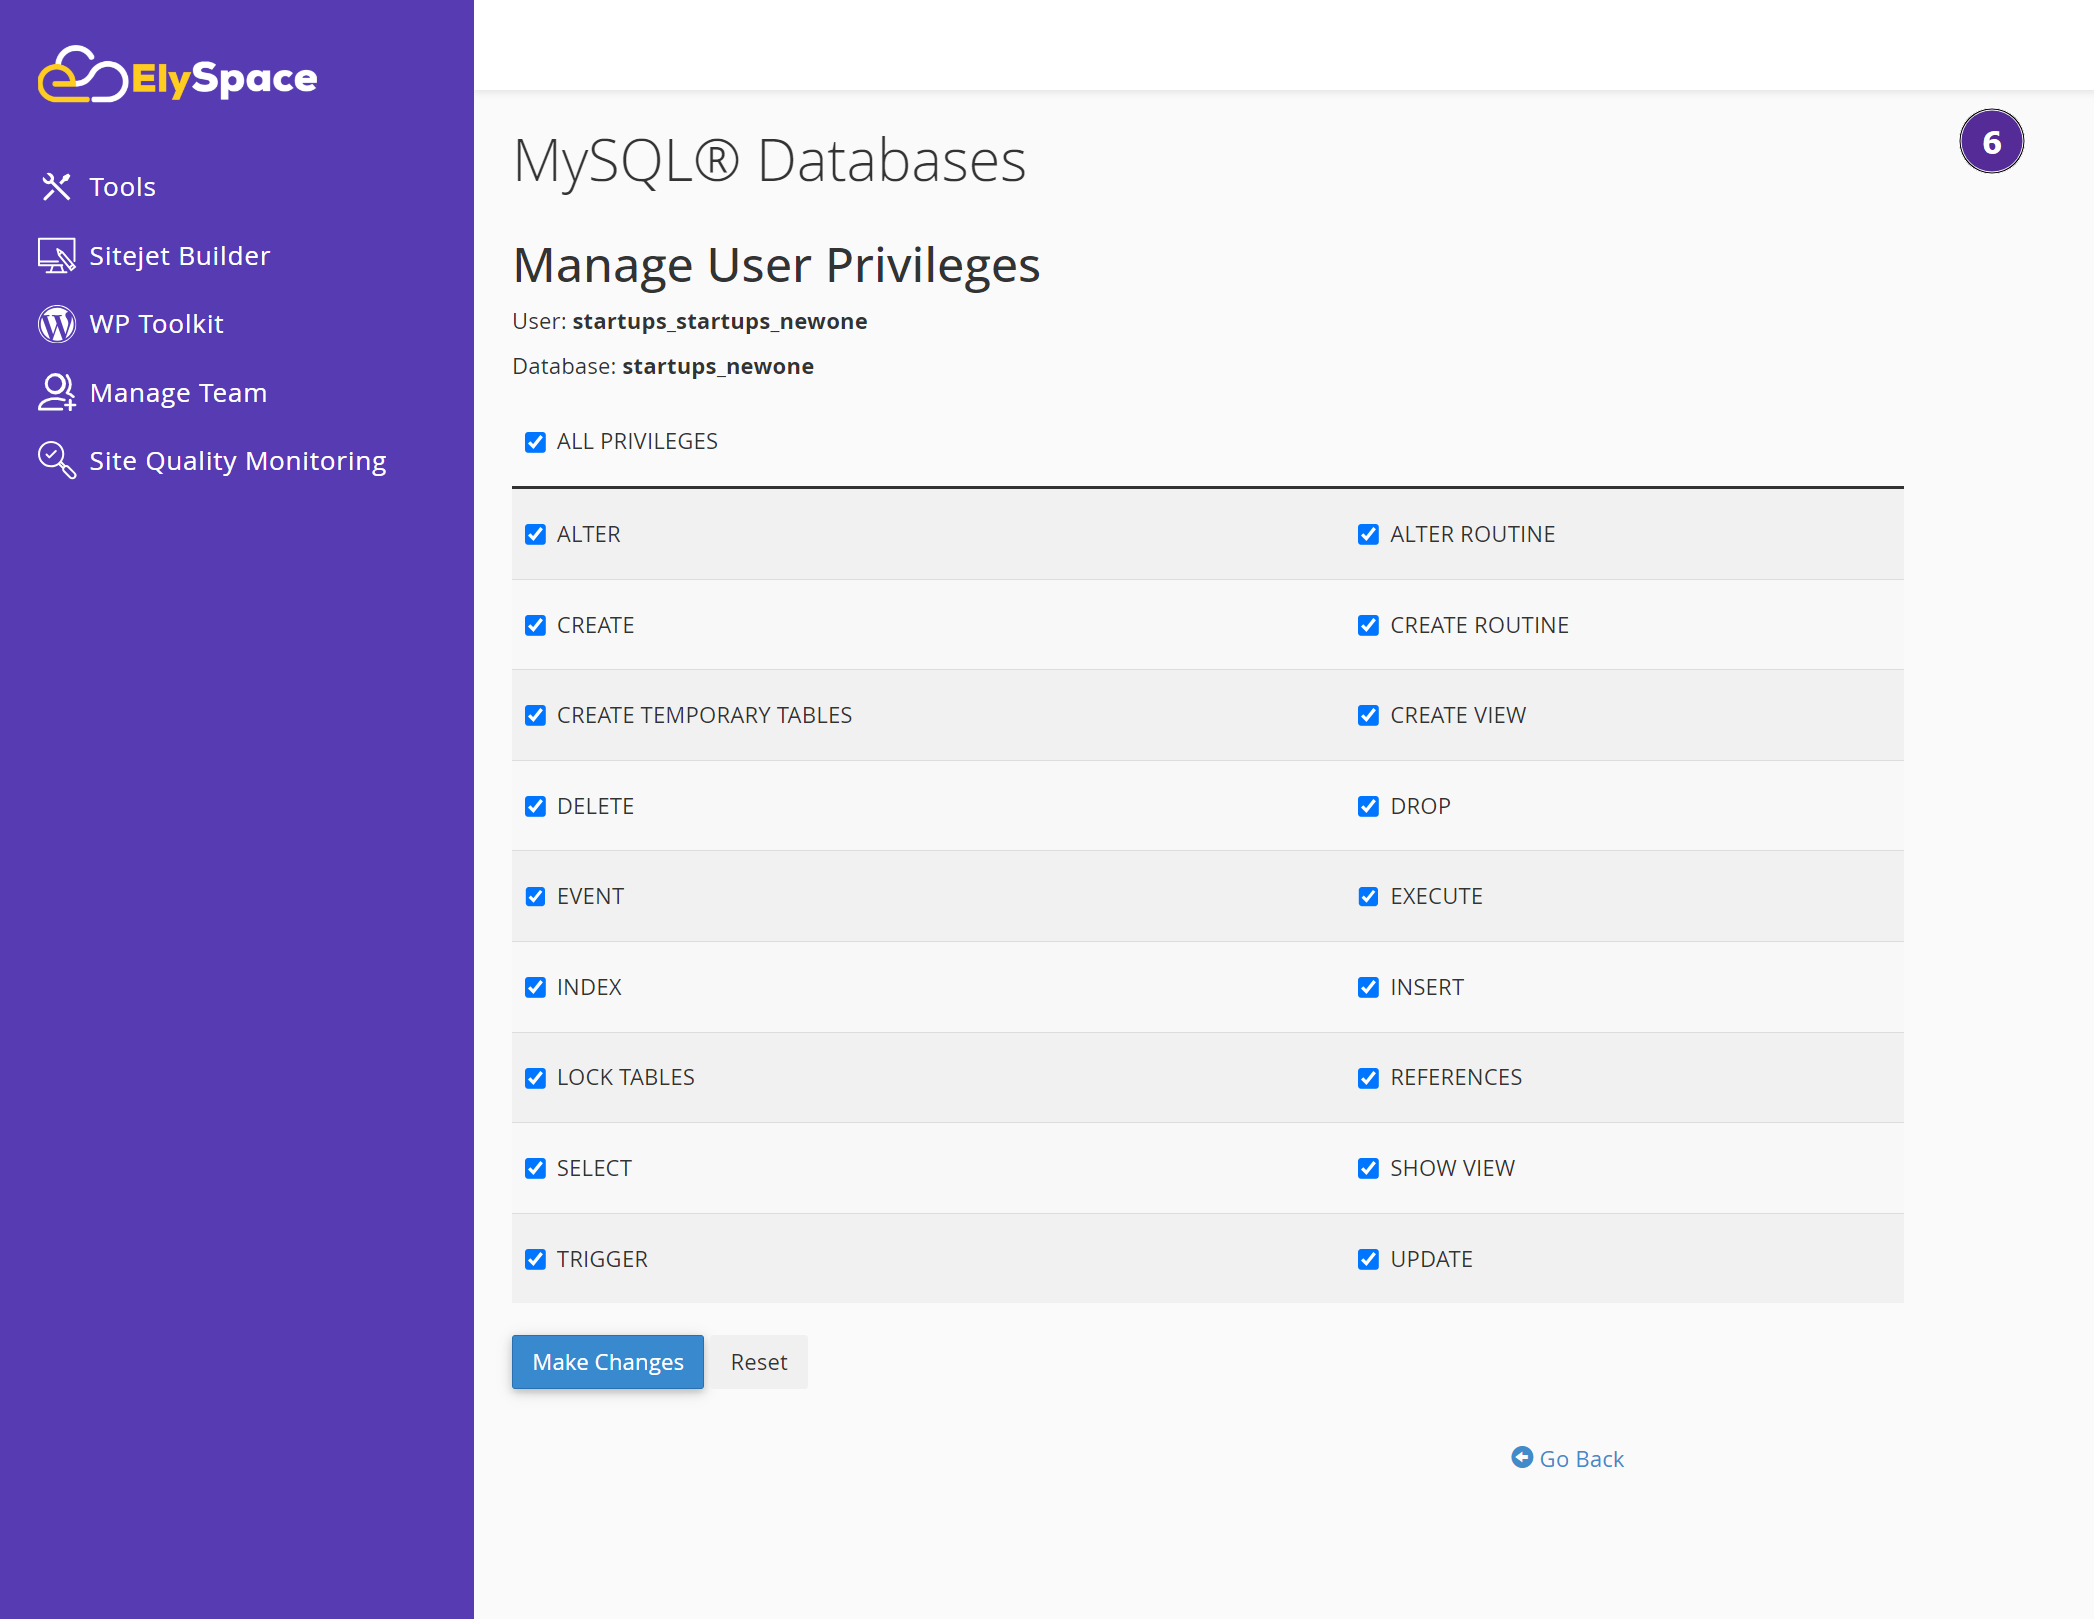
Step 6: Manage User Privileges
You will be redirected to a page where you can manage the privileges for the user.
Check the boxes for the following and select all privileges:
Once you have selected the necessary privileges, click on the "Make Changes" button.
Your database is now ready to be used by the assigned user.
Deleting a Database
Step 1: Navigate to the MySQL Databases Section
Click on the "MySQL Databases" icon to manage your databases.
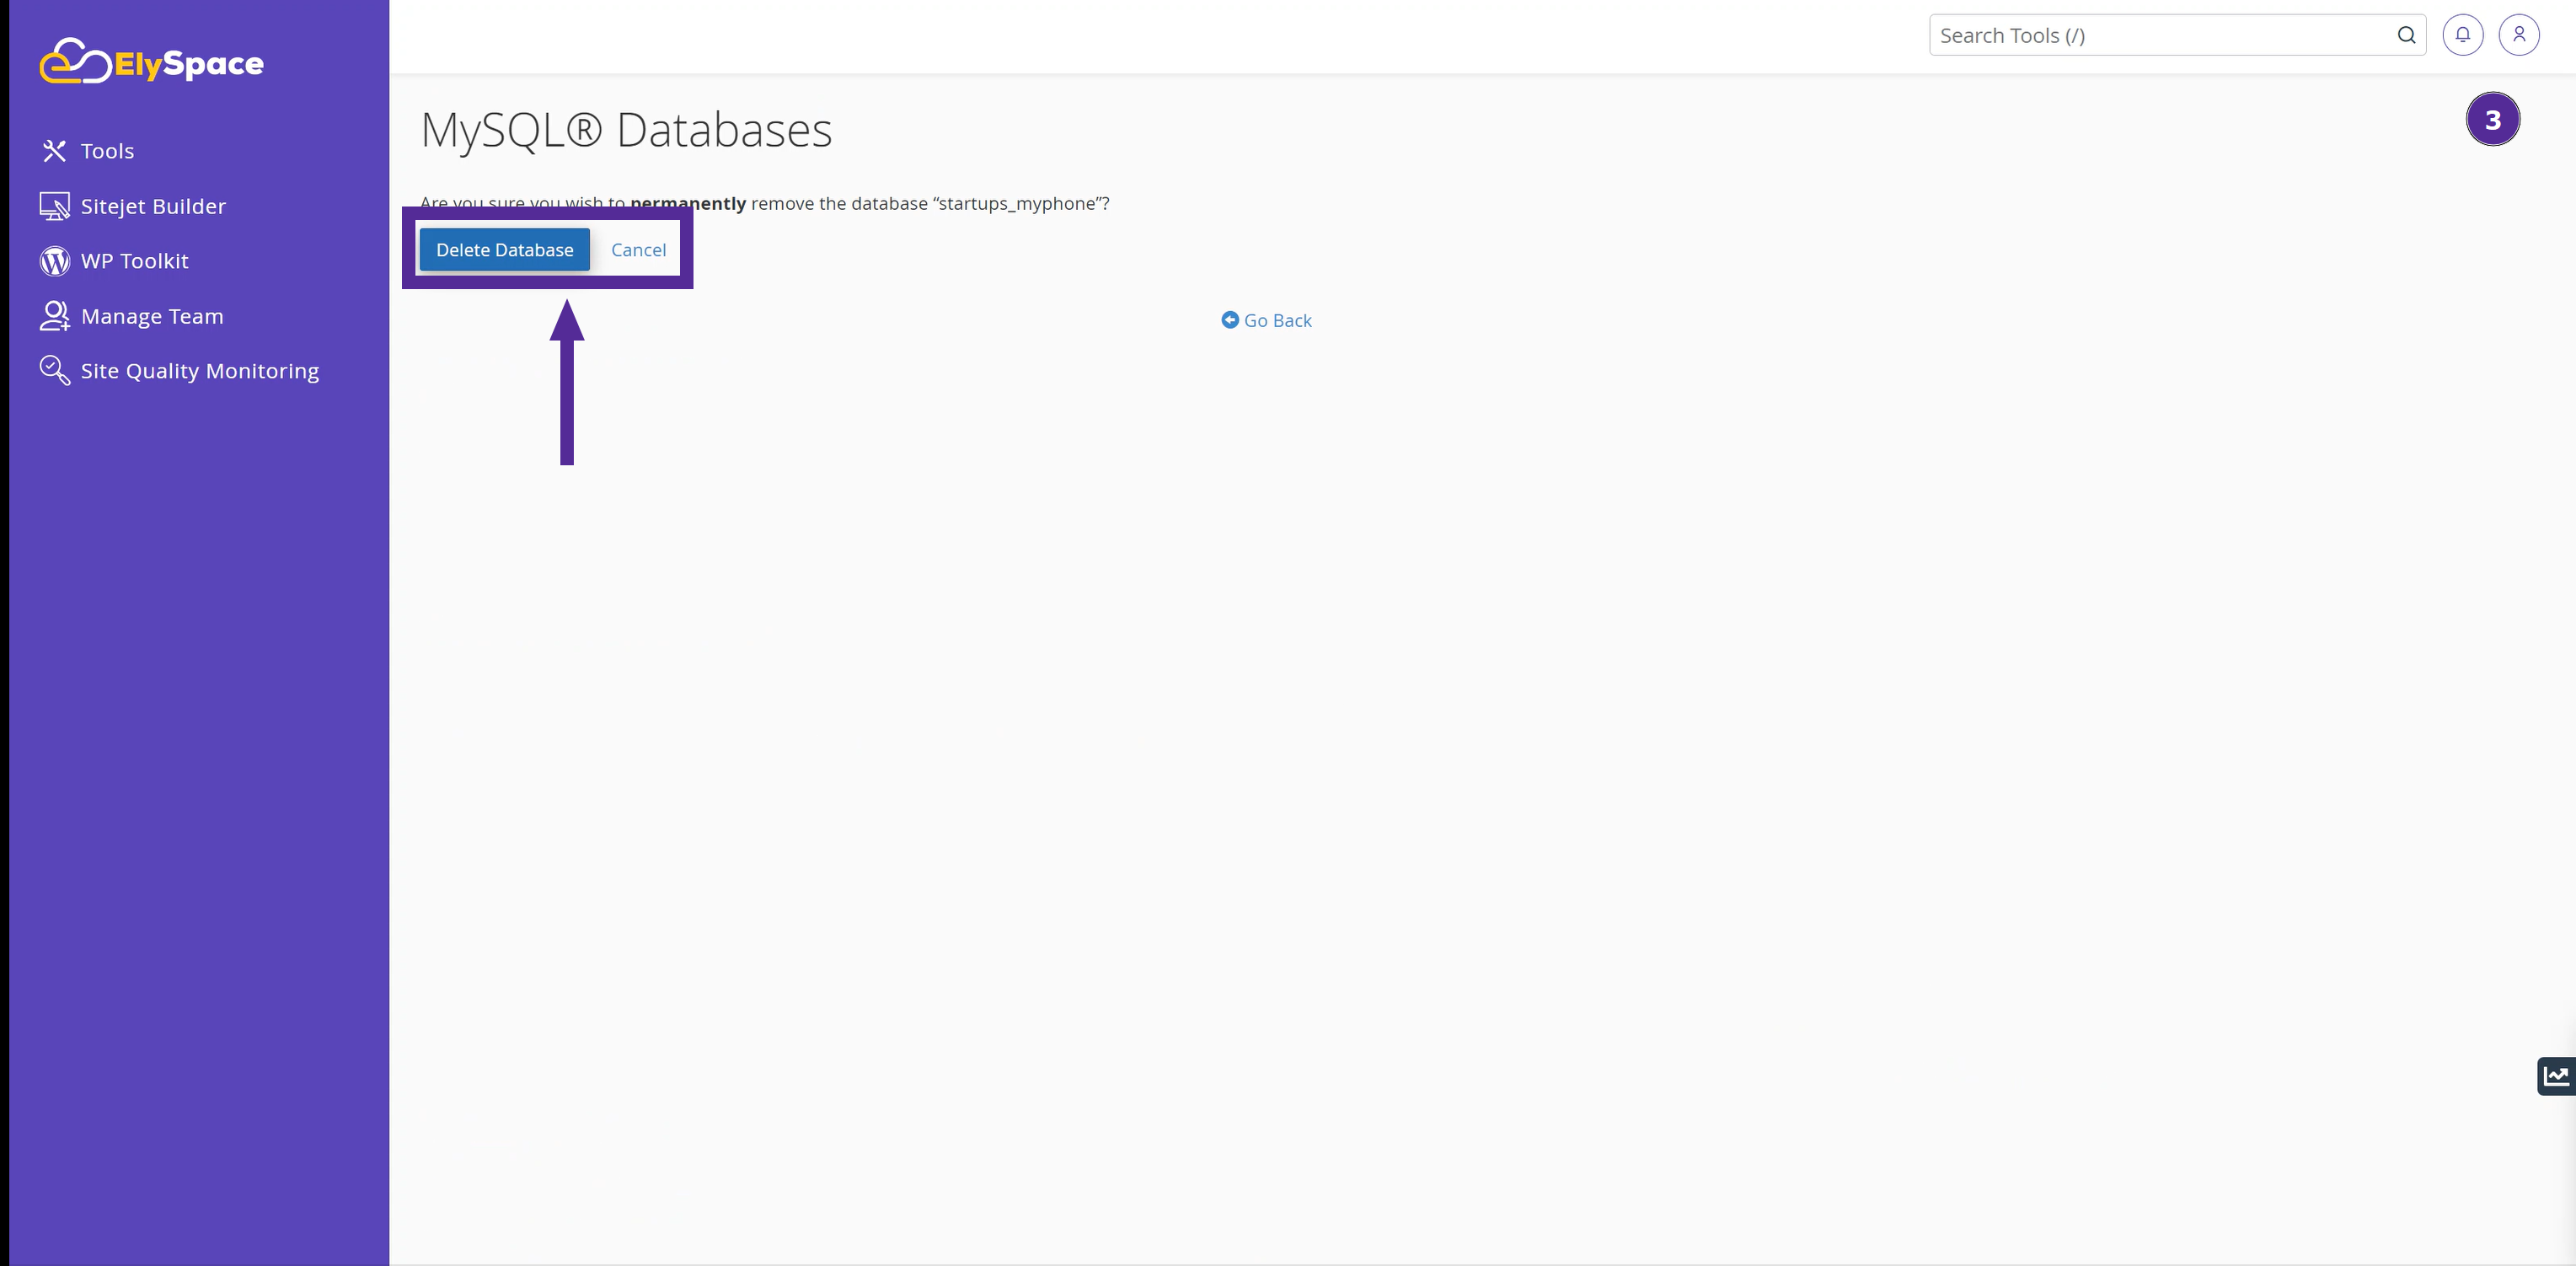
Step 2: Delete the Database
In the "Current Databases" section, find the database you want to delete.
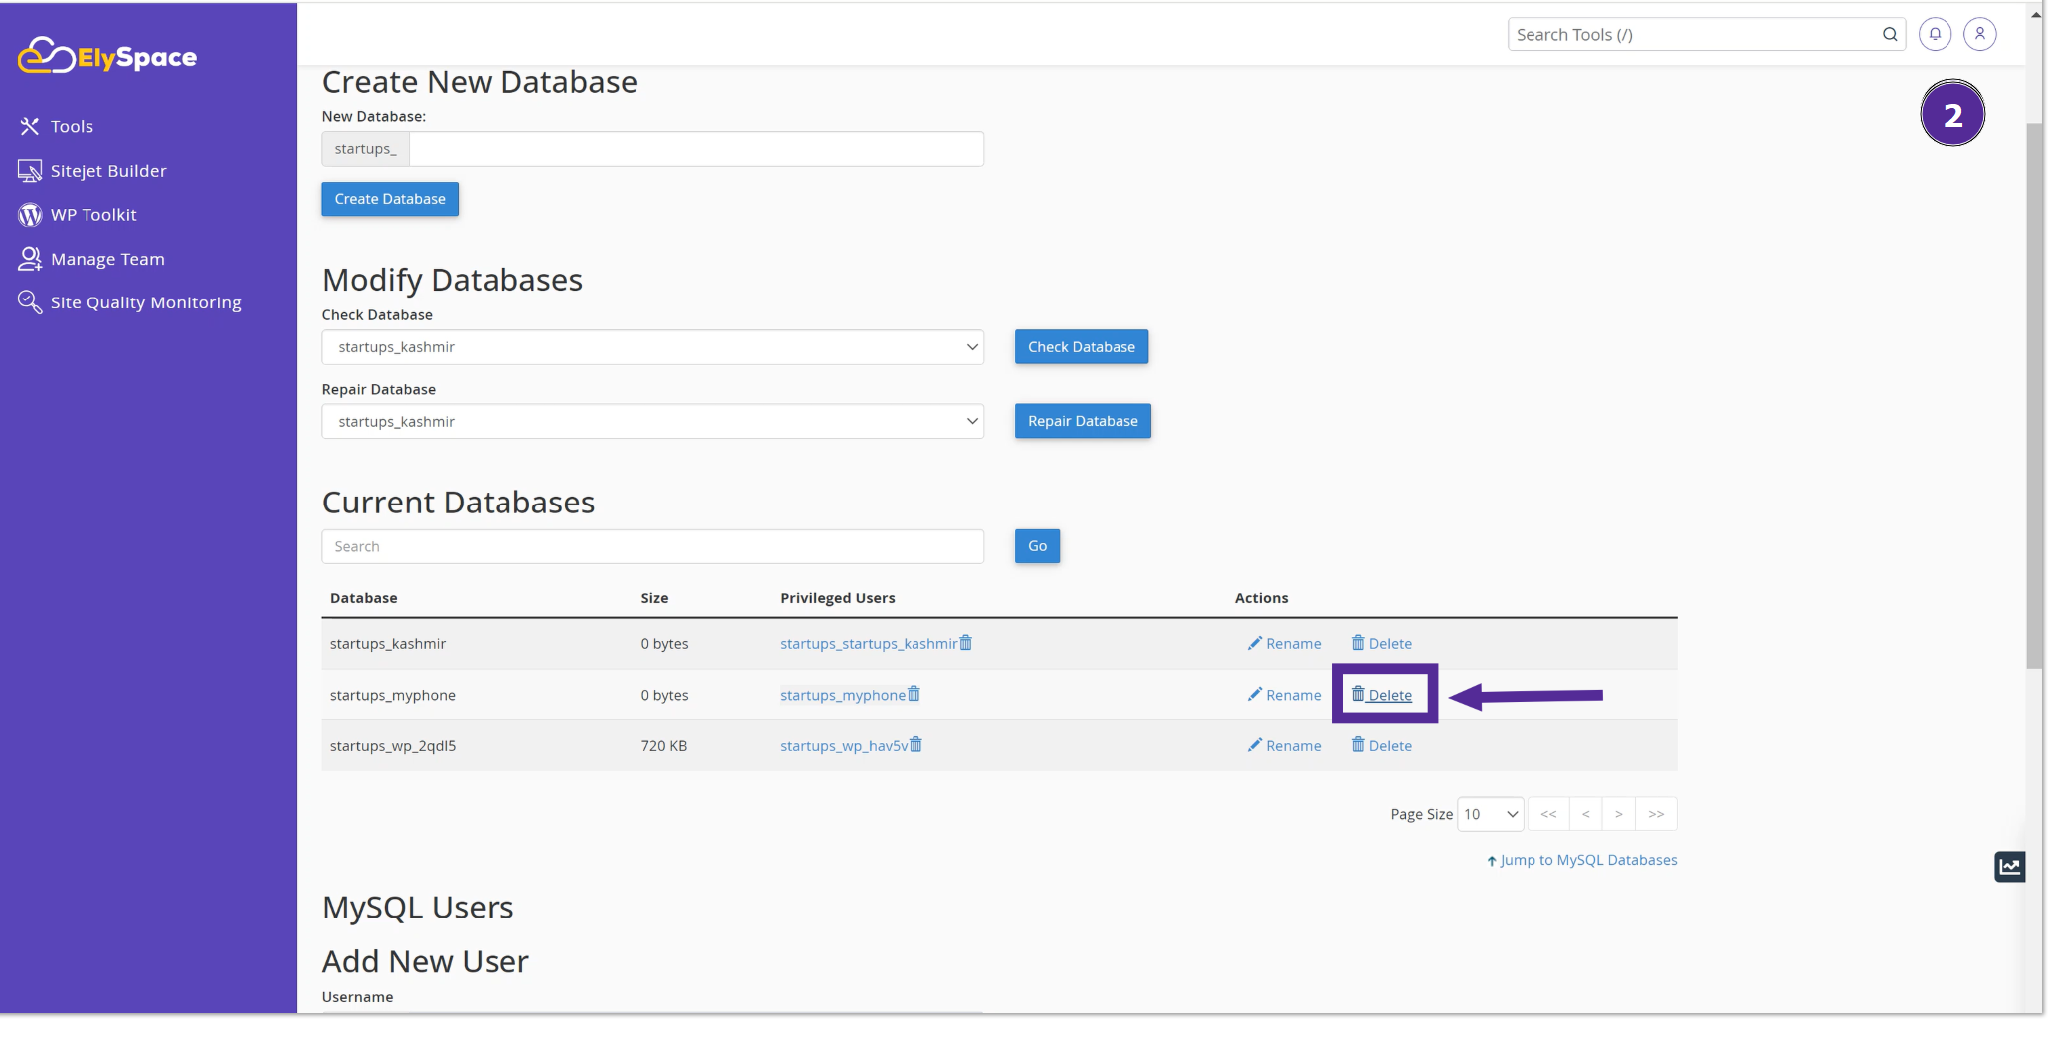
Click on the "Delete" button next to the database name.
Confirm the deletion when prompted.
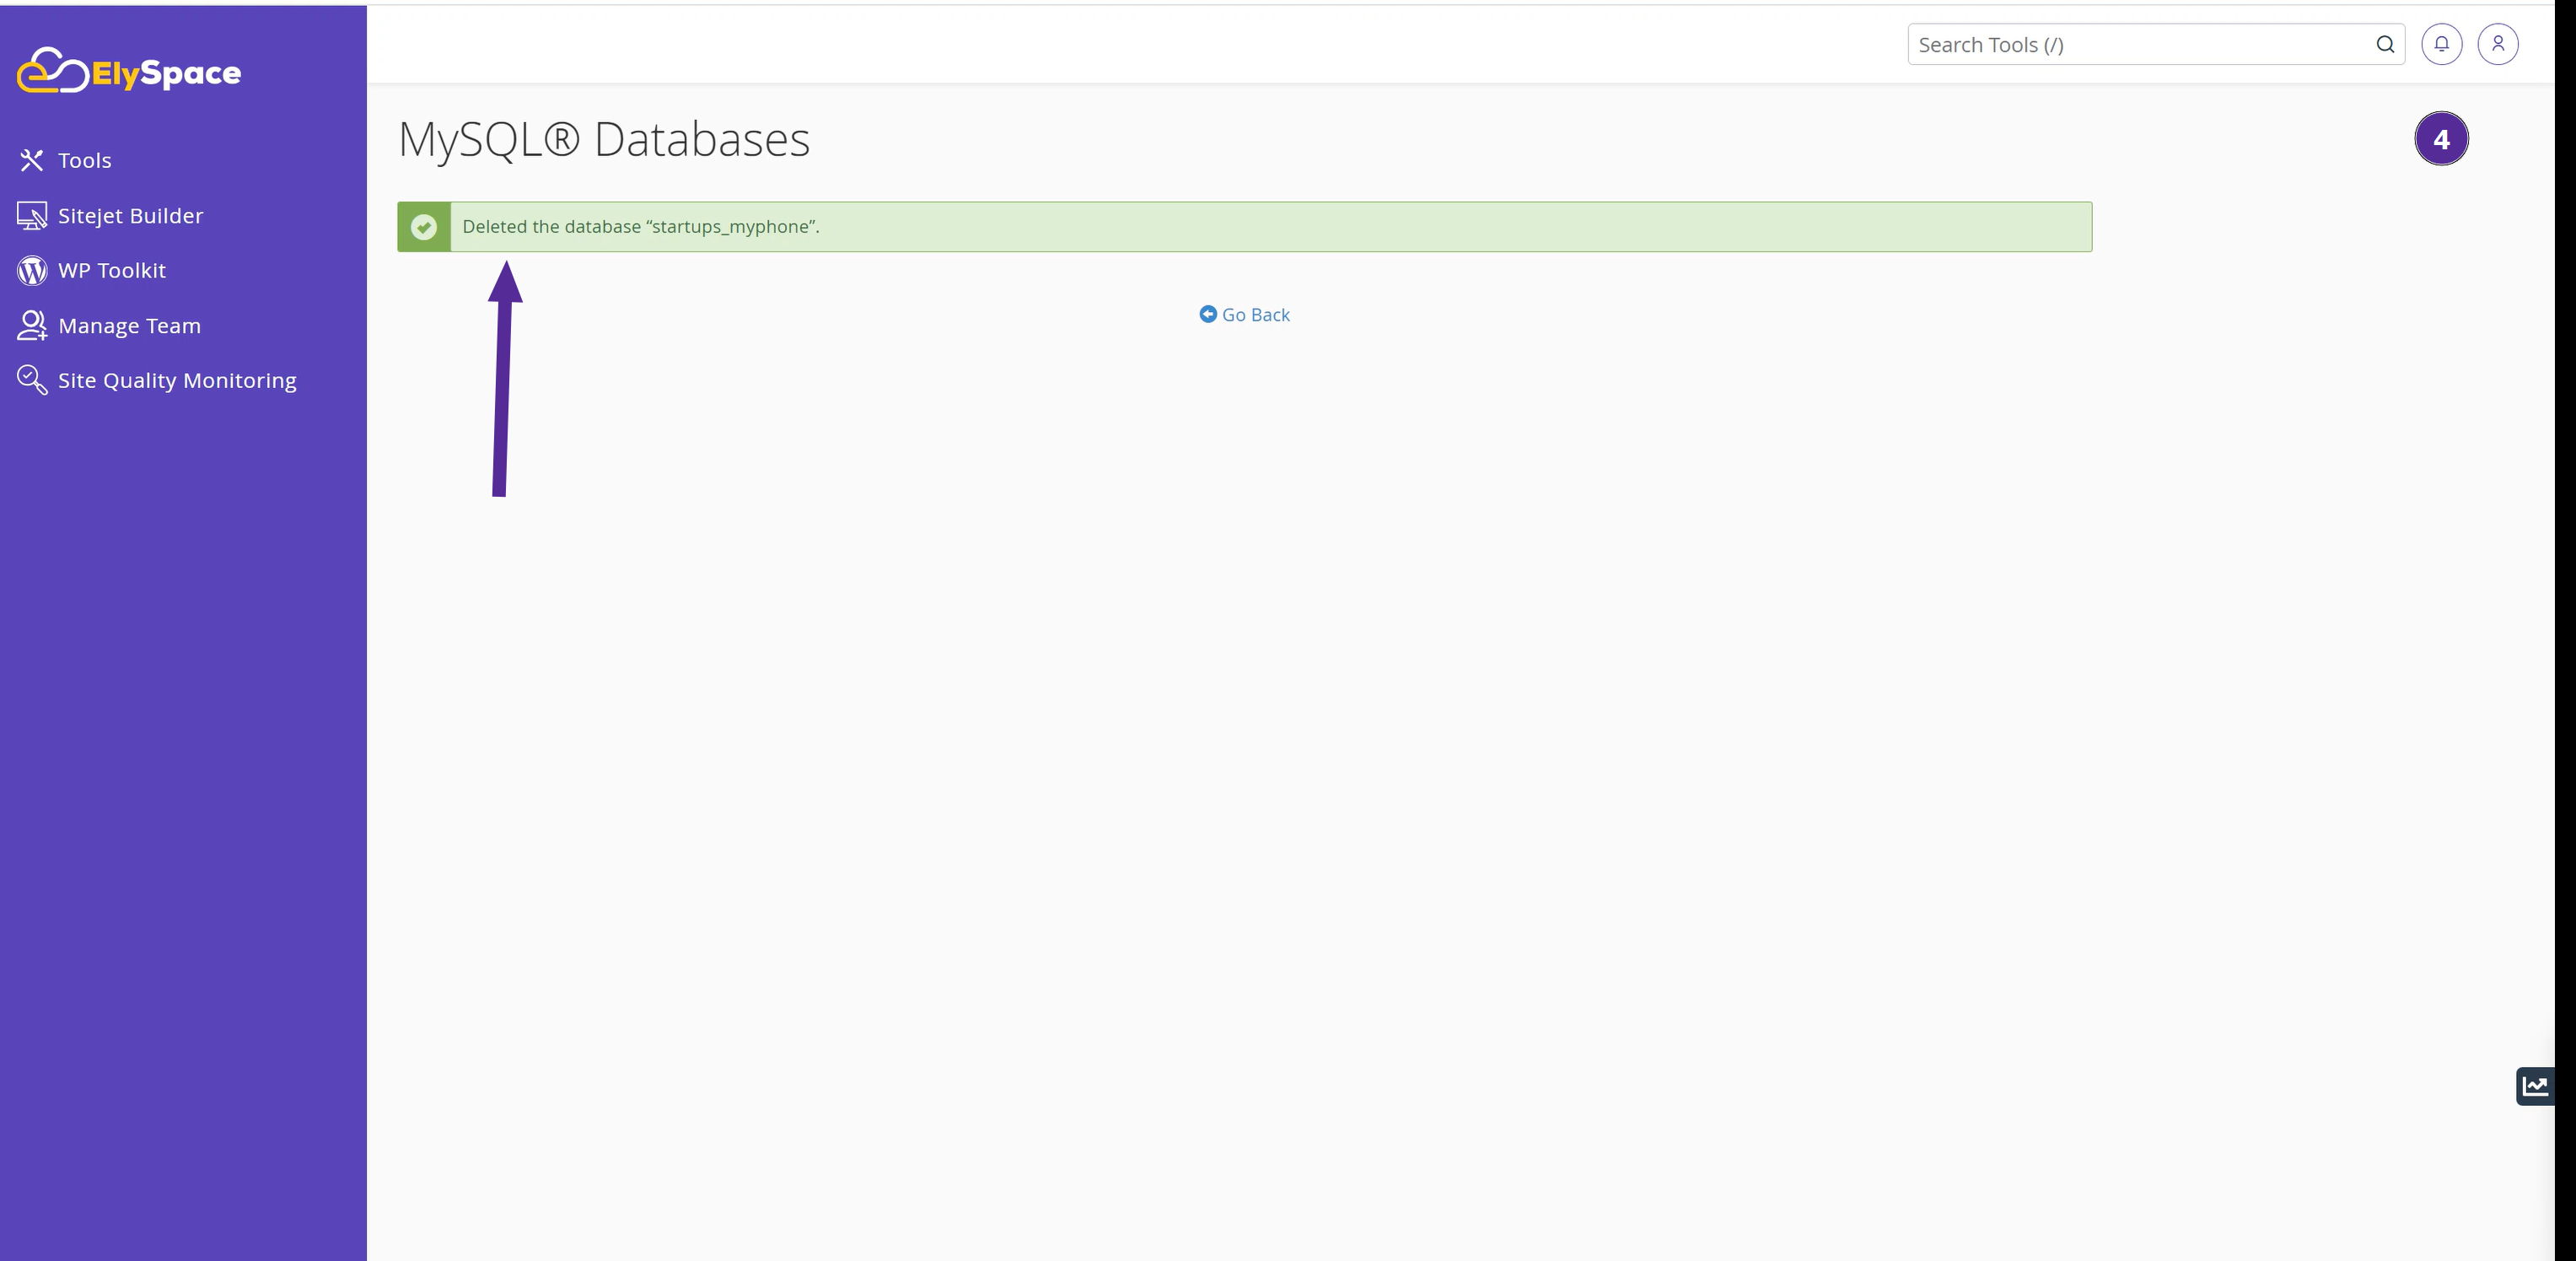
A confirmation message will appear, indicating that the database has been successfully deleted.
Watch Video:
Conclusion
Managing your databases on ElySpace is simple and straightforward. By following the detailed steps above, you can easily create new databases and users, assign privileges, and delete databases when they are no longer needed. If you have any questions or need further assistance, our support team is here to help!


